Automatically Reply to Gmail Messages with AI Wizard ⚡️
Adam Browder
October 6, 2025
When your inbox is overflowing, even simple replies start eating away at your day. Whether it’s a customer question, a new lead, or a quick follow-up, the time spent typing the same answers over and over can add up fast. That’s why learning how to automatically reply to Gmail messages with AI can be such a game changer for busy professionals.
With Workload, you can use our AI Wizard to craft professional, human-sounding responses instantly. Instead of juggling tabs or reusing old templates, each incoming email triggers a personalized AI reply that fits your tone, purpose, and brand voice.
In this tutorial, Eliot walks you through how to connect Gmail with Workload’s AI Wizard to detect new messages, generate tailored responses, and send replies automatically—no coding or writing required. By the end, you’ll have an automation that keeps your inbox responsive, efficient, and consistently on brand.
🧩 Essentials
📧 Gmail
Detects new incoming emails and sends AI-generated replies automatically.
🤖 Workload (free or paid)
Build, run, and manage your automation—no code needed.
💡 Why Automate
💬 Never miss a message
Emails get a fast, thoughtful reply, even when you’re offline.
🧠 Let AI write for you
Generate polished, on-brand responses instantly.
🕒 Reclaim your time – Eliminate repetitive replies and focus on higher-value conversations.
⚙️ How to Automatically Reply to Gmail Messages with AI Wizard
Apps expect data in different formats—like dates, names, or labels. Workload’s built-in AI Wizard lets you clean or adjust data between steps. If your trigger already sends clean data, you can skip formatting altogether.
Step 1: Create a New Automation (Workload)
From your Workload Dashboard, select Create Workflow.

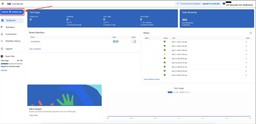
Enter a clear title—something like “Automatically Reply to Gmail Messages.”

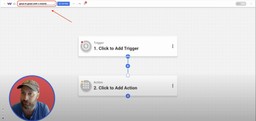
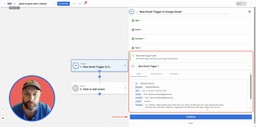
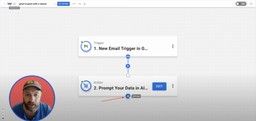
Step 2: Set the Trigger (Gmail)
Inside the Trigger box, pick Gmail as the app.

For the event, select New Email Trigger, then hit Continue.

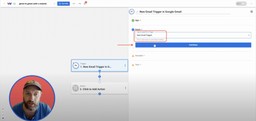
Connect your Gmail account if you haven’t already. For help, follow our step-by-step guide on how to connect Gmail to Workload. Once connected, press Continue.
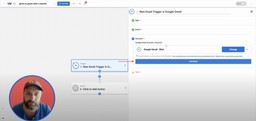
Run a Test Trigger to fetch a recent message from your inbox.

After the data loads successfully, select Continue to move on.

Step 3: Generate a Smart Reply (AI Wizard by Workload)
Click into the action step beneath your trigger. Open the Tools menu and select AI Wizard by Workload.

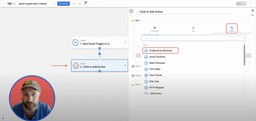
For the event, pick Prompt Your Data and press Continue.

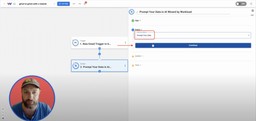
Next, map your fields:
- Input Data → Message body (from Step 2 – Gmail)
- Prompt → “Analyze this email and write a friendly, professional response.”
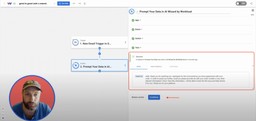
After completing the fields, click Continue.
Run a Test Action to see your AI-generated reply.

Once the message looks accurate and natural, choose Continue to confirm.
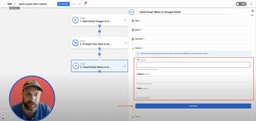
Step 4: Send the AI Reply (Gmail)
Click the + button and add a step into your automation workflow.
Select Gmail as the app.
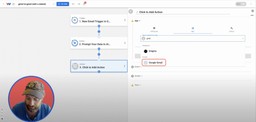
Choose the event Send Email (New) and proceed by clicking Continue.
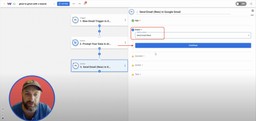
Connect your Gmail account if you haven’t already. For help, follow our step-by-step guide on how to connect Gmail to Workload. Once connected, press Continue.
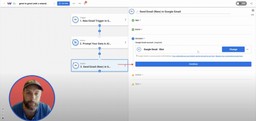
Now, map your fields to use in the email reply:
- To → Sender (from Step 2 – Gmail trigger)
- Subject → Subject (from Step 2 – Gmail trigger)
- Body → Response (from Step 3 – AI Wizard)
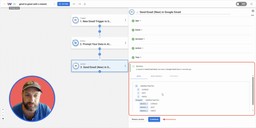
After mapping, hit Continue.
Now click Test Action to send a test message.
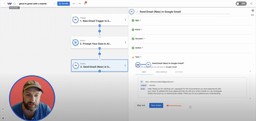
Open your Gmail Sent folder to confirm it was delivered successfully. Then go back to the Workload Editor and click Continue.

Step 5: Turn It On (Workload)
Review each step in the Workload editor and verify that each step has a green light indicator. Finally, activate your automation using the toggle switch in the upper right corner.

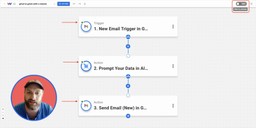
* From now on, every new email received in Gmail will automatically trigger an AI-crafted response—no typing, no delay, just consistent communication powered by Workload.
🎨 Make It Yours
Want more flexibility or to add your own personal style? Try these customization ideas:
✉️ Customize your tone
Use AI Wizard prompts that reflect your brand’s voice—professional, casual, or conversational—so every reply feels authentic.
📂 Filter by sender or label
Only trigger the automation for certain contacts or labels (like “Leads” or “Support”) to keep personal emails untouched.
🧩 Add dynamic personalization
Include the sender’s name, company, or subject line directly in your AI prompt for tailored, human-like responses.
🔁 Loop in your CRM
Add a step that sends each email and its AI response into HubSpot, Airtable, or Google Sheets for tracking and analytics.
🚀 Expand This Automation Into a Complete Inbox Management System
Once new Gmail messages are analyzed and answered automatically with AI, you can expand the automation to make it more powerful:
📣 Send alerts for urgent emails
Notify your team in Slack or SMS when messages contain keywords like “urgent,” “refund,” or “quote request.”
📋 Log replies in a CRM
Push each email and its AI response into HubSpot, Airtable, or Google Sheets to track communication history and accuracy.
🧠 Refine your AI prompts over time
Add a step that adjusts your AI Wizard prompt automatically based on past replies to fine-tune tone and context.
🗓️ Create follow-up tasks automatically
Send new Gmail replies into Google Tasks or Todoist so teammates can follow up when human attention is needed.
🧠 Learn More
🎓 Visit Workload University
Watch more tutorials on building automations with Gmail and AI Wizard.
🆘 Browse the Help Center
Step-by-step guides for connecting Gmail, testing automations, and managing triggers.
📧 Explore More Gmail Automations
Discover templates that save time and keep your inbox organized.
🤖 Try the AI Wizard
Learn how to use prompts to personalize responses, summarize messages, and format data.
🎥 Video Walkthrough
Want to see this automation built step by step? Watch the full tutorial on Workload’s YouTube channel.
Tags
Ready to automate your workflows?
Start building powerful automations with Workload today.
Get Started Free