Turn Airtable Records into Google Calendar Events 📋 ➝ 📅
Adam Browder
June 19, 2025
Keeping your calendar up to date shouldn’t feel like busywork. But if you’re logging info in Airtable and then re-entering it in Google Calendar, you’re doing double the work. This automation fixes that by sending Airtable Records into Google Calendar Events automatically.
Workload handles everything. When you create a new record in Airtable, it pulls the title, time, location, and notes. It also uses AI to set the end time. Then it builds a complete event and sends it to the calendar you choose.
If you manage meetings, client calls, or project schedules, this setup keeps everything in sync. You save time, avoid mistakes, and never have to copy and paste again. It’s fast, reliable, and 100% no-code—with Workload doing the heavy lifting.
🔌 Essentials & Connections
Before you build, here’s what you’ll need:
- Airtable account to store and manage your records
- Google Calendar account to create and view your events
- Workload account (free or paid) to set up your automation
Workload makes connecting these tools seamless. Just sign in and grant access when prompted.
⚙️ How to Turn Airtable Records into Google Calendar Events
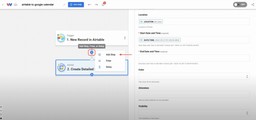
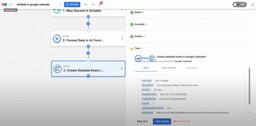
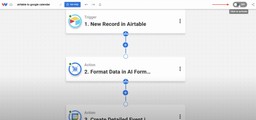
Step 1: Create a new automation in Workload
- Go to your Workload dashboard and click “Create Workflow”

- Give your automation a name (ex: Airtable to Google Calendar)

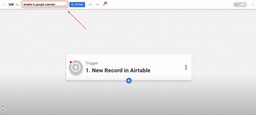
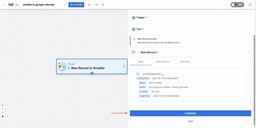
Step 2: Set up the Airtable trigger
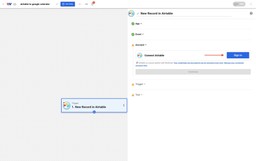
- Click the trigger box and choose the trigger app: Airtable

- Select the trigger event: New Record

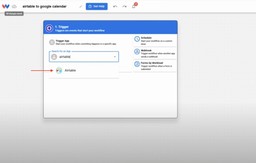
- Securely connect your Airtable account to Workload by clicking Sign in

- You will need to grant access to Workload by clicking + Add a Base and then choosing a base, then click Grant access


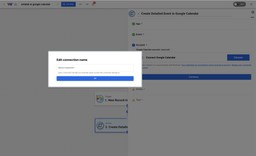
- Enter a new connection name into the box and click OK

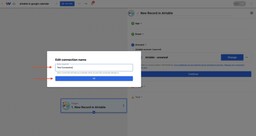
- You will now see you connection name has been updated. Now, click Continue

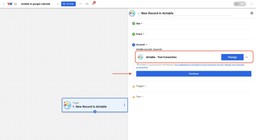
- Select the base and table where you’ll be adding new records from the dynamic dropdown menus, then click Continue


- Click on Test Trigger

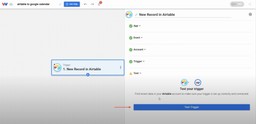
- When a new record is found, click Continue

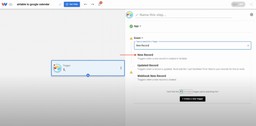
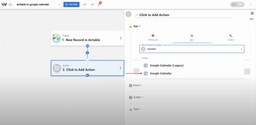
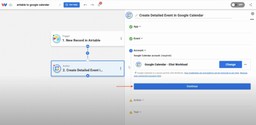
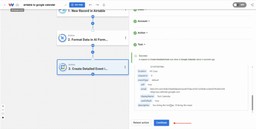
Step 3: Add the Google Calendar action
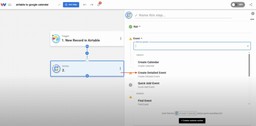
- Click into the Action Step 2 and choose the action app: Google Calendar

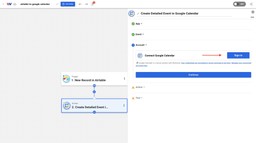
- Select the event: Create Detailed Event

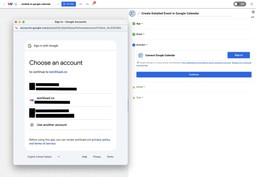
- Connect your Google account by clicking Sign in

- You will now see a pop-up window that directs you to choose a google account to connect. Select the account you want to connect.

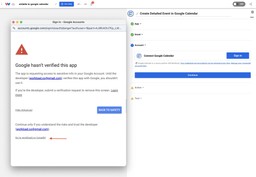
- You will now see a new screen that says, this app hasn’t been verified by Google (Note: We are currently working on getting this removed by Google), click on the Advanced button

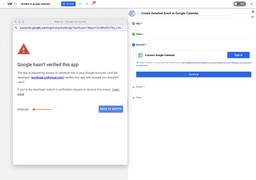
- Click on Go to workload.co (unsafe) – we promise it is actually very safe!
- Click Continue on the Sign in screen

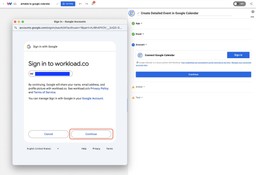
- Choose Continue on the access page

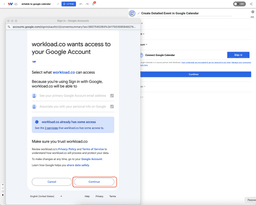
- Your Google account has now been connected, now enter a connection name and click OK

- Click Continue to move on
Step 4: Map your fields from Airtable
- Use Airtable fields from the trigger to populate the fields you want to use in the Google Calendar event being created. The fields available from the trigger depend on the fields available in the table you created for AIrtable. Required fields for Google Calendar are noted in the Editor. We used the following fields:
- Title
- Description
- Location
- Start Date and Time
- End Date and Time
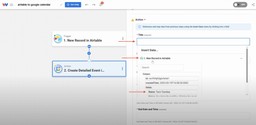
- If your Airtable record doesn’t include an end time, you will need to create a new step to create the end time. If it does, map that data, and skip to Step 6
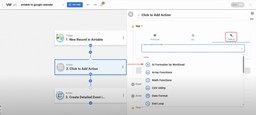
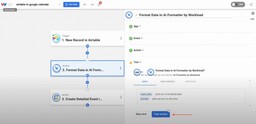
Step 5: Add an AI Formatter step to create the End Date and Time
- Add a step in between the trigger and action by click the + and then choosing Add Step

- Click the Tools menu and then select the app: AI Formatter by Workload

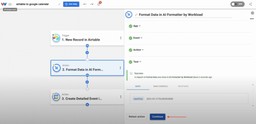
- In the Input Data field, select the Date/Time field from the Airtable trigger

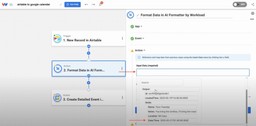
- Enter the standard meeting length in the Prompt field (ex: Add 1 hour to this time) then click Continue

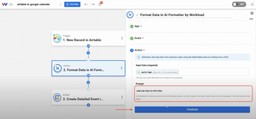
- Test the formatter step by clicking Test Action

- Make sure that the new time appears as you intended, then click Continue

- Return to Step 3 (Create Detailed Event) and map the end time from the AI Formatter step in the End Date and Time field

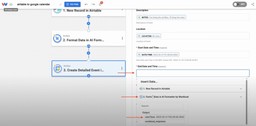
- Finish mapping the rest of the data and then click Continue
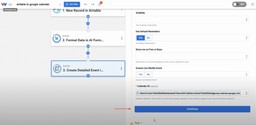
- Click Test action
- After getting a successful reponse, click Continue

Step 6: Finalize your calendar event setup for your Turn Airtable Records into Google Calendar Events
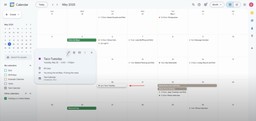
- Open your Google Calendar and verify that the new event appears

- Go back to the Workload Editor and verify that each step in your workflow automation has a green light indicator


- Click the On/Off toggle to activate your automation
🔓 Skill Unlocked: Turn Airtable Records into Google Calendar Events
You no longer need to switch between apps or copy and paste the same information twice. This automation bridges the gap between Airtable and Google Calendar, keeping your schedule up to date the moment new data is added.
It’s perfect for managing:
- Client bookings and meeting schedules
- Internal team standups or project milestones
- Interview pipelines or sales follow-ups
- Event coordination and timeline planning
With everything handled automatically—from pulling record details to formatting event times—you’ll reduce human error, speed up your workflow, and free up time to focus on what really matters.
👉 Build your own automation now with Workload
🛠️ Customizing Your Airtable Records into Google Calendar Events Workflow
Once your automation is live, you can fine-tune it to better fit your process. Workload gives you full control over how records become events. Here are a few ways to customize:
- Adjust event duration by changing the AI Formatter prompt (e.g. “Add 30 minutes” instead of 1 hour)
- Apply filters to only trigger events when certain fields are filled or match specific values
- Add logic branches if different types of records need different event formats or destinations
- Map extra fields like guests, video links, or internal tags—anything stored in Airtable
- Use dynamic calendar colors based on record type, category, or status for easy sorting
With just a few tweaks, you can tailor the automation to match how your team works best.
⚡ Power-Up: Make It Part of a Bigger Workflow
This automation is just one piece of what’s possible. You can use it as the starting point for more advanced workflows that connect your operations from end to end.
Here’s one example: A client onboarding flow
- Form submission in Typeform or Jotform
A potential client fills out an intake form on your site. - Create a record in Airtable
Workload takes the form data and creates a new client record in your Airtable CRM or projects base. - Turn Airtable Records into Google Calendar Events
This automation triggers when the new record is added and schedules a kickoff call on your calendar. - Send confirmation email via Gmail or Brevo
Add another step to send a calendar invite and onboarding email to the client, using dynamic data from Airtable. - Update internal Slack channel
Notify your team in Slack that a new client has been scheduled and linked to their Airtable record.
This creates a seamless onboarding experience—automated from lead capture to calendar scheduling to team coordination. No one needs to touch a thing after the form is submitted.
🧠 Learn More about Workload and Automations
Keep exploring automation and save even more time:
- 📺 Watch the full tutorial video
- 📚 Visit Workload University
- 🛠️ Browse setup guides in our Help Center
- 🔗 Explore more Airtable automation tutorials
- 🔗 Explore more Google Calendar tutorials
Tags
Ready to automate your workflows?
Start building powerful automations with Workload today.
Get Started Free