Workload Editor Filters: Unlock Smarter Workflow Automation
Adam Browder
March 24, 2025
Automation should simplify your business, not complicate it. With Workload Editor filters, you can streamline your workflows so they trigger only when the right conditions are met. In this guide, you will learn how these filters give you control of your automation process, making sure only the intended actions take place when you want them to.
If you need help, check out our in depth video on our Workload YouTube channel. You can also visit Workload University or our Workload Help page for more tips.
What are the benefits of Workload Editor Filters?
Workload Editor filters make automation more simple and efficient. They help you focus only on the conditions you want, so unnecessary actions don’t slow you down. By ensuring each step runs only when needed, filters improve workflow efficiency and reduce errors. With more control over your automation, your business runs more smoothly. When you use Workload Editor filters, you save time and focus on growth.
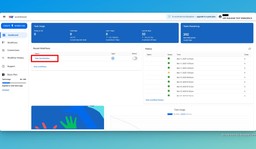
How to Set Up a Filter in Workload
Follow these simple steps to refine your workflow using filters:
- Open Your Workflow in Workload Editor
- Navigate to your existing workflow where you want to apply a filter.

- Add a Filter Step
- Click the plus (+) button between two steps in your workflow.
- Select Filter from the available actions.

- Choose the Field to Filter
- Identify the data field you want to filter. Click in the box that says “Choose Field…” and then click on the response that contains the field (e.g., “1. New Entry in Typeform”). Next, choose the field to filter on from the dropdown menu.


- Set Your Condition
- Define the rule that determines whether an action proceeds. Click in the “Choose condition” box and select the condition that you want to use from the dropdown menu (e.g., “(Boolean) Is true”). This means that if the response is not true, the workflow will stop right there.

- Save and Activate Your Workflow
- Click Save to apply the filter.
- Switch the workflow back to Active mode to start filtering data immediately.


Real-World Use Cases
Filters can help you fine-tune your workflow for a variety of scenarios:
- Targeted Campaigns – Only proceed with actions for users who meet specific criteria.
- Location-Based Actions – Tailor processes based on geographical data, such as inviting only local customers to events.
- Lead Qualification – Advance only high-quality leads into your CRM for further engagement.
Wrapping Up Workload Editor Filters
Using filters in your workflow empowers your business to operate efficiently. They simplify complex processes and prevent uIn summary, Workload Editor filters give you complete control over your automation so that only the right actions occur. Using filters makes your workflow more efficient while saving time and resources. This lets you focus on what matters most—growing your business. Start using Workload Editor filters today and unlock smarter automation that propels your business forward!
For more tips, be sure to visit Workload University or check out our Workload Help page.
Work smarter- watch your business grow!
Ready to automate your workflows?
Start building powerful automations with Workload today.
Get Started Free