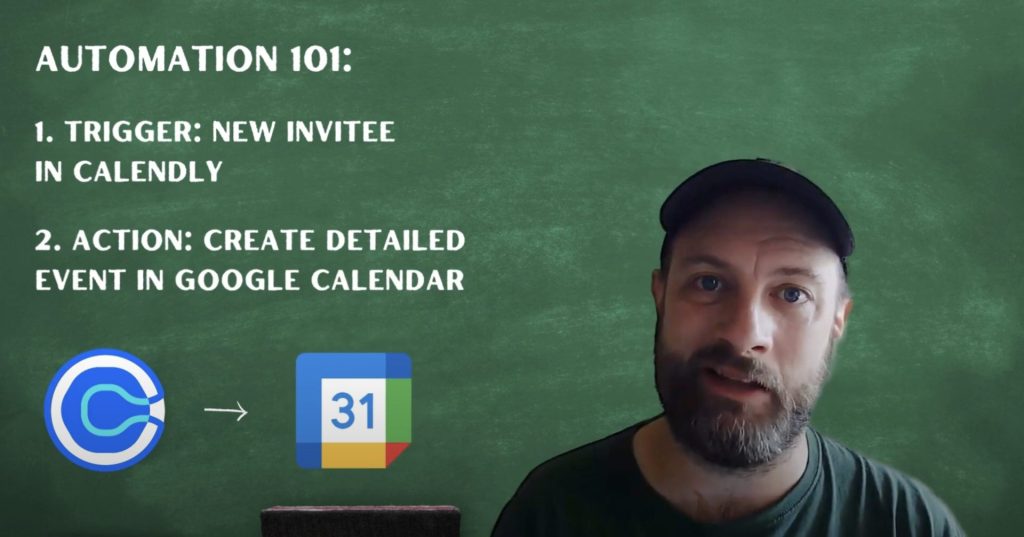
Adding meetings to your calendar by hand takes time and can lead to mistakes. If you use Calendly to book appointments, this automation makes things easier. The Google Events from Calendly Invitees workflow connects Calendly to Google Calendar—no coding needed.
Each time someone books with you on Calendly, the workflow creates a Google Calendar event with their name, email, phone number, meeting type, and time. You can choose what details to include. This helps you save time, stay organized, and avoid double-booking. It’s perfect for anyone who schedules calls, interviews, or meetings—like recruiters, coaches, consultants, and sales teams.
Need more help? Watch our tutorial video with Eliot from Workload. You can also visit Workload University or check out our Help Center for more tips on automation.
Overview: Google Events from Calendly Invitees #
This workflow connects Calendly to Google Calendar. Here’s what it does:
- Watches for new Calendly bookings
- Pulls key invitee information automatically
- Creates a detailed Google Calendar event for you
What You’ll Need #
- A Calendly account
- A Google Calendar account
- A Workload account (free or paid)
Step-by-Step: Build Your Google Events from Calendly Invitees Workflow #
Step 1: Set Up the Trigger (Calendly)
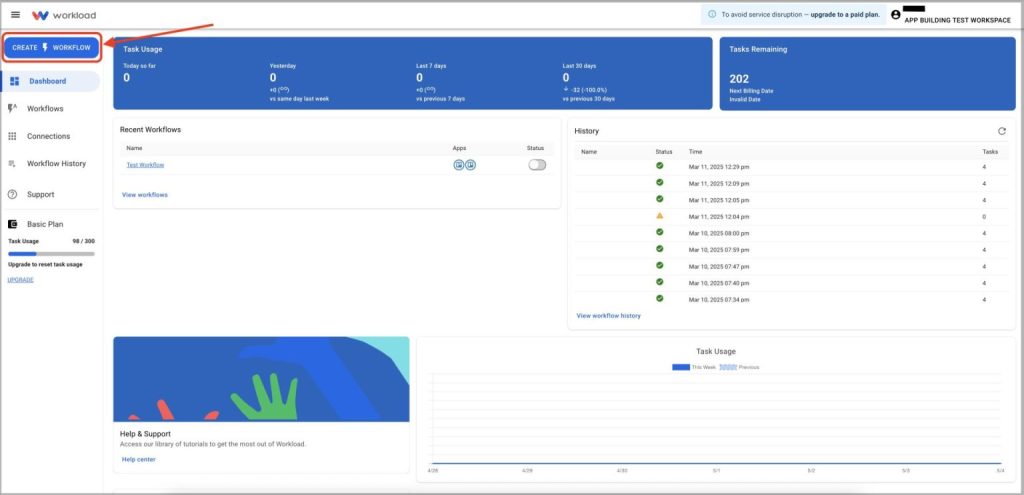
- Create Workflow: Log in to the Workload dashboard and click Create Workflow.
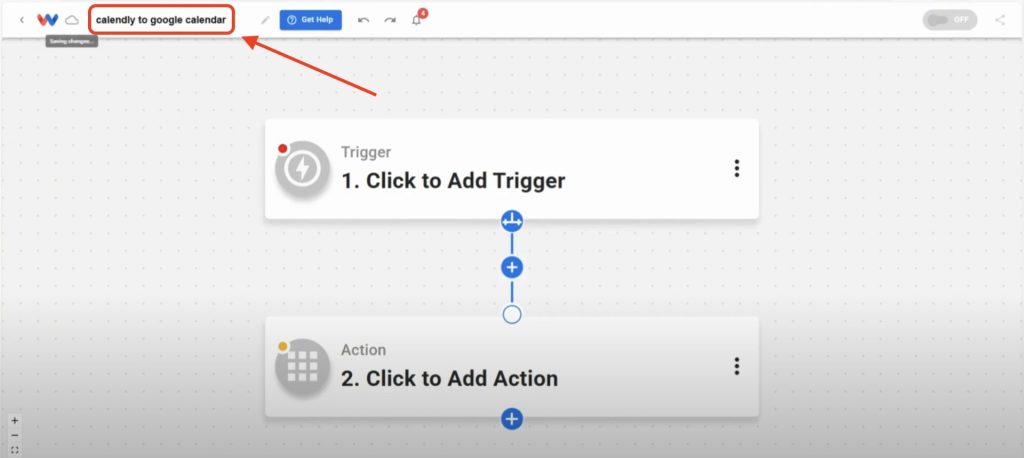
- Name It: Give your workflow a name.
- Choose Trigger App & Event: Select Calendly, then choose Invitee Created.

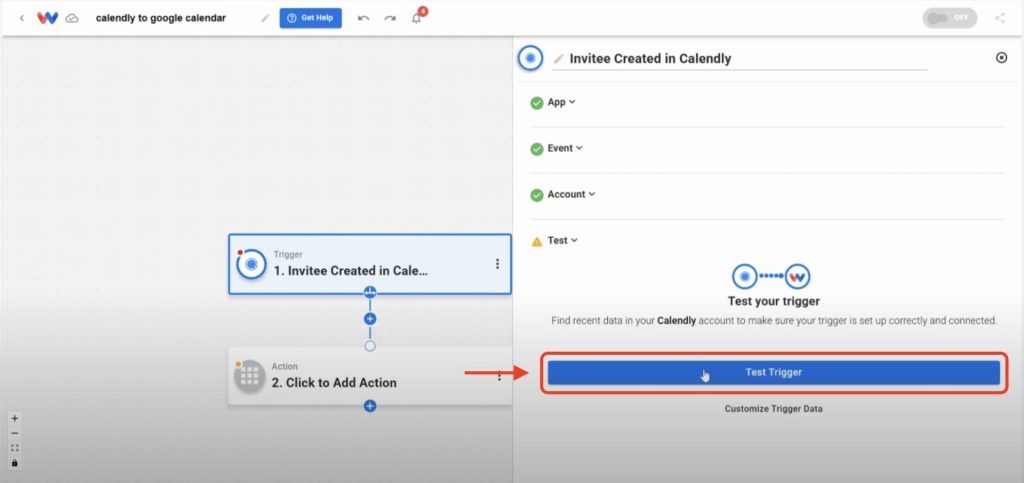
- Connect Your Account: Click Sign in to link your Calendly account to Workload.
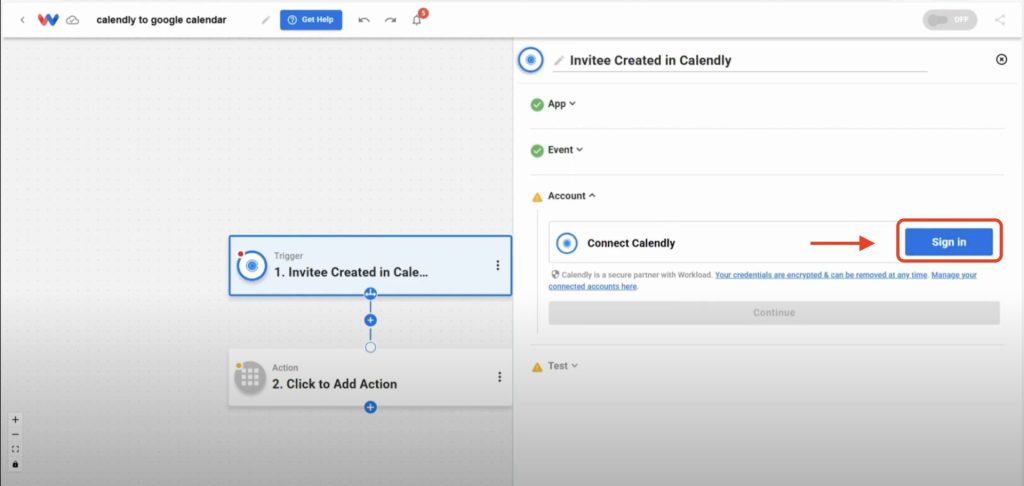
- Test Trigger: Click Test Trigger to pull in a sample record.
Step 2: Create Step 2 Action (Google Calendar)
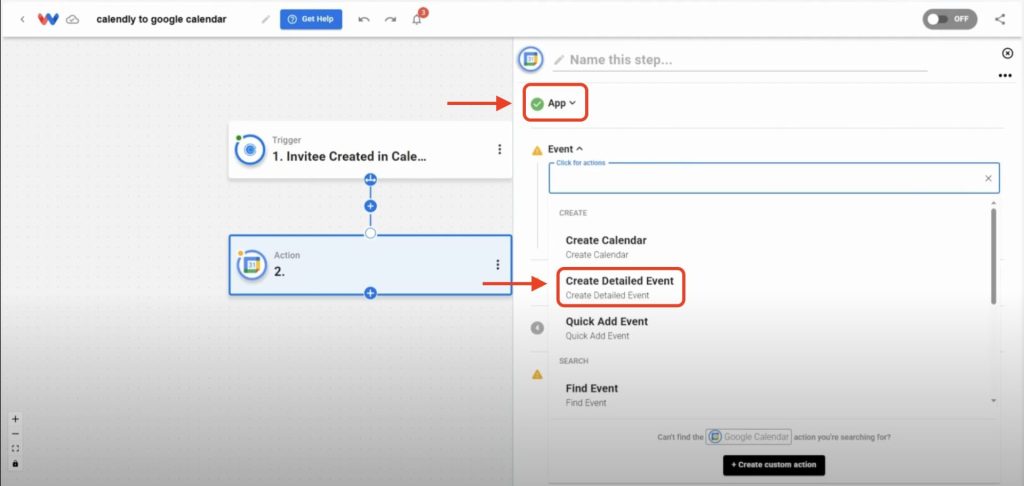
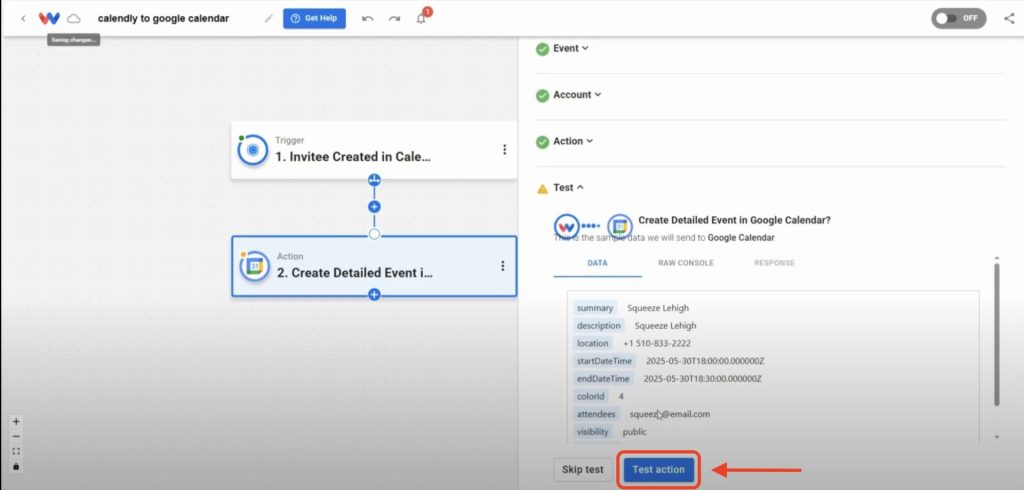
- Choose Action App & Event: Select Google Calendar, then choose Create Detailed Event.
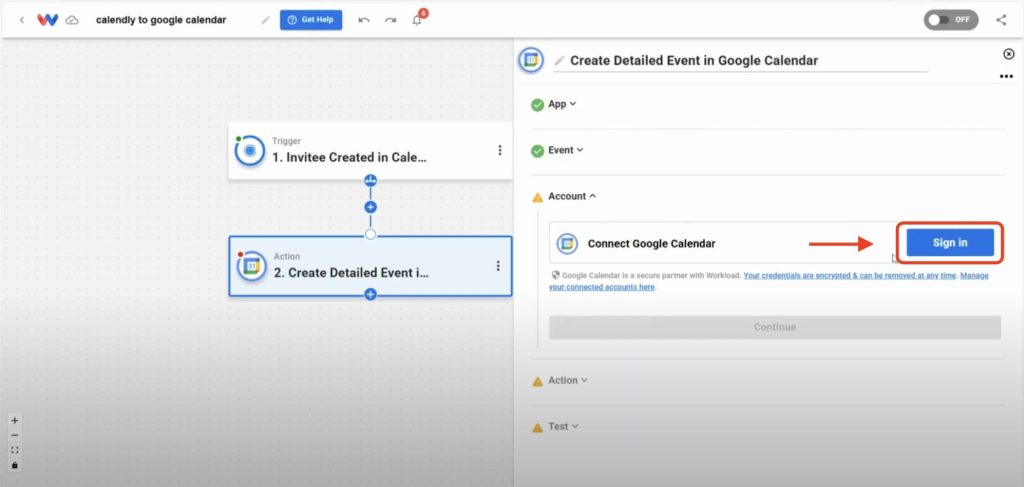
- Connect Your Google Account: Sign in to allow Workload to access your Google Calendar.
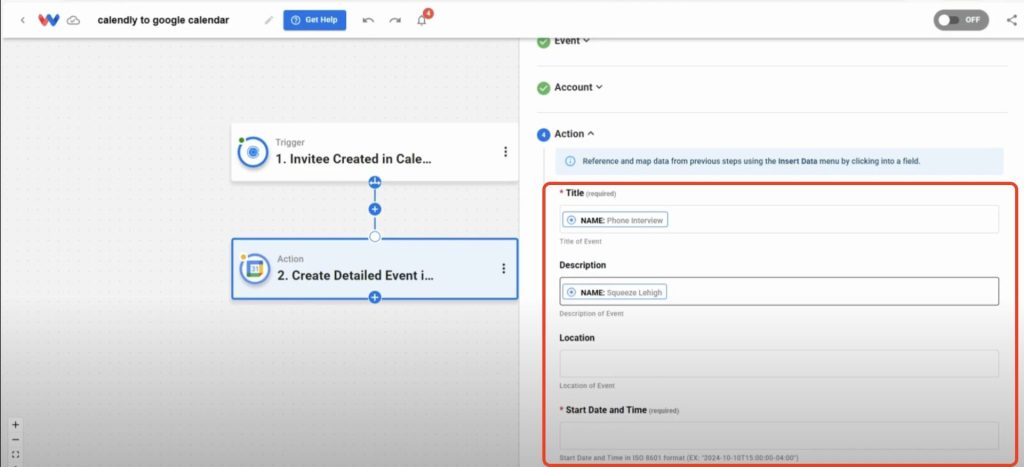
- Customize Event Details: Map the data from the trigger that you want to use to create the event. Some commonly used fields include:
- Title (required)
- Description
- Location
- Start Date & Time (required)
- End Date & Time (required)
- Color Coding
- Guests
- Visibility
- Calendar Selection (required)
- Test the Action: Click Test Action to create a sample calendar event.
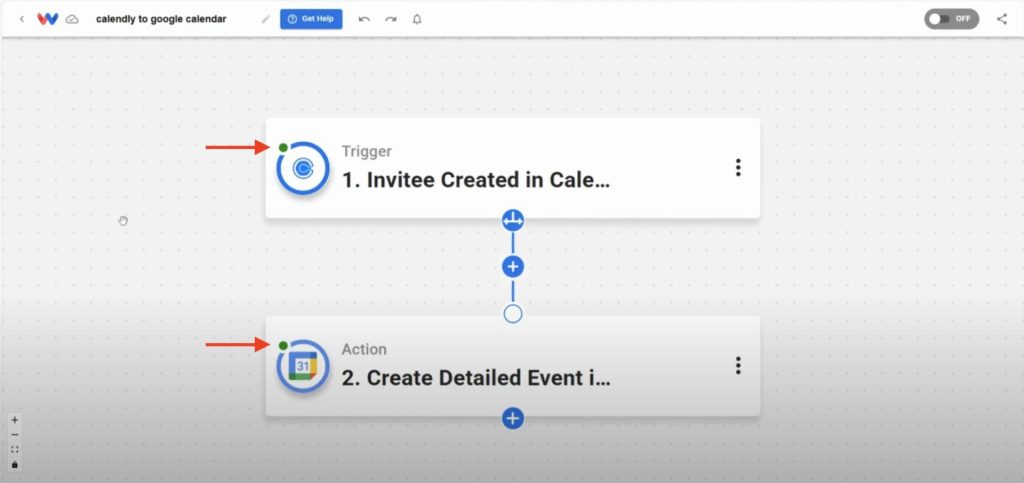
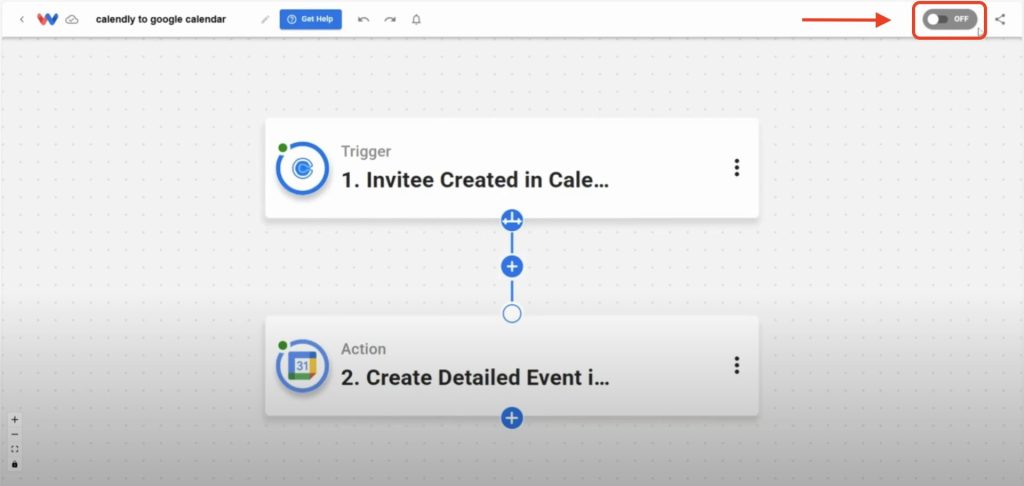
Step 3: Complete the Workflow
- Check Status: Make sure all workflow steps show green light indicators.
- Turn It On: Use the toggle to activate your workflow.
Customization Tips #
- Use Dynamic Titles: Automatically pull meeting types or names from Calendly.
- Send to Multiple Calendars: Add another action if you need to duplicate events.
- Add Notifications: Trigger a Slack or email alert to remind you.
- Capture More Info: Use custom Calendly questions to enrich your calendar events.
Final Thoughts #
Calendly makes scheduling easy. But what about keeping your calendar organized? That’s where this workflow helps. The Google Events from Calendly Invitees automation adds full events to your calendar—automatically. You save time, avoid mistakes, and stay on top of your day. It runs in the background and keeps your calendar up to date. You won’t miss a meeting again.
Want to do even more with automation? Use Workload templates to build your own workflows, or explore our guide library for more ideas. Need help? Visit Workload University or check out our Help Center. With Workload, automation is simple and it works.
Automate your work—simplify your day!


