For this quick start guide, we will guide you through the process of setting up your first, basic workflow using Google Sheets and Google Gmail. When a new row is added to a spreadsheet in Google Sheets, send email in Google Gmail. By the end of this short tutorial, you’ll be automating your work in no time!
Set up your trigger step
Triggers are the very first part of setting up a workflow. It is the event that happens in a 3rd party app that kicks off the entire workflow process. Think in terms of “When (event) happens in (app), do (action) in (app).
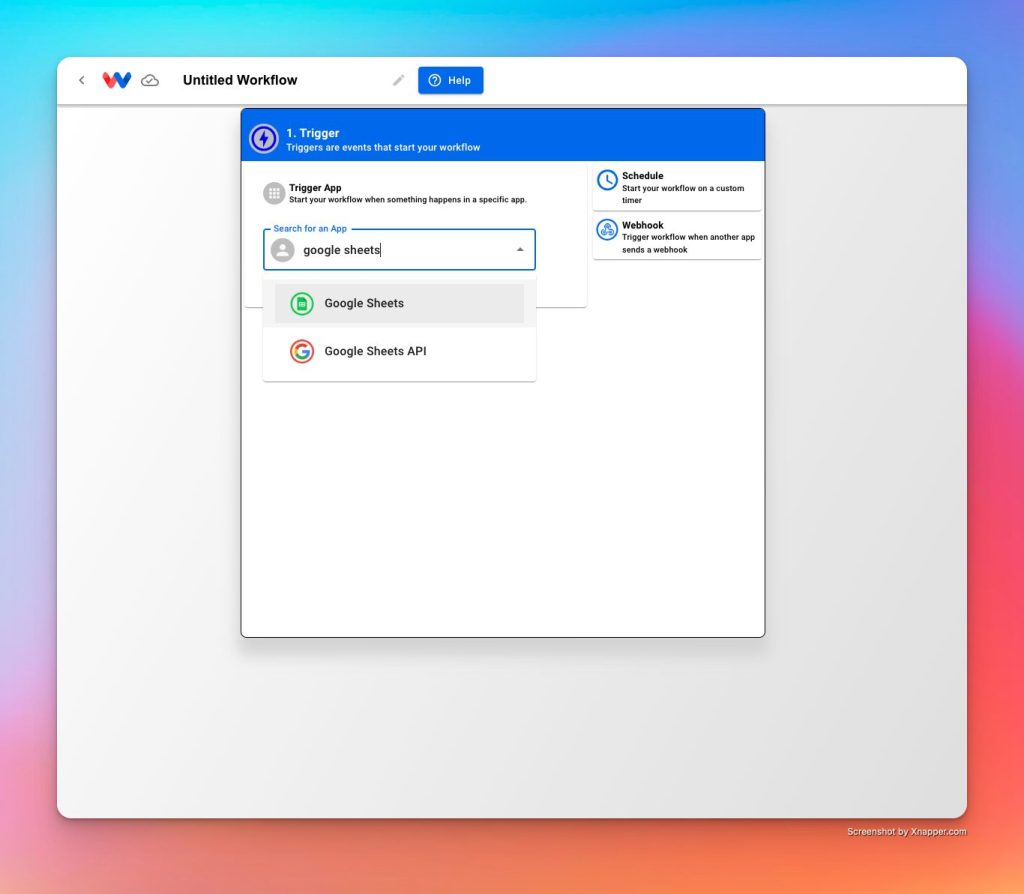
Choose an app from the list available integrations
In this example, we’ll use Google Sheets as our trigger application (i.e. When XXX happens in Google Sheets)
Select the event you want to to trigger the workflow (i.e. When New Spreadsheet Row happens in Google Sheets)
Now that we’ve selected Google Sheets as our app, we want to focus our workflow to trigger when a new spreadsheet row is added to a sheet.
Authorize Workload
Authorize Workload the access needed to access your Google Sheets
Configure and set up the trigger
Ensure that you select a spreadsheet and a sheet within the spreadsheet to monitor for new rows being added.
Test trigger for data
You can use the dropdown to select a specific sample from your spreadsheet to work with in future action steps
The data is viewable under the “Output” field. This represents the keys that will mapped to future workflow runs. The values are just there for placeholder purposes to give you an idea of what would happen during a live run of the workflow.
Set up your filter (if needed)
Sometimes you’ll need to add a filter to your workflow. Filters are useful if you only want your workflow to run only when certain conditions are met. In this example, we want this workflow to trigger every time a new row is added to our worksheet. What if we only want this workflow to run if column F is greater than 4? We can achieve that by adding a filter!
Click on the tool icon along the connection line between the two steps
Select “Filter/Delay” after clicking on the wrench tool icon
Title your filter
Add a title to your filter so the black label will appear in between steps. This will remind you of its existence next time you login.
Add a condition
Click on “+ Add Item”, and then click on “+Add Item” again inside of the Conditions menu.
Select the key to filter on
In this example, we want to select the key for Column F from our dropdown menu
Select the filter type
Select (Number) Greater than as your “Condition”.
Add a filter value to be met
Using your keyboard, just type “4” into the field for “Enter or select value…”. Your filter should now look similar to the screenshot above. Click out of the filter side pane to go back to your workflow set up.
Set up your action
Action steps are the workhorses of automation. This where you define what happens after the triggering event. For our example in this tutorial, we want to send an email to ourselves every time a new row is added to Google Sheets. You can add as many action steps to a workflow as you need, but this example only covers a simple 2 step process.
Choose an app
In this example, we will be using Google Gmail as our example action app.
Select an event
For our example, we are going to select “Send Email” as our action step’s event. This means when a new row is added to the spreadsheet (when column F is greater than 4), we will send an email to someone using Gmail.
Authorize Workload
Allow Workload access to your Gmail account in order to be able send emails on your behalf when this workflow runs.
Set up the action and map fields
Make sure to add the “To”, “From”, “Subject” and “Body” fields. You can use the dropdown to map fields from the trigger step (and any other previous step’s output) to dynamically replace the key’s value during the workflow automation. This process is referred to as “mapping keys”. Whatever the output from the previous step is, that will be replaced during the live trigger of this workflow! It tells Workload where to look for the real value.
Send a test
Click on “Test & verify” to submit a test to make sure all connections are working and you actually receive the email to yourself!
If you get a successfully response back from Gmail, click Save & Close to save your workflow up to this point.
Title and activation
Give your workflow a title so you can keep things organized in your workspace
Title your workflow by simply clicking into the “Untitled Workflow” default text and start typing
Turn your workflow to ON
Click the switch in the upper right corner to turn your workflow ON. Now every-time a new row is added to our spreadsheet, an email will be sent to Gmail with our formatted Subject and Body as long as the value in column F of our spreadsheet is greater than 4.
Share your workflow
Click the “share” icon next to the ON/OFF switch
The share button is located in the upper right corner next to the On/Off switch
Provide a title and description for your workflow
Be sure to provide a clear title and description that accurately describes what your workflow does. This makes it easier for people to understand what your sharing with them when they search for ready made workflows.
Click Share!
Be sure to copy the template link. When you share a link with your colleagues and associates, Workload will scrub out all sensitive details like account information and workflow history.
Ready to automate your workflows?
Start building powerful automations with Workload today.