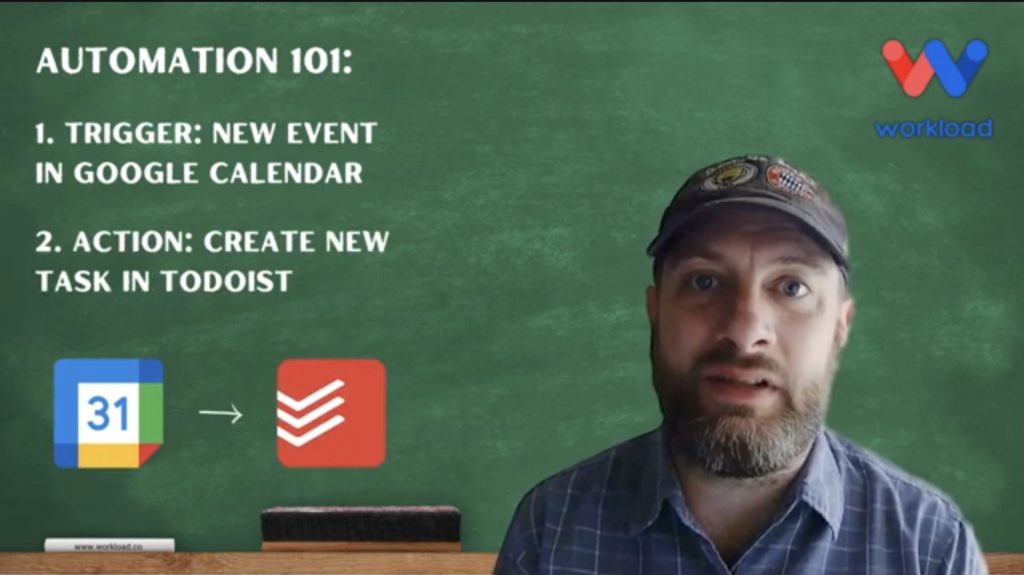
Google Calendar Todoist Task Sync from Workload automatically turns each calendar entry into a detailed Todoist task. By watching your chosen Google Calendar and directing tasks to your preferred Todoist project, Workload ensures every appointment—be it a client call, team meeting, or personal reminder—lands in your to-do list with title, due date, and notes. It’s easy to set up, even if you’ve never used automation before—no tech skills needed.
Setup is a one-time process: connect your accounts, select your calendar, map your fields, and flip the switch. After that, Workload handles the rest, so you can focus on what really matters.
Need more help? Watch our blog post companion video with Eliot as your personal workflow building coach, visit Workload University, or check our Help Center for tips on automating your work.
Benefits of a Google Calendar Todoist Task Sync #
🔄 Auto-sync: Google Calendar events instantly show up in Todoist as actionable tasks.
🗓️ Seamless daily planning: Your to-do list is always up to date with meetings, deadlines, and reminders.
📌 Better follow-through: Important details like notes and links carry over from the calendar to your task list.
Essentials & Connections #
Before diving in, make sure you have these:
📅 Google Calendar account with events you want to monitor
✅ Todoist account where your tasks will be created
🚀 Workload account (free or paid) to build and run your workflow
How to Build Your Google Calendar Todoist Task Sync Workflow #
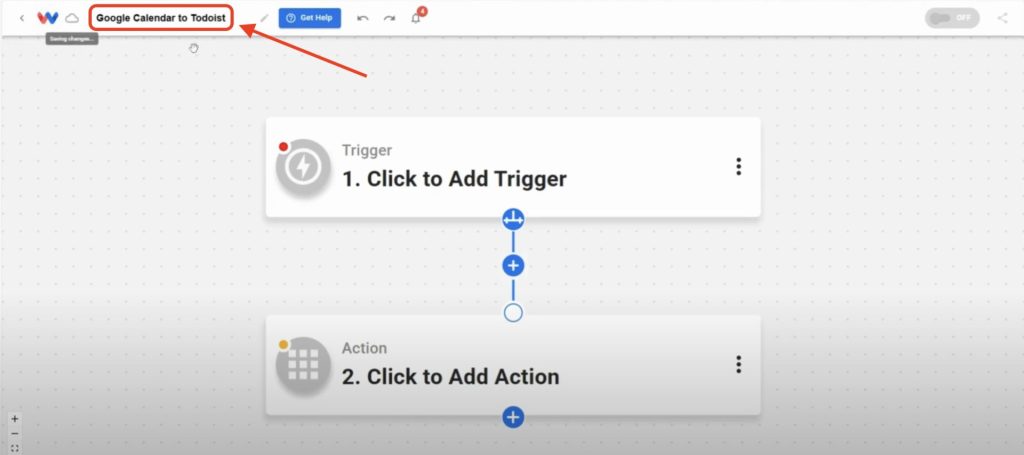
1. Start Your Workflow
- From your Workload dashboard, click New Workflow.
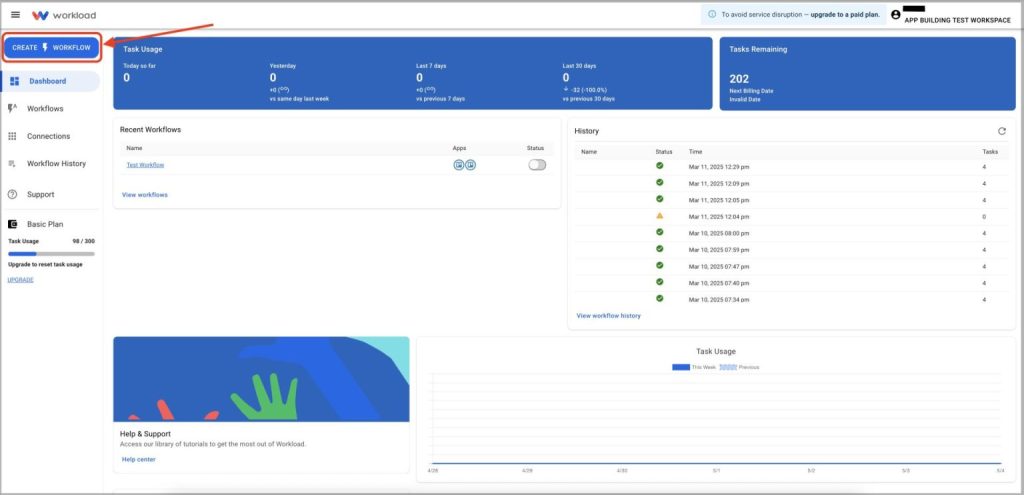
- Give your workflow a clear name, like “Calendar → Todoist Sync.”
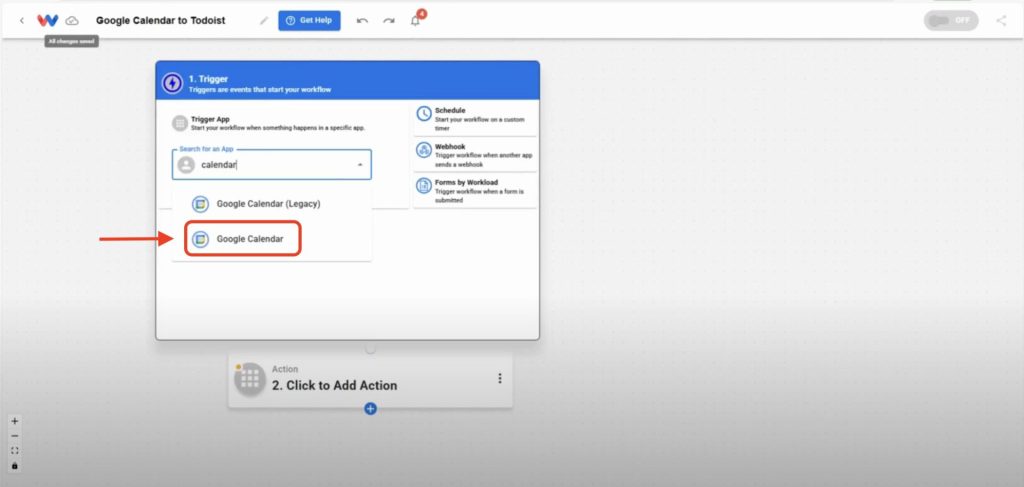
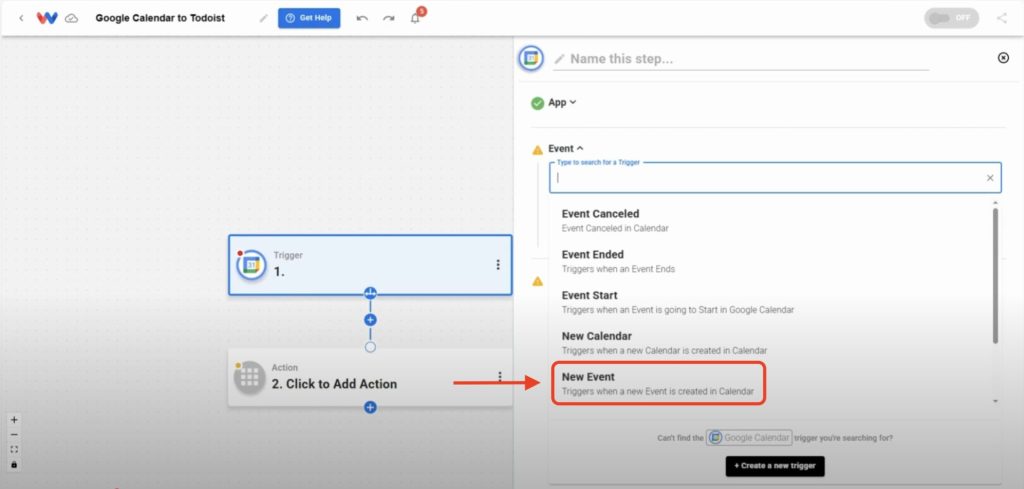
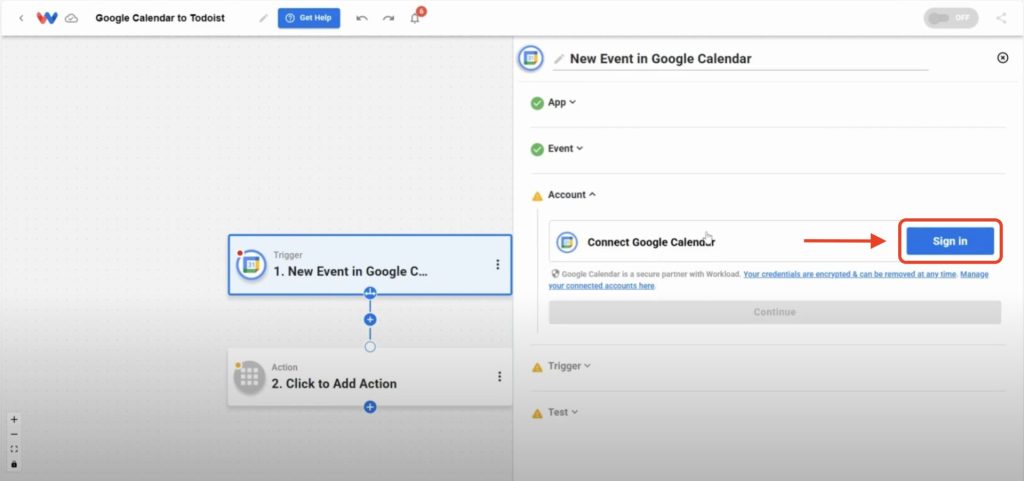
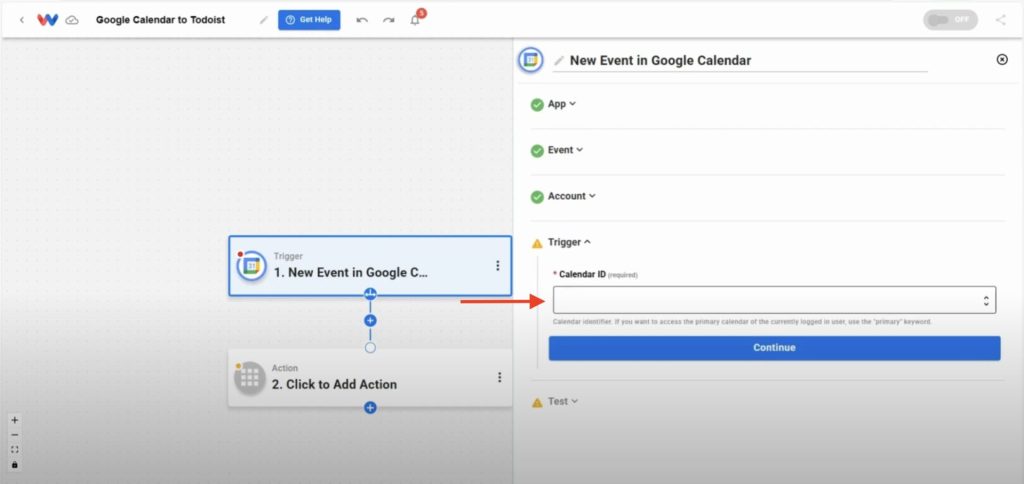
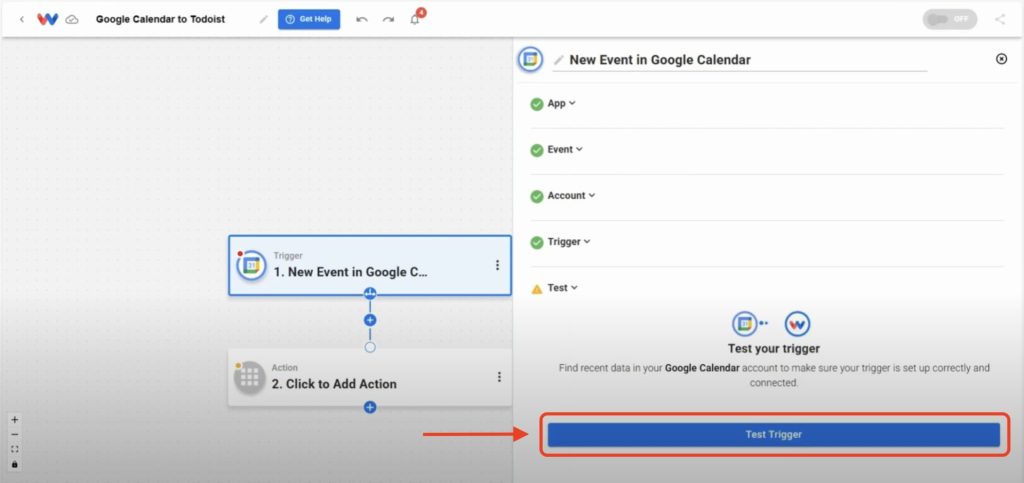
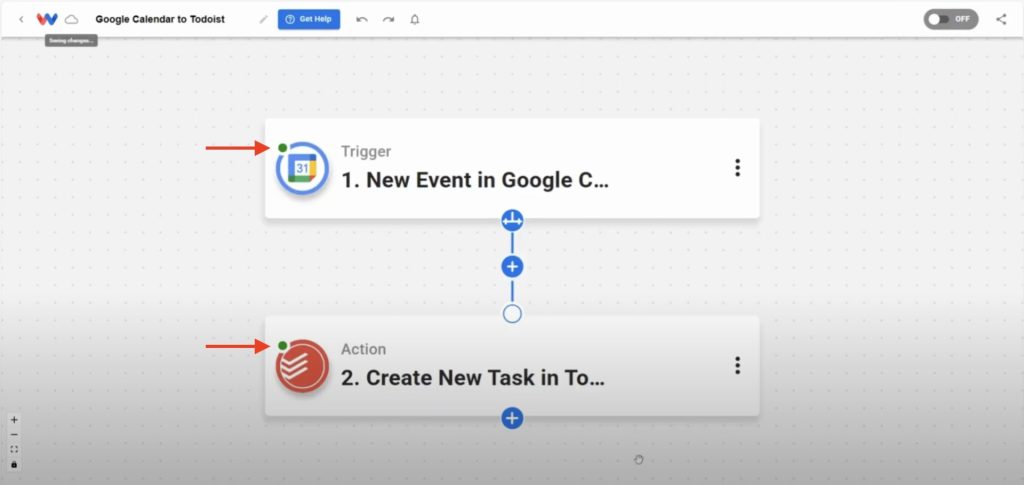
2. Create the Google Calendar Trigger
- Select the Google Calendar app as your trigger.
- Choose the New Event trigger event.
- Securely connect your Google account.
- Choose the calendar you want to watch.
- Click Test to fetch a sample event.
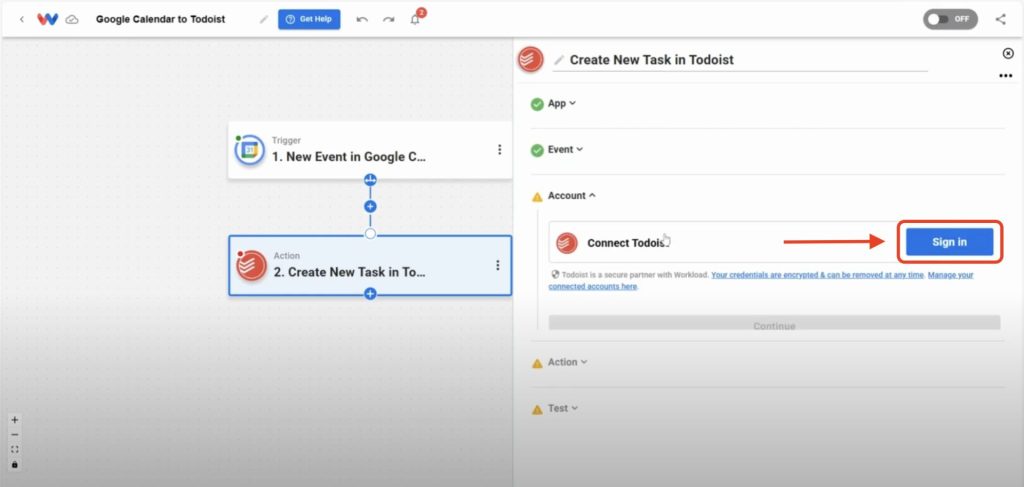
3. Create the Todoist Action
- Select the Todoist app as your action.
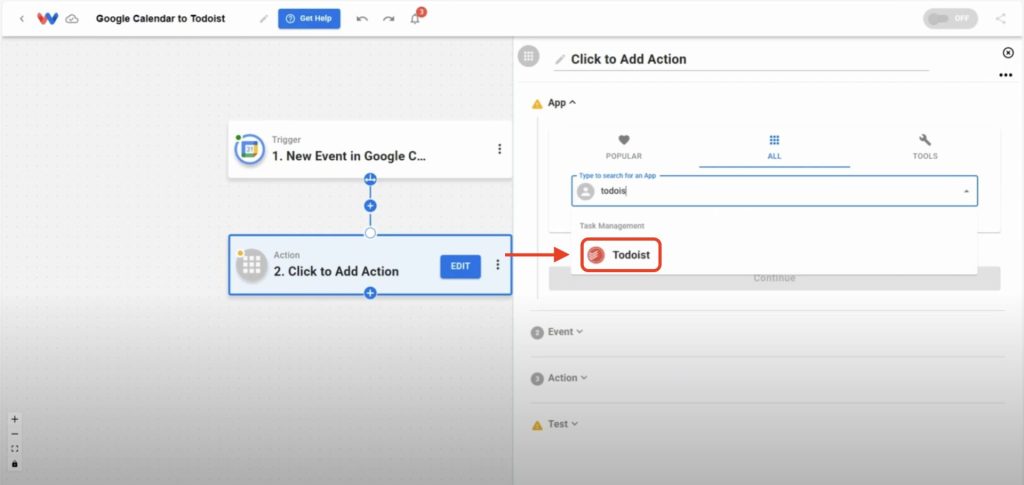
- Choose the Create New Task action event.
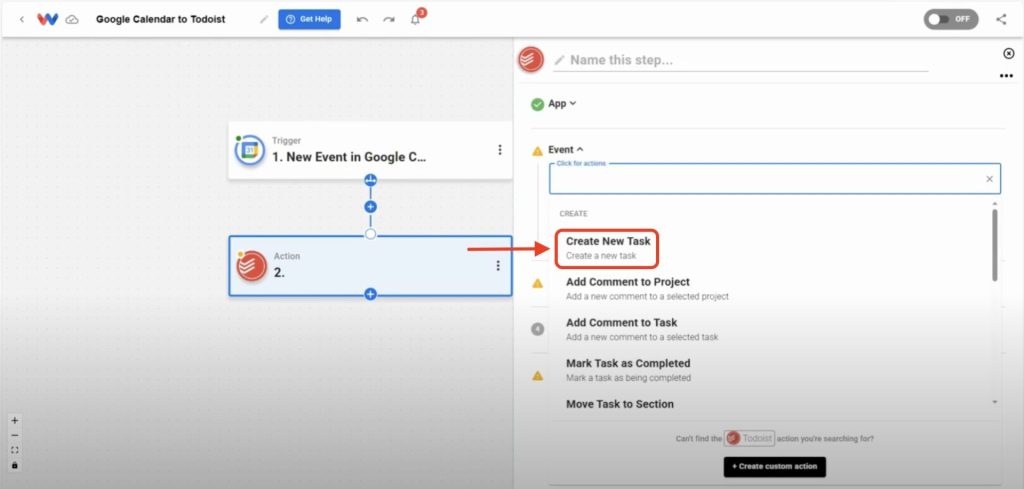
- Securely connect your Todoist account.
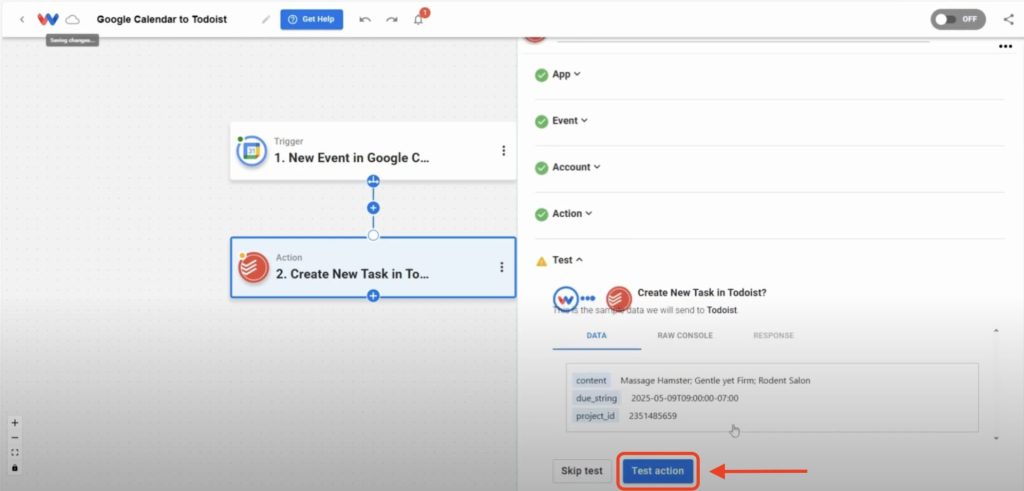
- Use the trigger event data to link calendar details to your task:
- Title: Set this to the Summary field so you know what the task is about.
- Due Date: Match this with the event’s start time to keep deadlines aligned.
- Project: Select the project that the task will belong to from the dropdown menu.

- Click Test action to confirm a task is correctly created in your Todoist project.
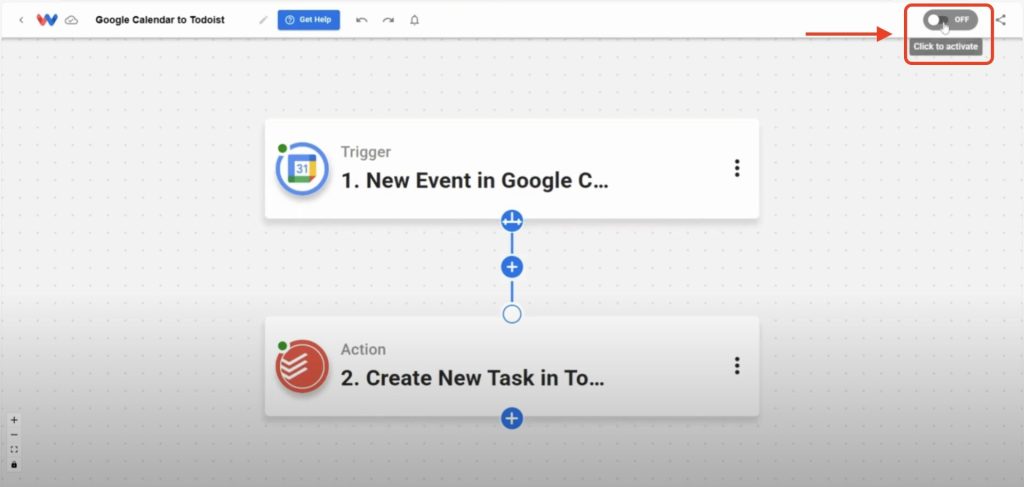
5. Activate Your Workflow
- Verify each step has a green light indicator.
- Toggle the On/Off switch in the top right corner to activate the workflow.
Customize Your Own Google Calendar Todoist Task Sync #
- Keyword filters: Only create tasks when event titles include words like “Call” or “Deadline.”
- Priority mapping: Assign calendar colors to Todoist priority levels (e.g., red → P1).
- Daily agenda emails: Add a scheduled step to email yourself today’s tasks each morning.
- Team notifications: After task creation, send a Slack message to your team channel.
Ready to Automate? #
Now that you have built your own customized Google Calendar Todoist Task Sync powered by Workload, you’ll stop manually copying events into your to-do list and ensure no meeting or deadline slips through the cracks. Give it a try and experience seamless, no-code automation today!
Ready to streamline your day? Use Workload templates to build more workflows, or browse our guide library for fresh automation ideas. For step‑by‑step guidance, visit Workload University or check out our Help Center. With Workload, we are there for you—all the time, every time.
Automation by Workload—make your day flow!
#NoCode #Automation #GoogleCalendar #Todoist #ProductivityTools #WorkloadCo #ZapierAlternative #WorkflowAutomation #TaskManagement


