You’ve just launched a new customer registration form using Jotform—but now you need a clean, automated way to get those responses into a Google Sheet. With Workload, you can sync Jotform responses directly to your spreadsheet the moment they come in—no manual copy-paste required.
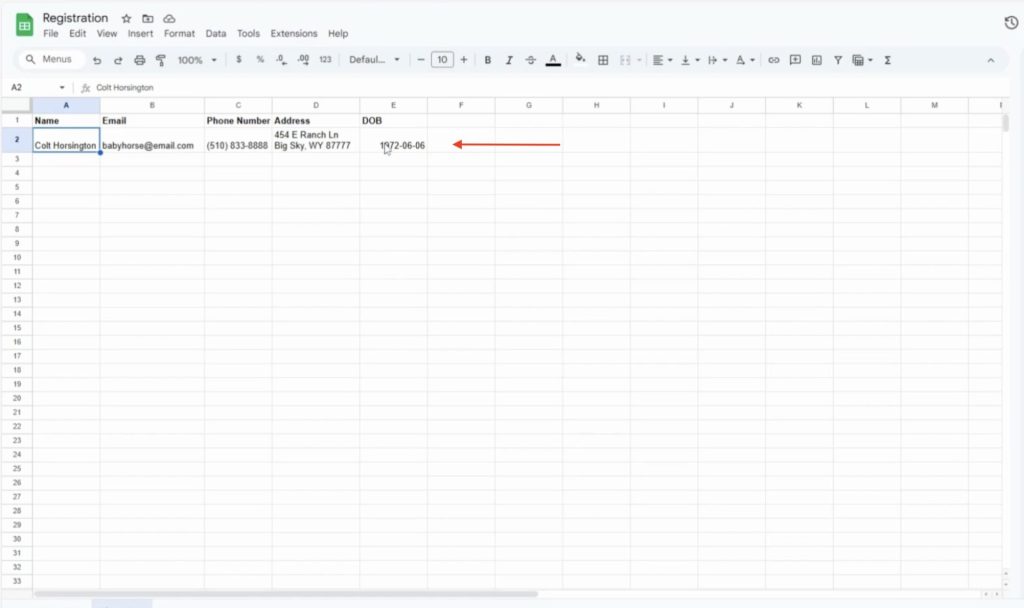
This automation pulls in form fields like name, email, phone number, address, and date of birth. Each answer is mapped to a matching column in your Google Sheet so you always know where your data lives.
It’s fast, consistent, and totally hands-free—ideal for onboarding workflows, lead tracking, or anywhere you rely on clean data in Google Sheets.
🧩 Essentials #
✉️ Jotform Account
Collect and manage form submissions from your audience.
📈 Google Sheets Account
Store and organize form responses in spreadsheet rows.
🤖 Workload Account
Build, run, and manage your automation—no code needed.
🛠️ Make It Yours #
📎 Add filters
Log responses from specific forms or with certain answers.
📅 Add timestamps
Include submission time to better sort and track your entries.
🔧 Use AI Formatter
Clean, format, or extract form data before saving to Sheets.
⚙️ How to Sync Jotform Responses to Google Sheets #
Step 1: Set up your Sync Jotform Responses automation #
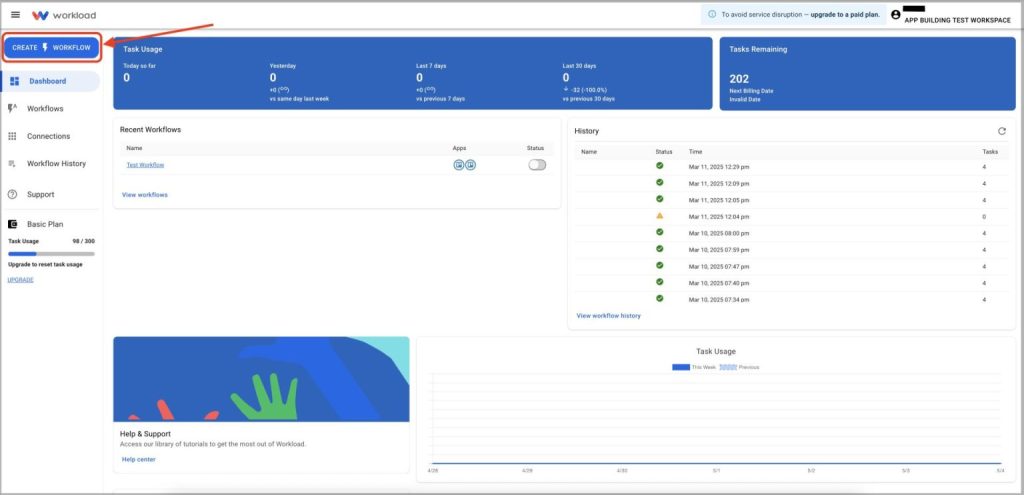
Log in to your Workload dashboard and click Create Workflow
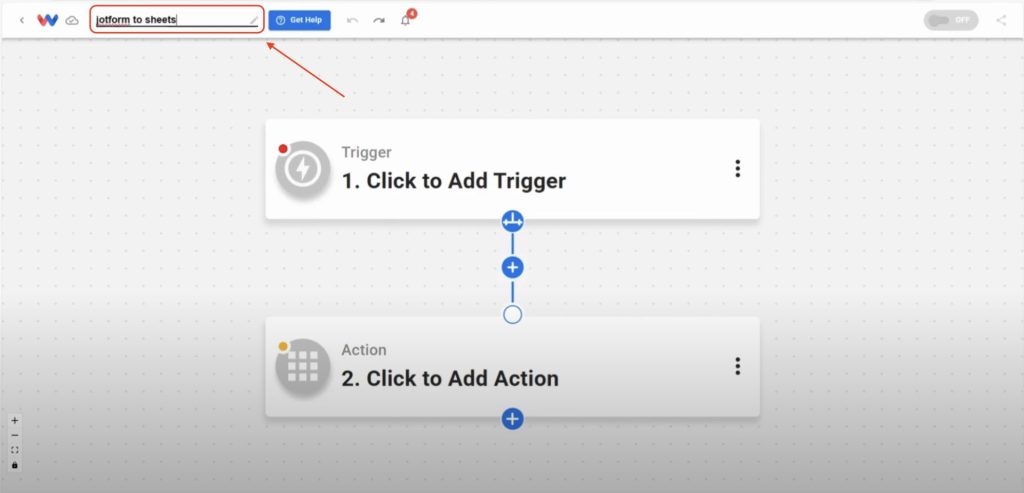
Give your workflow a clear title like “Jotform to Sheets”
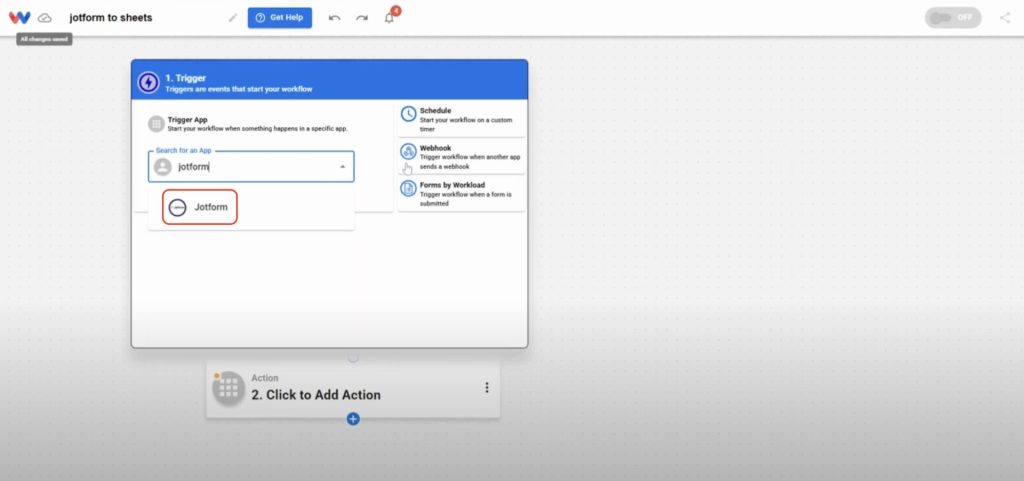
Step 2: Add your Jotform trigger #
From the trigger app menu, select Jotform
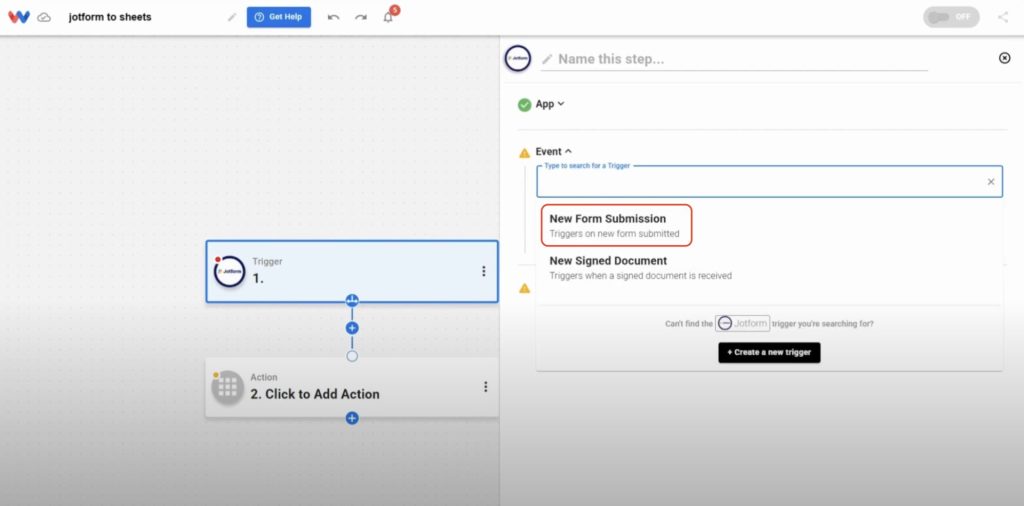
Choose the trigger event “New Form Submission”
Click Sign in to connect your Jotform account. For help, follow the step-by-step guide on how to connect Jotform to Workload. Once connected, click Continue.

Select the form you want to track (ex: New Customer Registration Form)
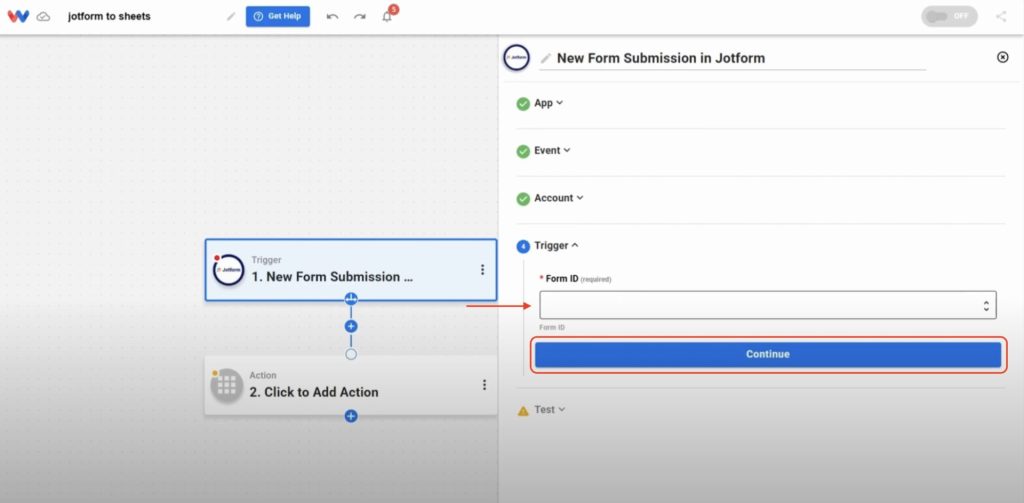
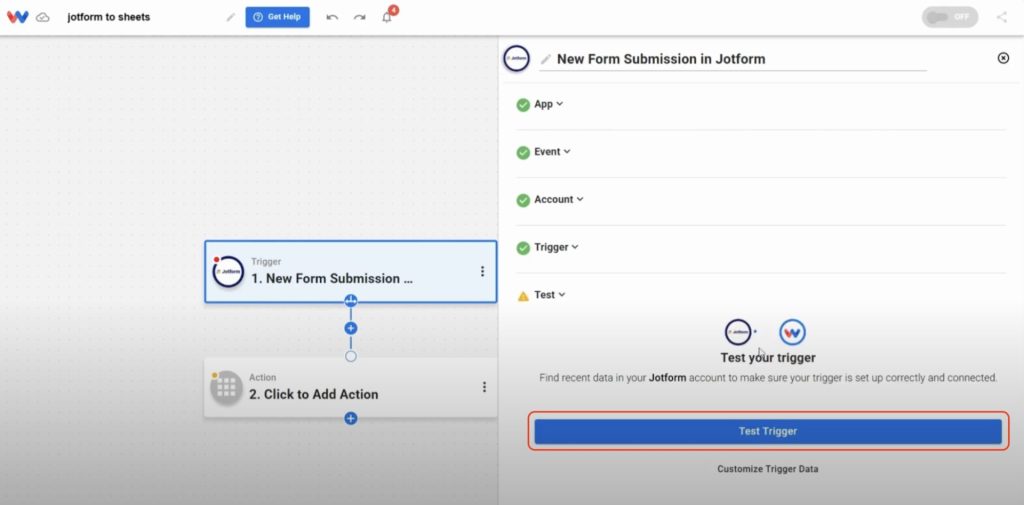
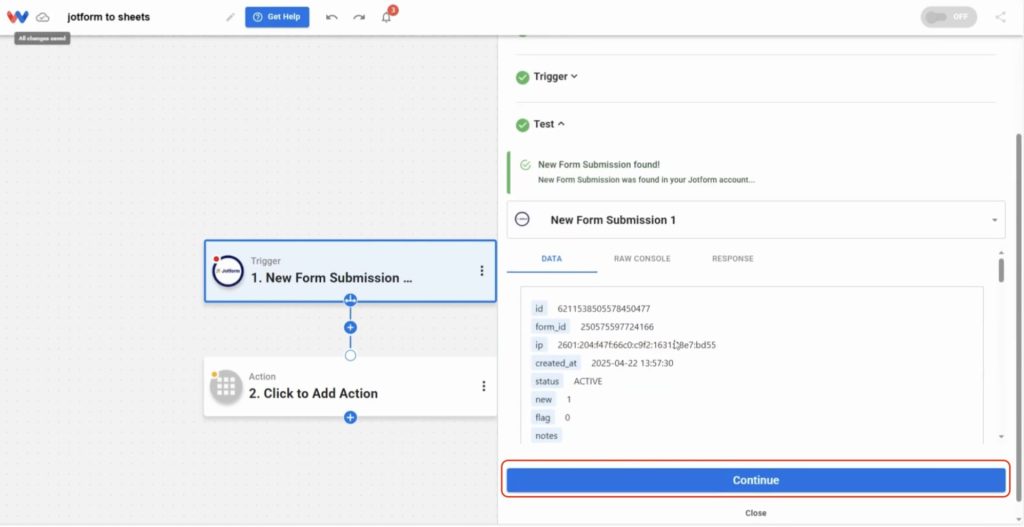
Click Test Trigger to pull in a sample submission
Once you get a successful response, click Continue to move on to the next step
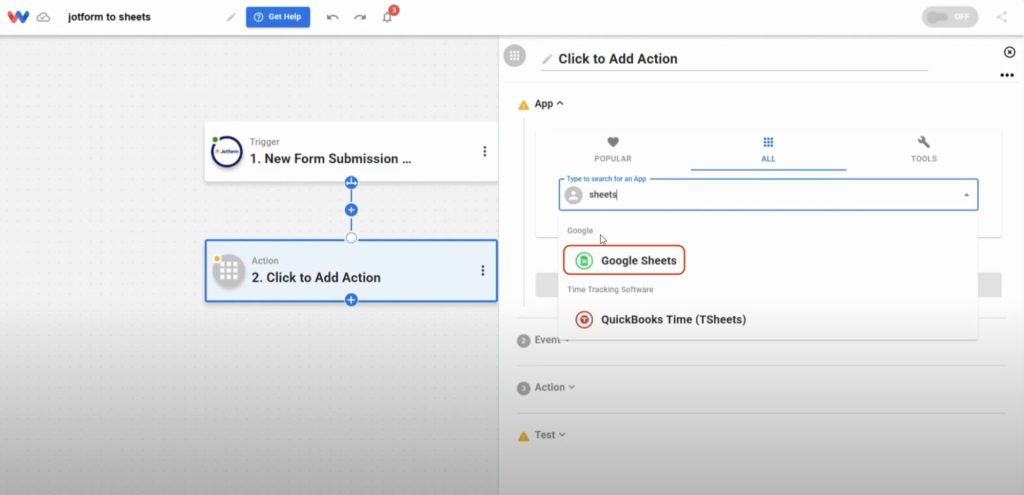
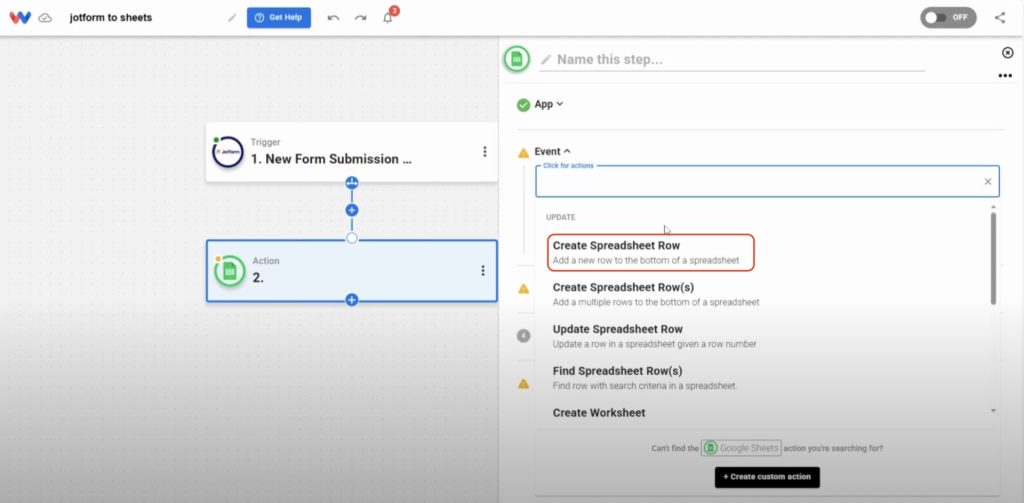
Step 3: Add your Google Sheets action #
In the action step, choose the app Google Sheets
Set the event to “Create Spreadsheet Row”
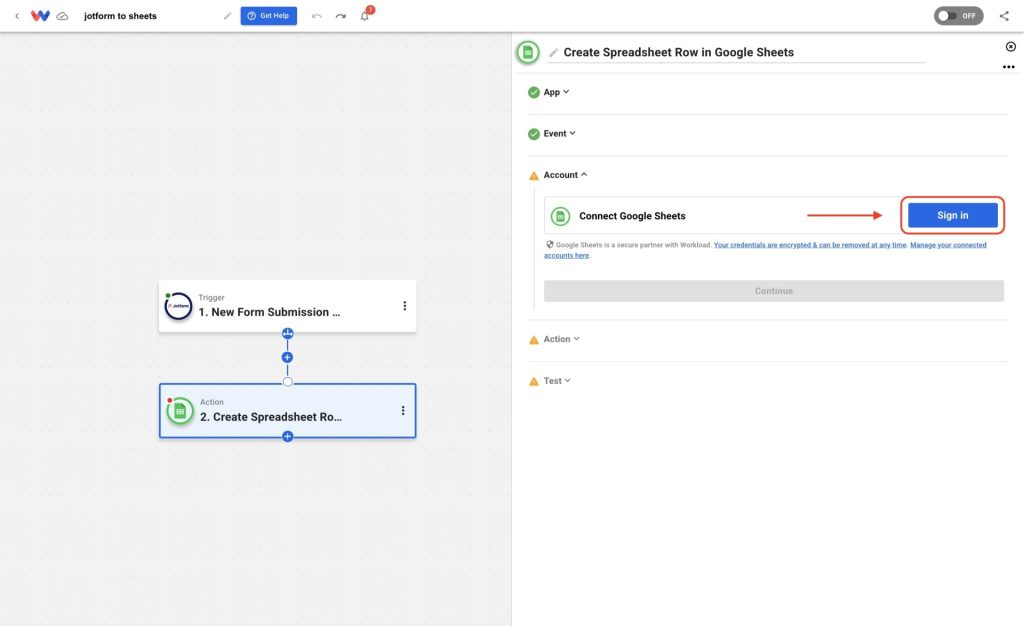
Click Sign in to connect your Google account if you haven’t done so already. For help, follow the step-by-step guide on how to connect Google Sheets to Workload. Once connected, click Continue.
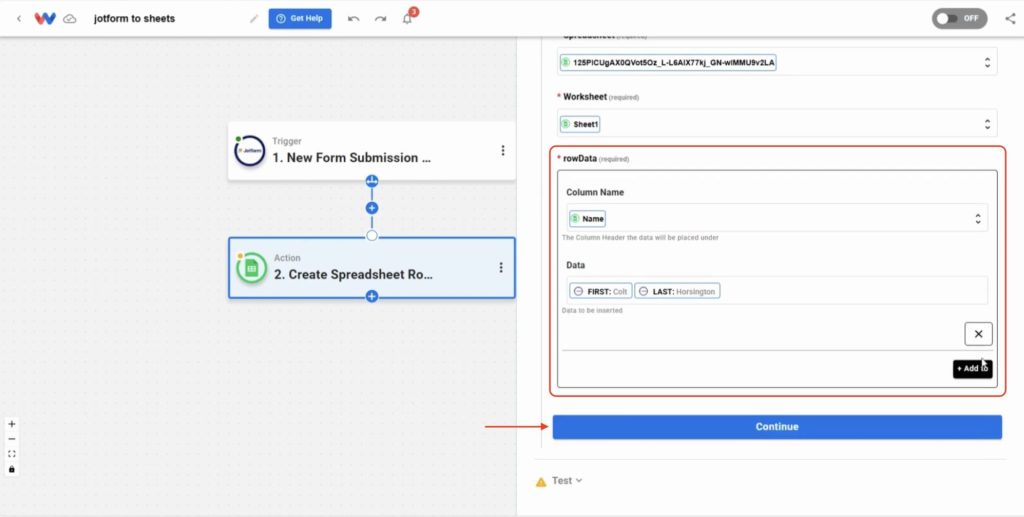
Pick the target spreadsheet and worksheet from the dynamic dropdown menus
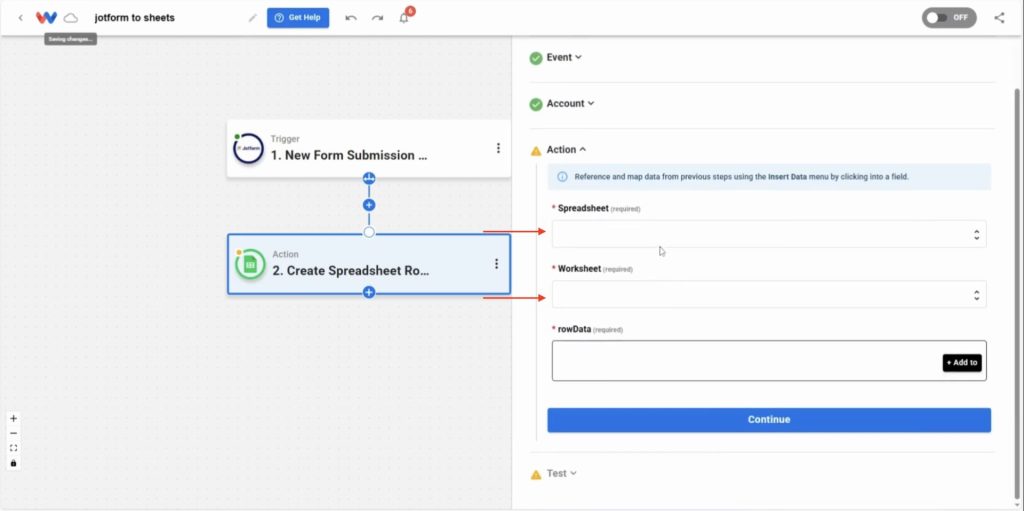
Step 4: Map each Jotform field to your sheet columns #
Click + Add To for each column in your sheet to map a field
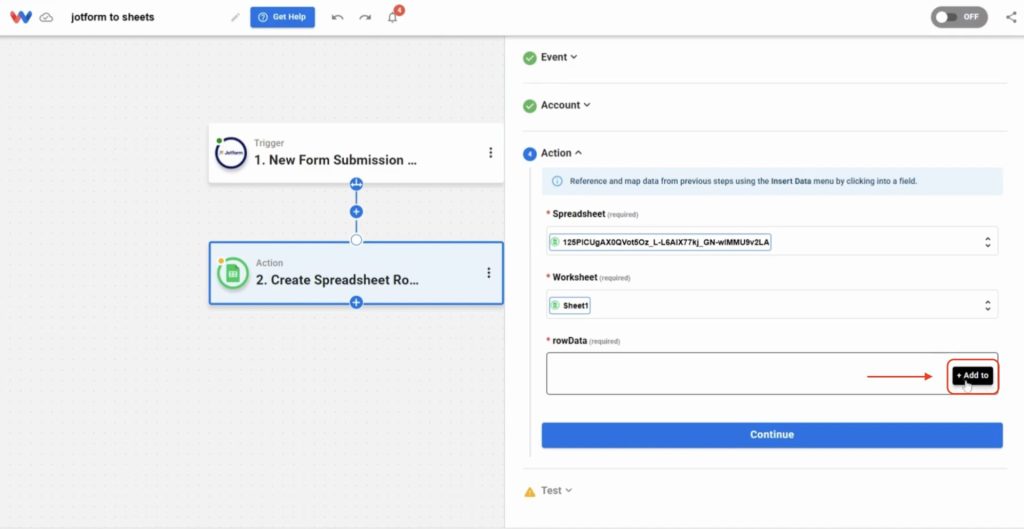
Click the + Add to button to begin mapping fields. Use the dropdown menus in the Row Data section to assign form responses to columns in your Google Sheets worksheet. You can add as many fields as needed to match your structure. When you’re done, click Continue.
Here are a few helpful mapping tips:
- Use the full name field or combine first and last name for the Name column
- Select the correct value for Email from the data dropdown
- Match your Phone field to the phone number column
- For Address, combine Line 1, a line break, City, State, and Zip for a complete value
- Assign the Date of Birth field to its corresponding column
(Note: the field options in your dropdown menus will reflect your specific Jotform and spreadsheet setup.)
Step 5: Test and activate your automation #
Use Test Action to send a preview row to your Google Sheet
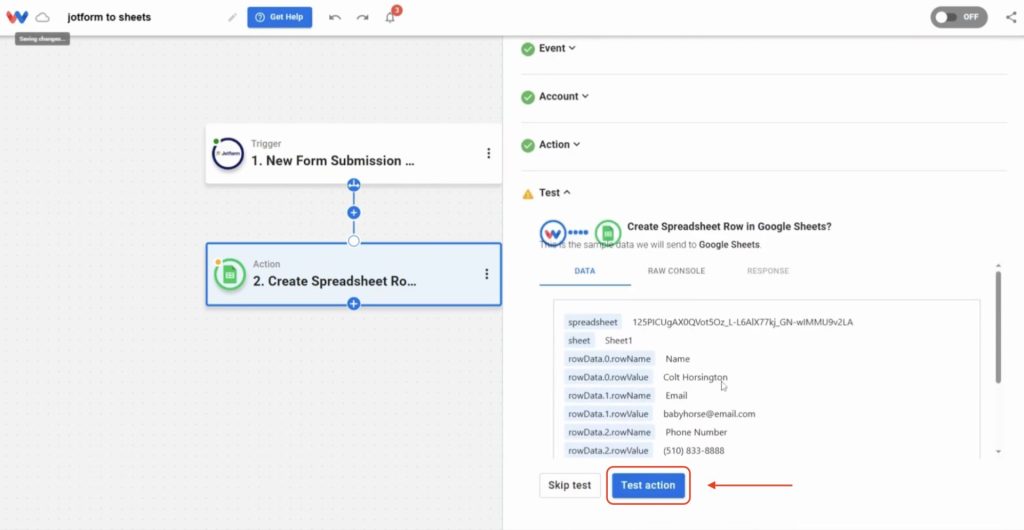
Check that you get a successful response, then click Continue
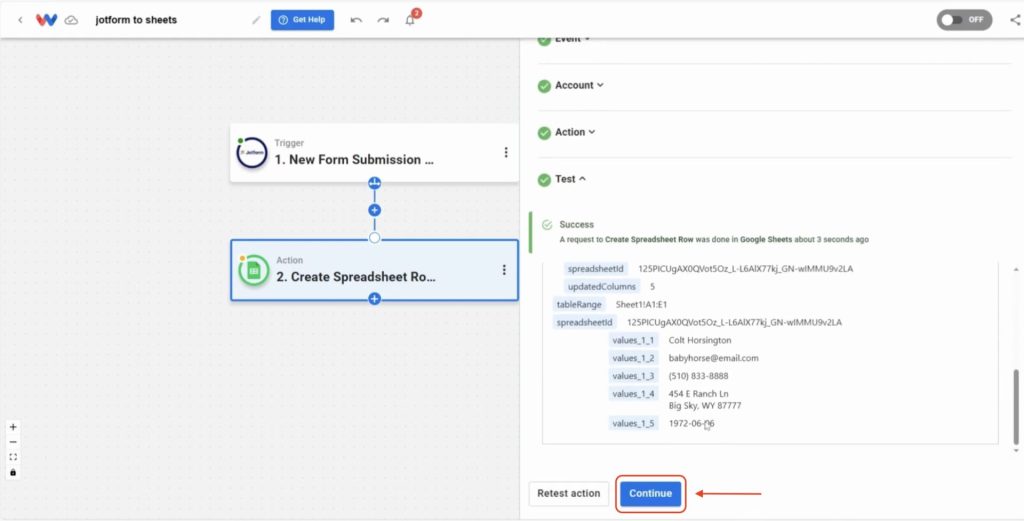
Head to your spreadsheet and confirm that all data landed in the correct spots
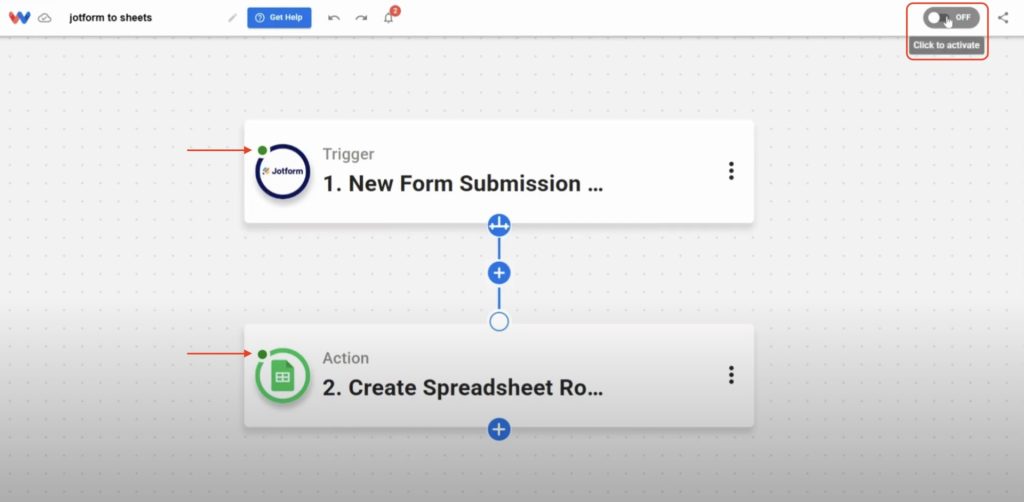
Back in the Workload Editor, verify that each step has a green dot—this means that the step has been setup correctly, then click activate the workflow by clicking the On/Off toggle. Your automation is now active and ready for live data.
⚡ Power-Up Sync Jotform Responses: Make It Part of a Larger Automation #
🔔 Send a Slack Alert
After syncing to Sheets, notify your team in Slack when a new form is submitted—so no response goes unnoticed.
📬 Email a Welcome Message
Trigger an automatic email reply to thank respondents or send onboarding materials using Gmail or Mailchimp.
🧹 Clean Up Data Automatically
Use AI Formatter to clean up phone numbers, standardize address formatting, or extract only what you need from responses.
📈 Track Metrics in Dashboards
Pipe new rows into an Airtable base or Notion page to track leads, applicants, or customers in a live dashboard.
🧠 Learn More with Workload #
🎓 Visit Workload University
Explore more automation tutorials and learn how to build smarter systems.
🆘 Browse setup guides in our Help Center
Get answers, tips, and visual instructions to help you build faster.
📝 More Jotform automation tutorials
See other ways to automate workflows using Jotform + Workload.
🌐 More Google Sheets automation tutorials
Discover spreadsheet automations for task tracking, reports, and more.


