To unlock powerful automations using Gmail, you’ll first need to connect your Gmail account to Workload. Below, we’ll walk through two quick methods—one from your dashboard and one from inside a workflow step. Use the dashboard method to connect Gmail before building anything, or connect directly from a workflow step if you’re already mid-build—all it takes is a quick Google sign-in.
🎛️ From the Dashboard #
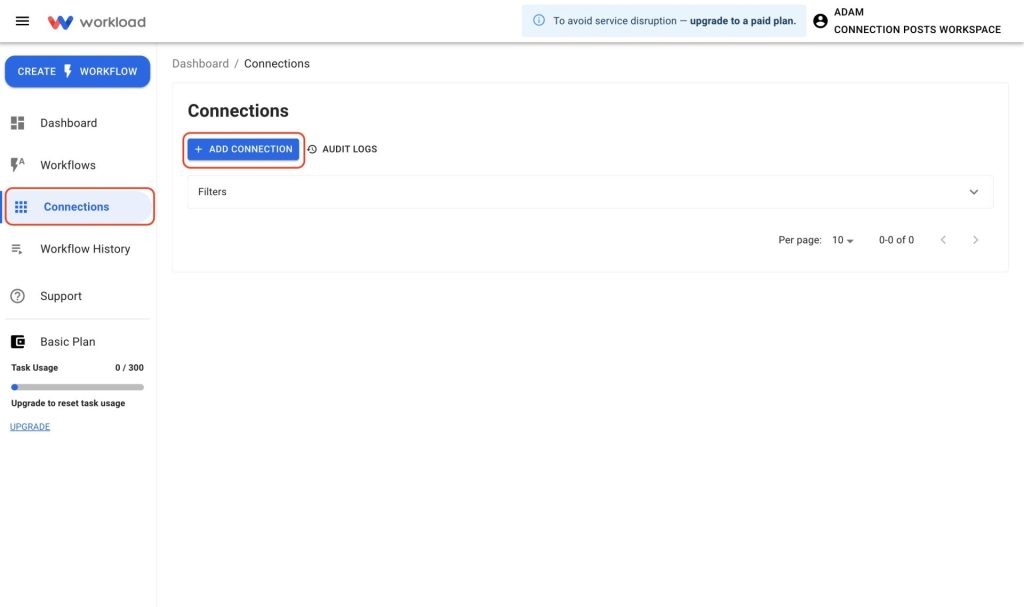
Start here if you want to connect Gmail before creating any automations.
Click the Connections tab on the left, then click the + Add Connection button
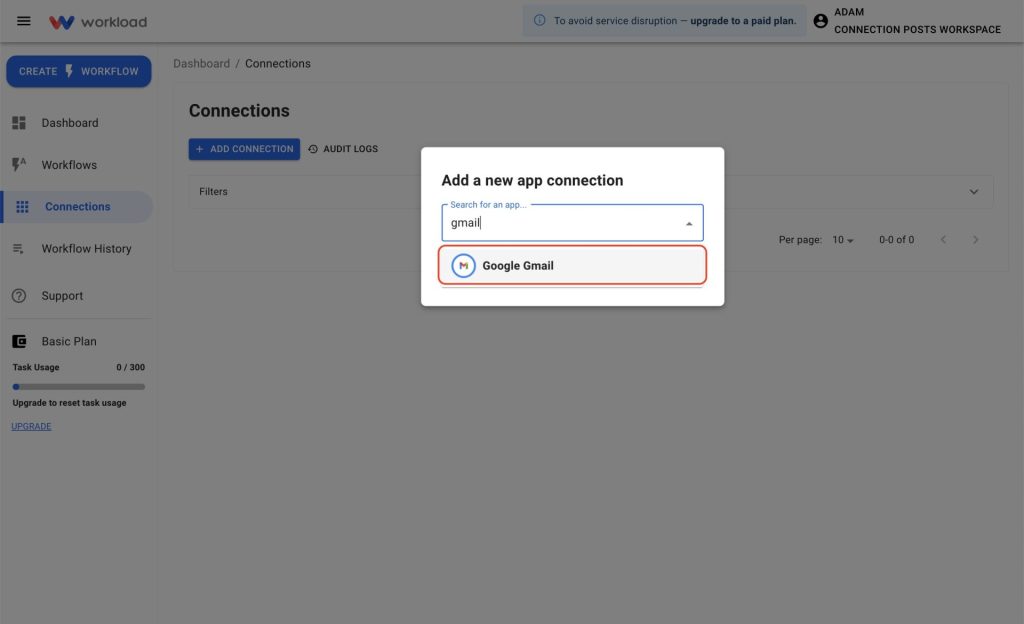
Search for Google Gmail in the popup and select it from the list
If your computer is already signed in to a Google account follow these steps (if not, skip to the next section):
Choose your Google account then click Continue
Click Continue on the next screen to complete the authorization process
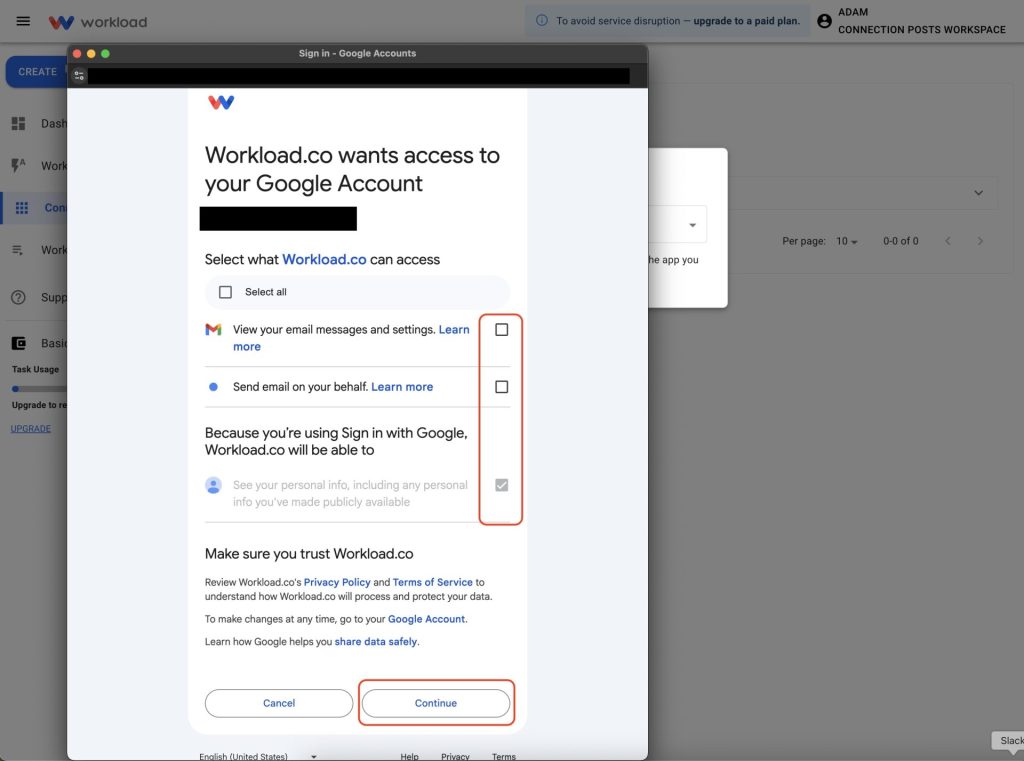
Grant Workload access to your Gmail account by clicking Continue
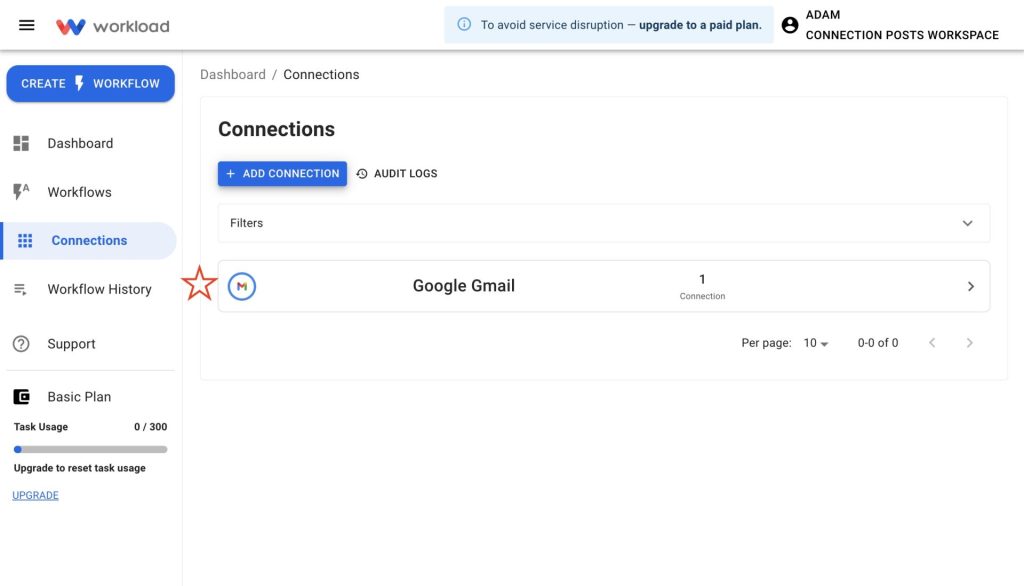
The connection is now complete and you will see the new connection in you list of connections

If you are not signed into a Google account, follow these steps:
Enter your Gmail address or phone number into the Email or phone field, then click Next
Type in your password or use your passkey, then click Next
On the next screen, click Continue
Grant Workload access to your Gmail account by selecting the boxes you want to allow, then click Continue
You will now see the connection listed in you Connections tab
🪜 From a Workflow Step #
Already building a workflow? You can connect Gmail directly from a step
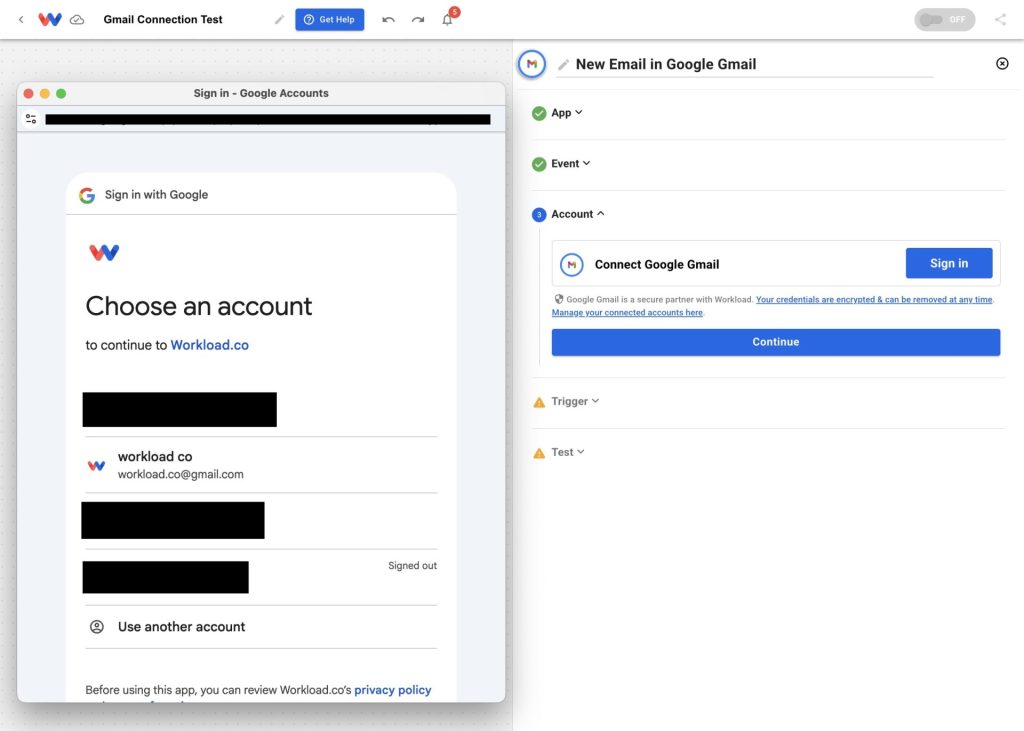
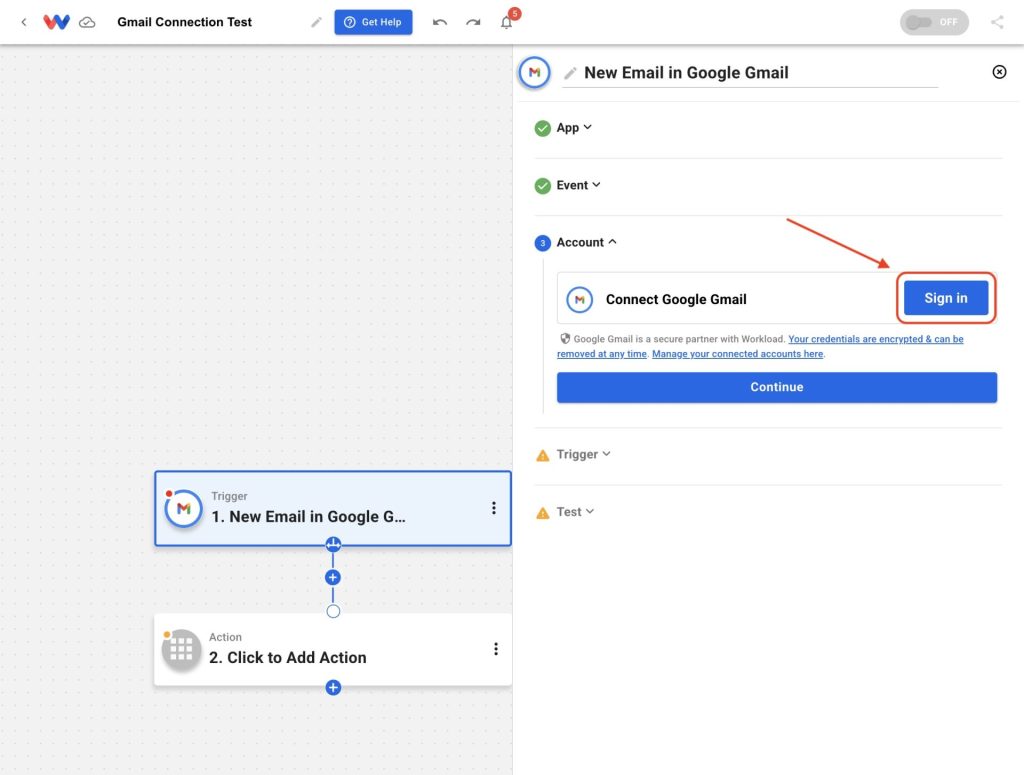
Add a Gmail step (trigger or action) in your workflow then navigate to the Account tab and click Sign in
If your computer is already signed in to a Google account follow these steps (if not, skip to the next section):
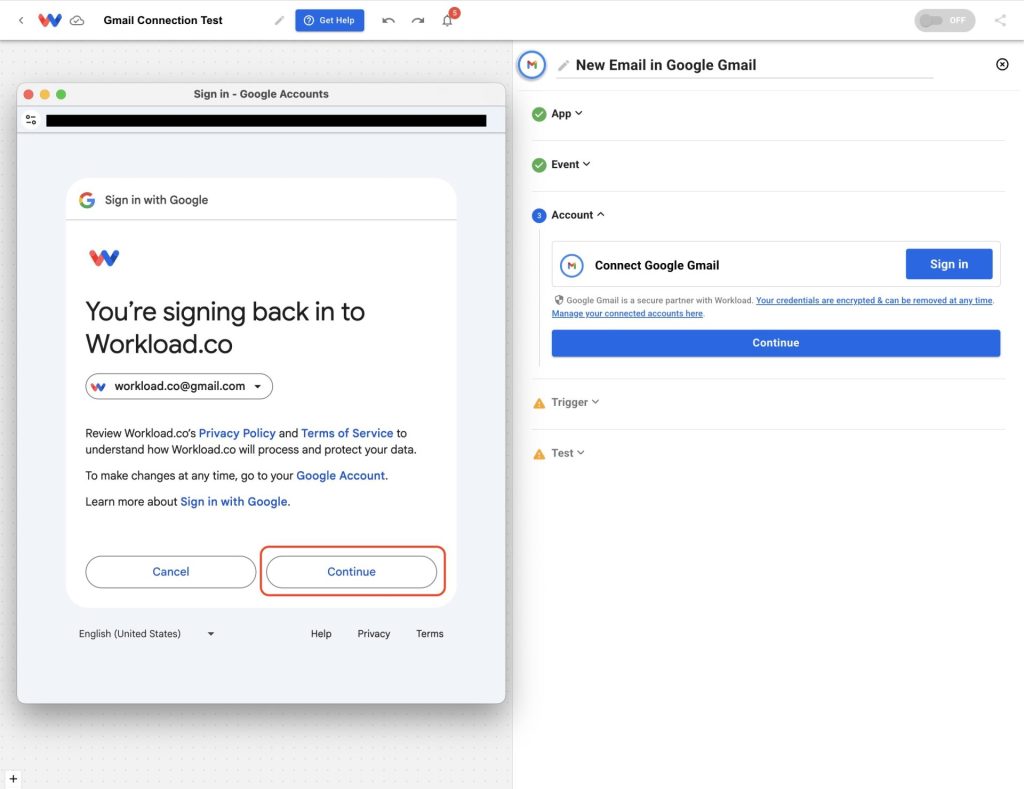
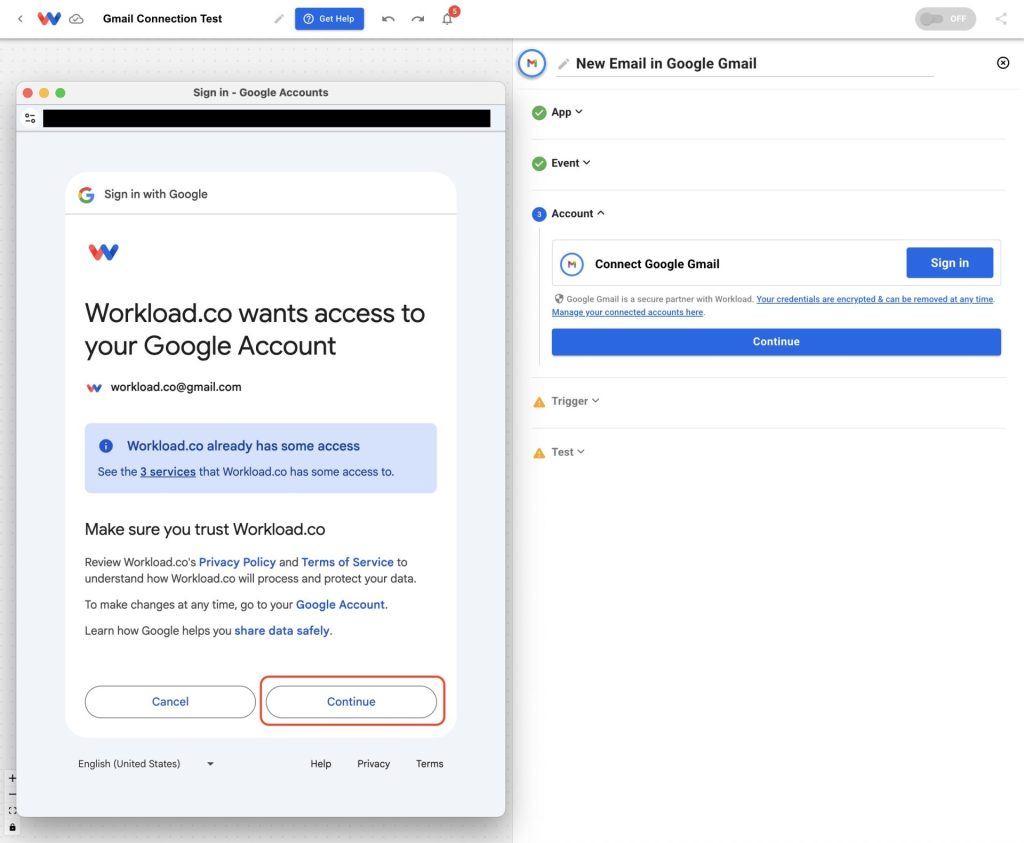
Choose your Google account then click Continue
Click Continue on the next screen to complete the authorization process
Grant Workload access to your Gmail account by clicking Continue
The connection is now complete and you will see the new connection in you list of connections
If you are not signed into a Google account, follow these steps:
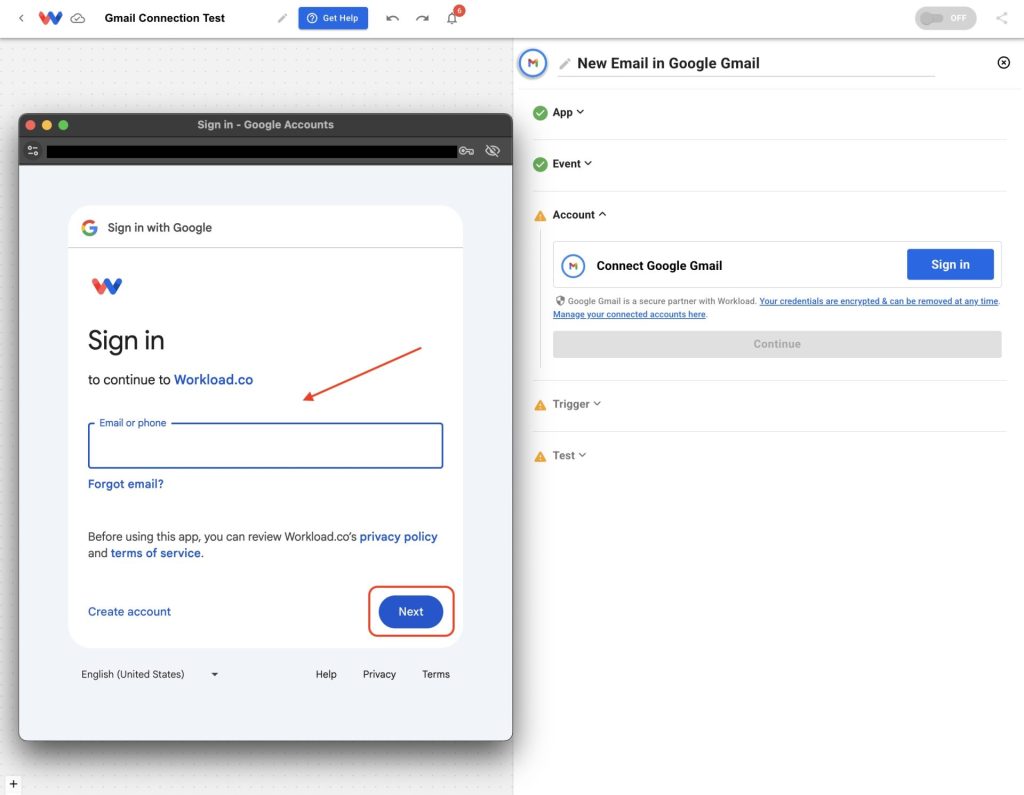
Enter your Gmail address or phone number into the Email or phone field, then click Next
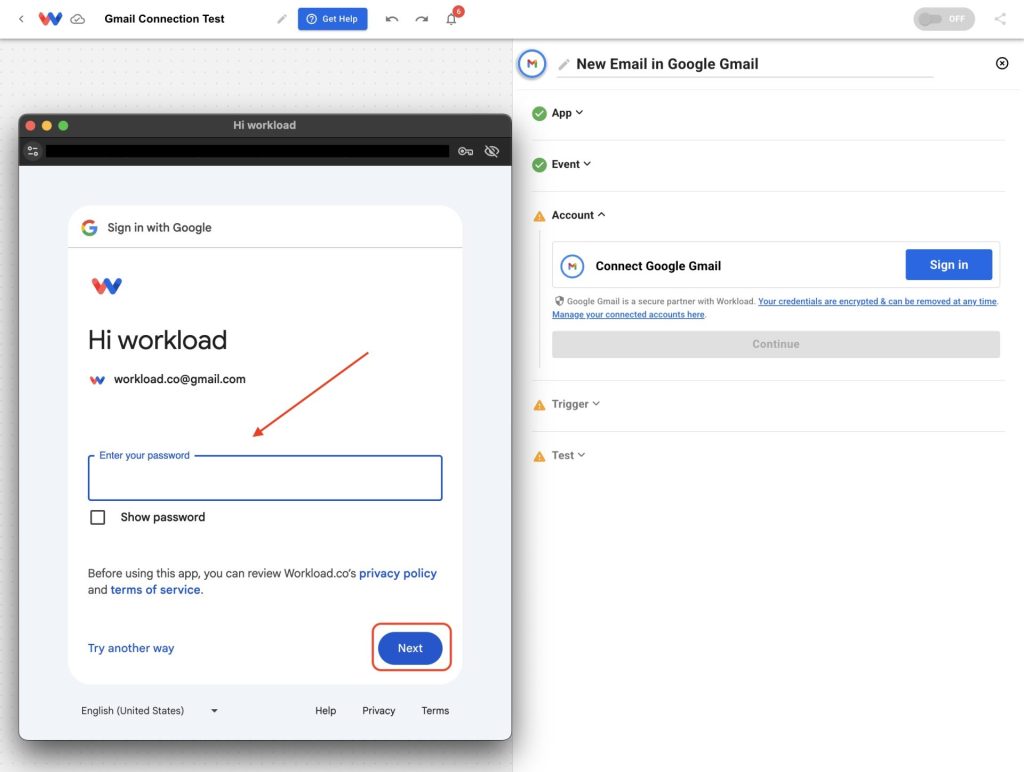
Type in your password or use your passkey, then click Next
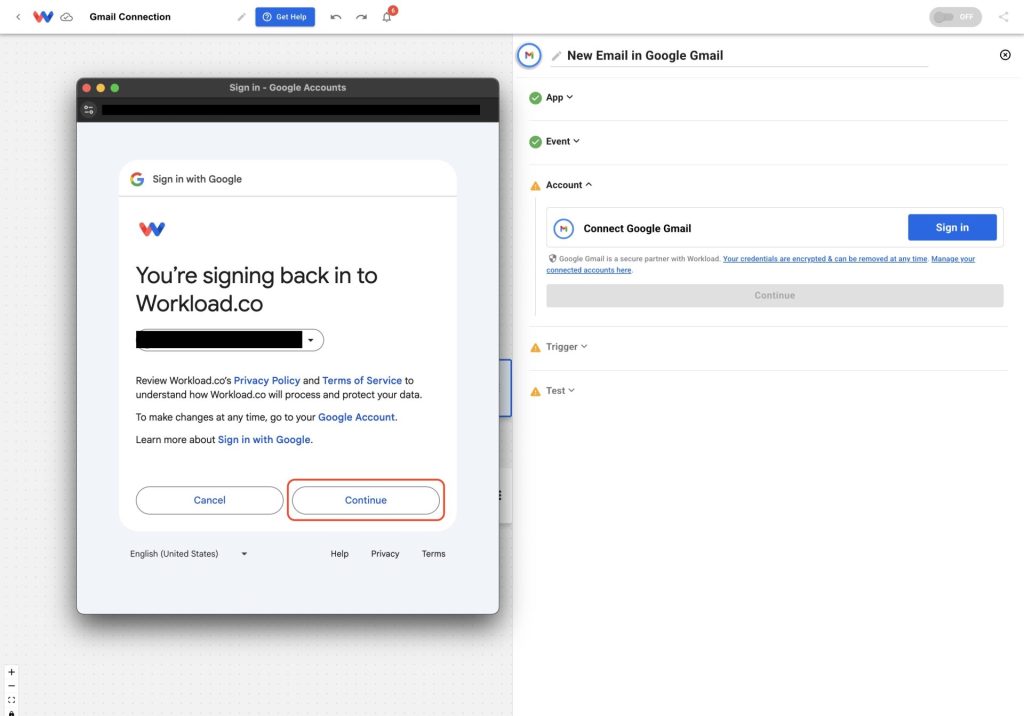
On the next screen, click Continue
Grant Workload access to your Gmail account by selecting the boxes you want to allow, then click Continue
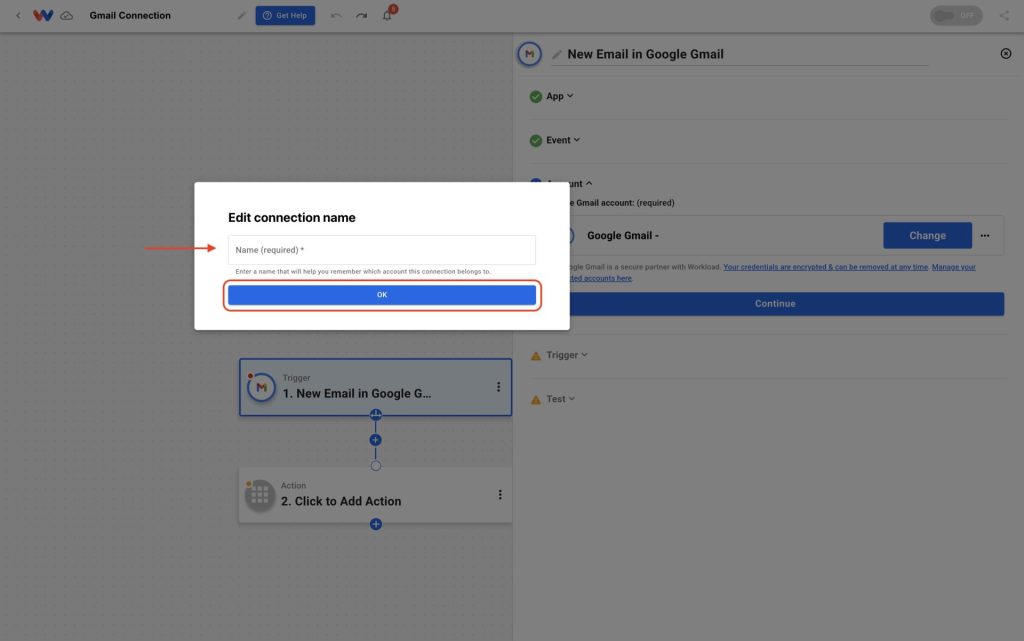
Enter a connection name for this connection, then click OK
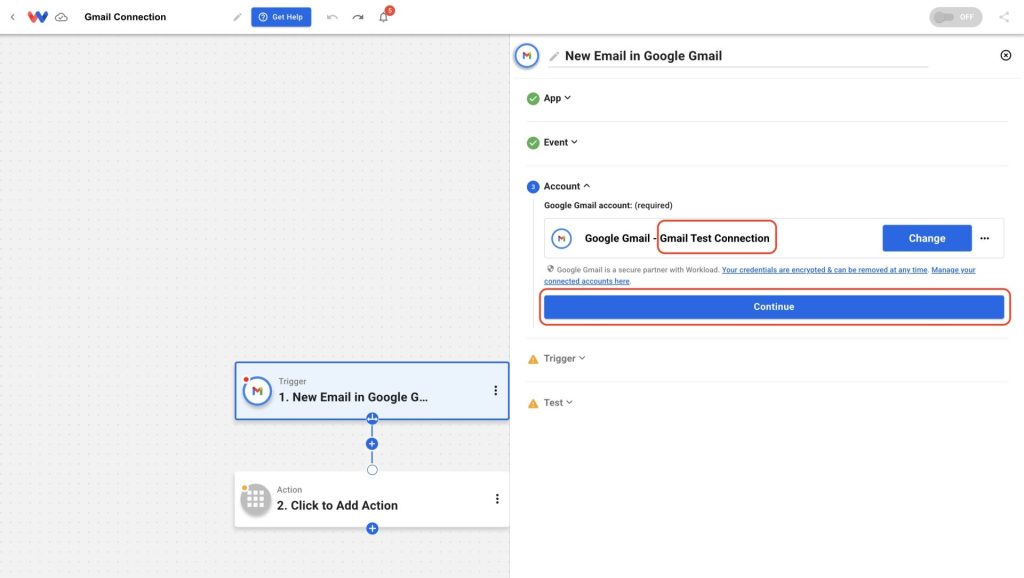
Your account will now appear in the workflow’s Account dropdown, then click Continue
✅ You’re all set! Gmail is now securely connected to Workload. You can use it as a trigger (like “New Email”) or an action (like “Send Email”) in your automations.
🚀 What You Can Do Once You Connect Your Gmail Account to Workload #
Once connected, Gmail becomes a powerful trigger or action in any Workload automation. For example:
- Log incoming emails in Google Sheets or Airtable for tracking and archiving
- Send Slack alerts when a specific sender or subject hits your inbox
- Automatically forward emails to a colleague or another app for processing
- Trigger email replies when leads submit a form or meet specific criteria
- You can even combine Gmail with tools like Notion, Calendly, or Stripe to build multi-step workflows that keep communication and data flowing


