Before you can start syncing bases, creating records, or building automations, you need to connect Airtable to Workload. This guide shows you two quick ways to do it—either from your dashboard or from inside a workflow.
Once you connect Airtable, you can move data between your tables and tools like Google Sheets, Slack, and Gmail. You control which base to use, which workspace to authorize, and how your data flows.
It only takes a few clicks. In minutes, your Airtable account connects to Workload, and you’re ready to start automating.
Methods to Connect Airtable to Workload #
You can connect Airtable to Workload in two easy ways—either from your dashboard or directly inside a workflow step. Use the dashboard method if you’re setting things up for the first time and want to link Airtable before building automations. If you’re already creating a workflow, connect Airtable right from the step where it’s needed.
🎛️ Starting from the Dashboard #
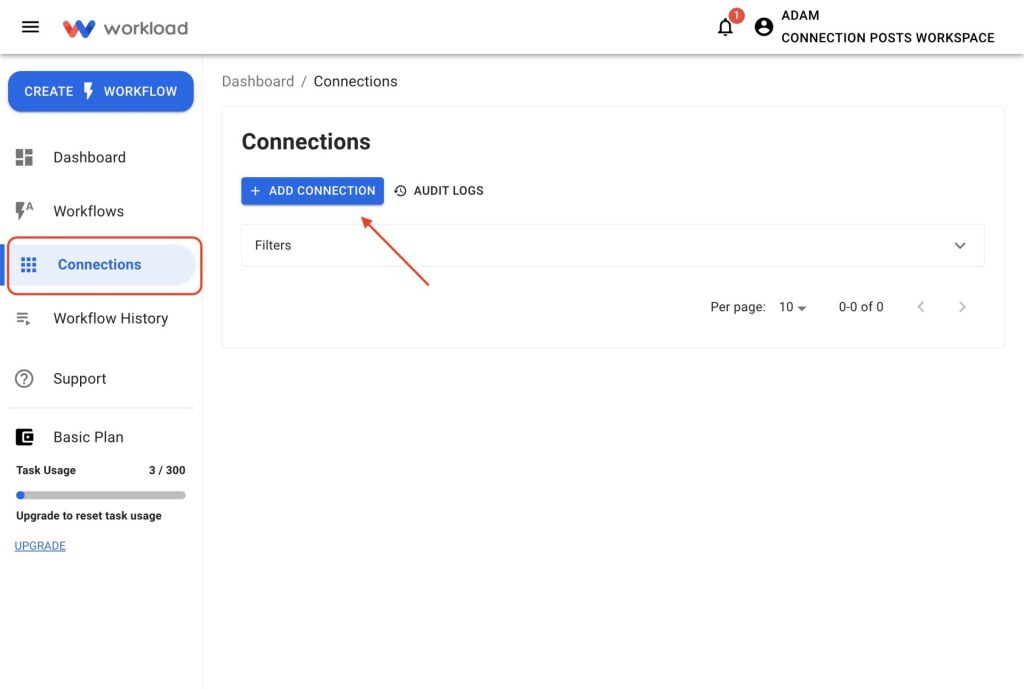
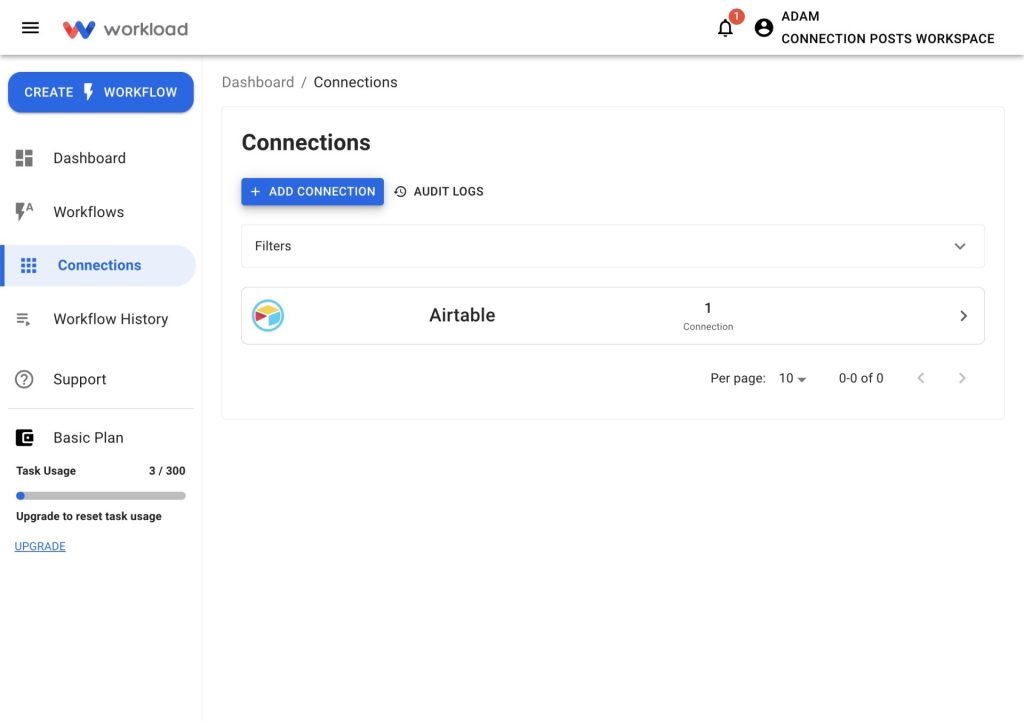
- Open the Connections tab in the left-hand menu, then click the blue + Add Connection button.
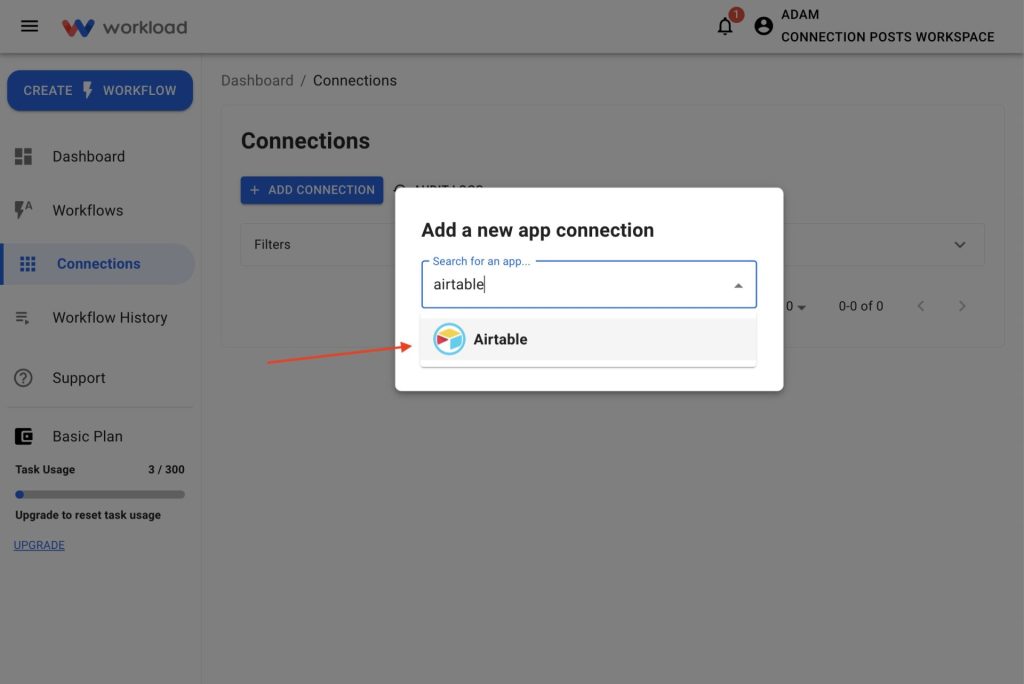
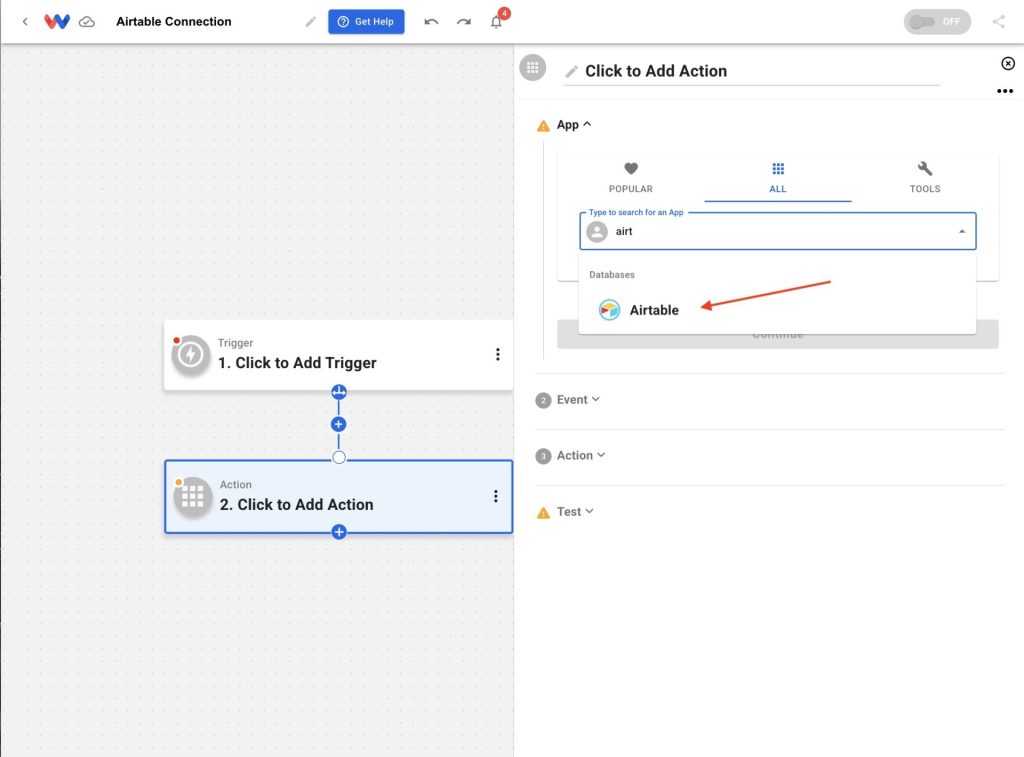
- In the popup window, type Airtable into the search bar and select it from the list.
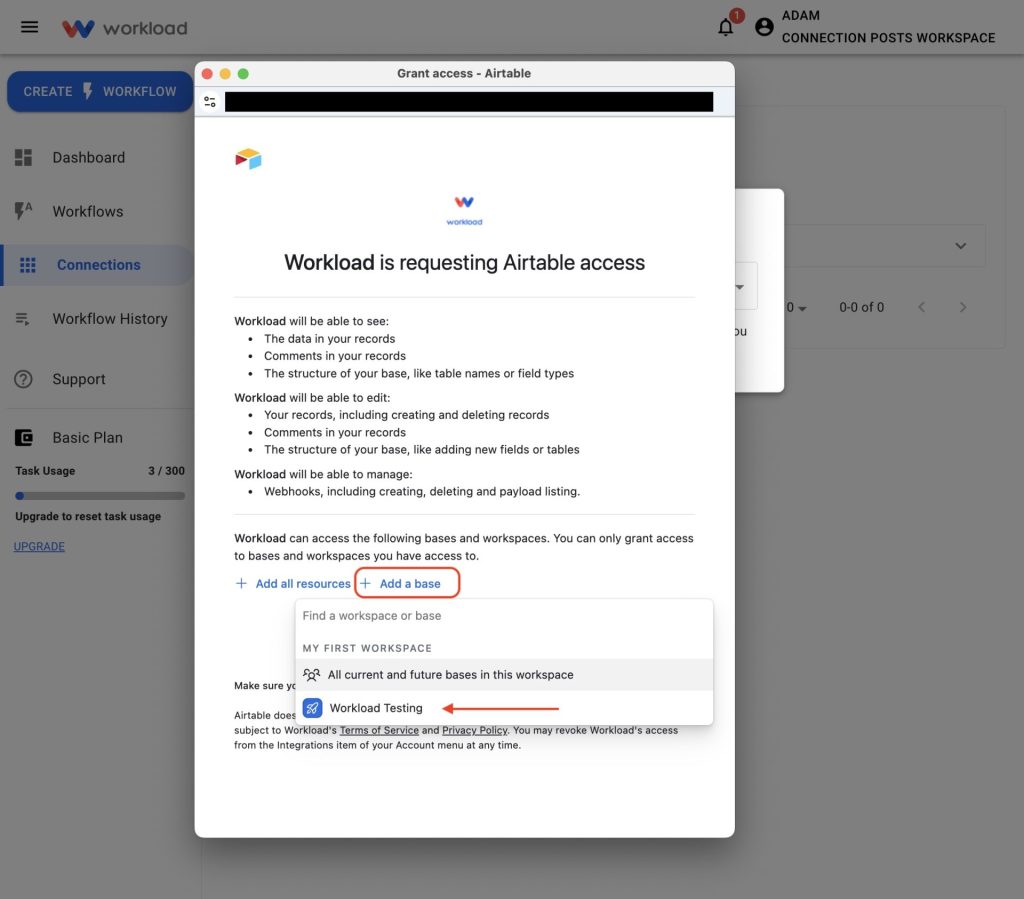
- When prompted, click Add a base, then choose the workspace or base you want to link.
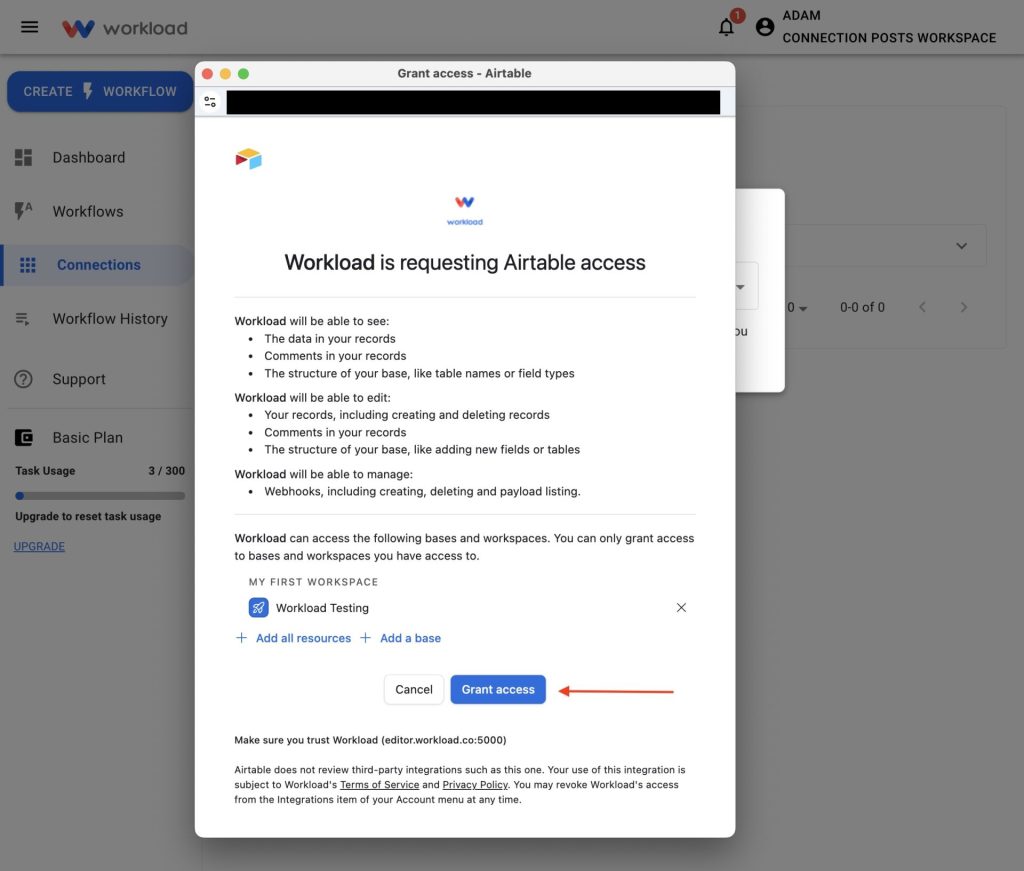
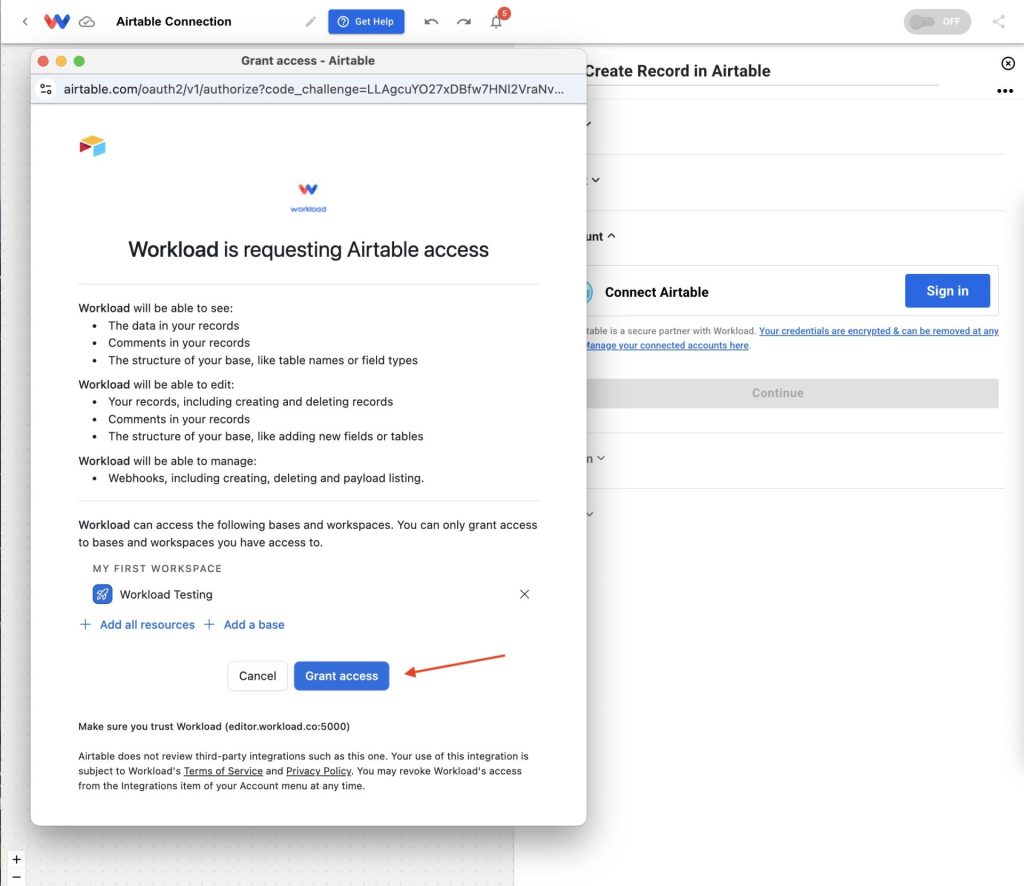
- To continue, click Grant access and authorize Workload to connect with your Airtable account.
- After completing the connection, you’ll see Airtable listed with a green checkmark in your connected apps.
🪜 Starting from a Workflow Step #
- Add an Airtable step to your workflow, then click the Account tab in the right sidebar.
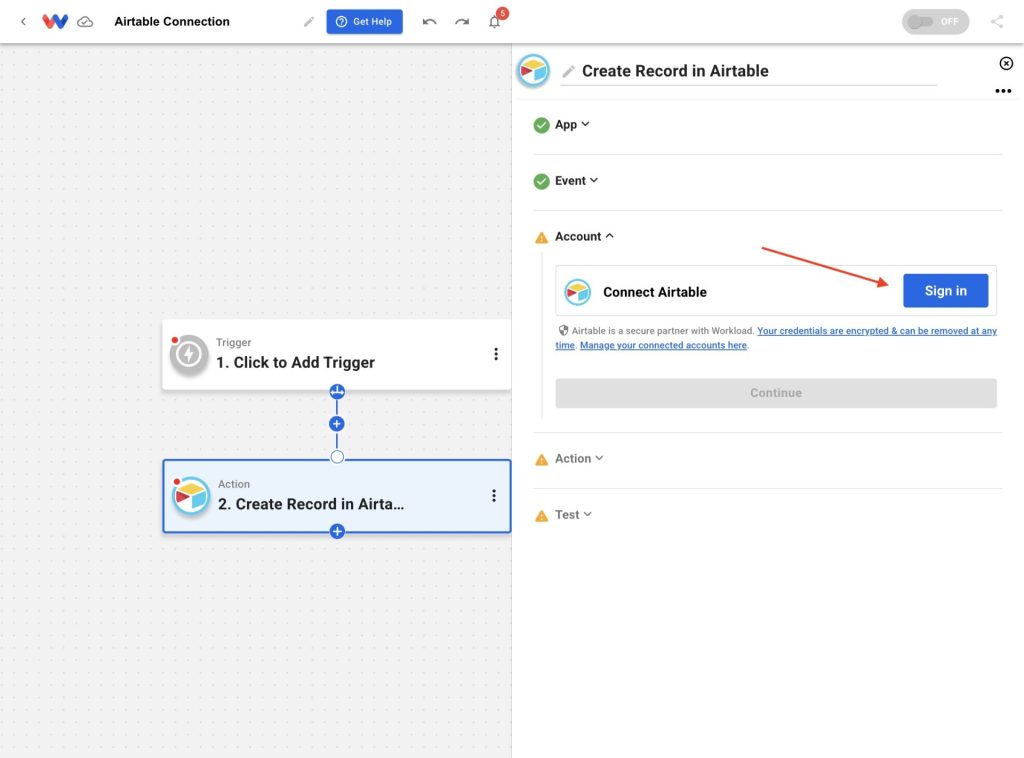
- Next, click Sign in to open the authorization window.
- In the popup, select Add a base and choose the workspace or base you want to connect.
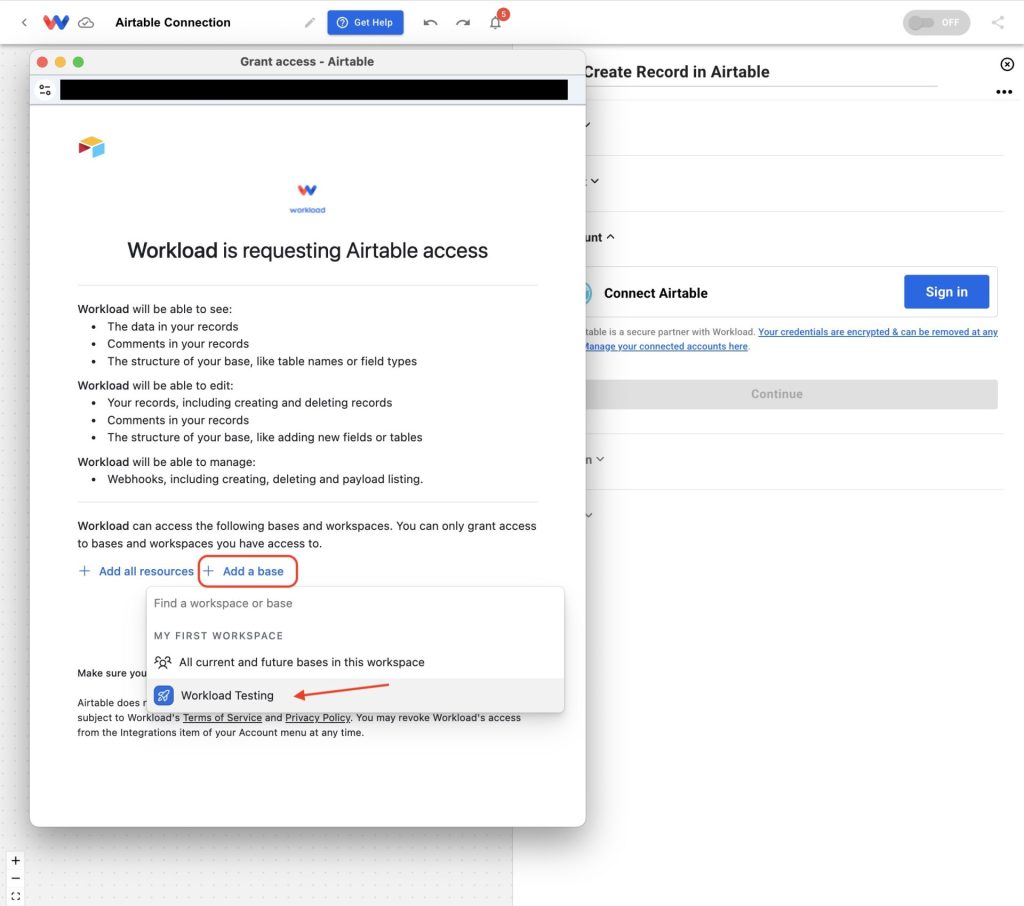
- After selecting your base, click Grant access to complete the authorization.
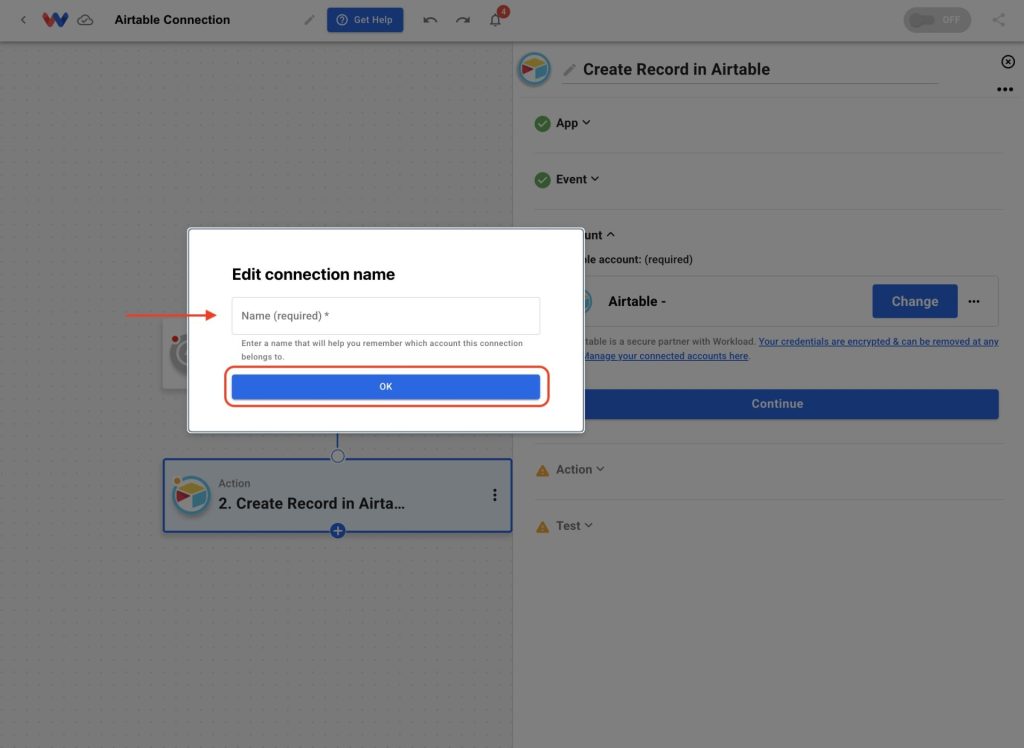
- When prompted, enter a name for your connection to keep things organized, then click OK.
- Finally, Airtable will show up in the account dropdown, ready to use in your workflow.

🛠️ Put Airtable to Work #
Your Airtable account is now connected to Workload. Once connected, Airtable becomes a powerful trigger or action inside any automation. For example:
- Log form submissions in Airtable and mirror them to Google Sheets or Notion
- Send Slack alerts when specific Airtable fields change or meet conditions
- Update your CRM when records are added to a particular Airtable view
- Trigger Gmail messages based on changes to rows, tags, or linked fields
- Build multi-step automations using Airtable with apps like Stripe, Outlook, or AI Wizard by Workload
You can now add Airtable to any workflow and start automating across your favorite tools—no code required.


