Managing pending insurance policies can be hard when details are spread across different systems. This automation creates Airtable Records from EZLynx right away. Your team can log every pending policy in one place without doing it by hand.
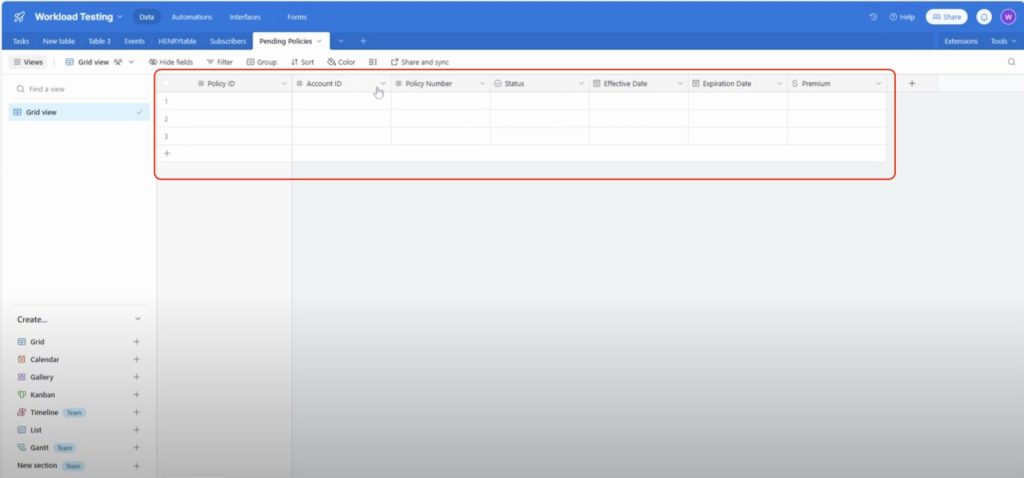
It captures key details from each new pending policy in EZLynx. This includes policy ID, account ID, policy number, status, effective date, expiration date, and premium amount. All of this information moves into Airtable fields you set up, keeping it accurate and consistent.
With no manual entry, you save time and avoid mistakes. Your team gets instant visibility into the status of pending policies. Whether you manage pipelines, build dashboards, or keep client records in one spot, this automation keeps your data current and ready to use.
🧩 Essentials #
Before you build, here’s what you’ll need:
🛡️ EZLynx account with access to pending policy data
✅ Airtable account with a base and table set up for policy records
🚀 Workload account (free or paid) to create your automation
Workload makes connecting these tools seamless. Just sign in and grant access when prompted.
🎨 Make It Yours #
📎 Filter by Policy Type
Add a filter step before Airtable. Only keep the policy types you need, like auto or home. This keeps your list clear.
📅 Format Dates for Clarity
Use Workload’s AI Formatter to match all date styles. Clear dates make your records easy to read.
💲 Highlight High-Value Policies
Mark any policy with a high premium. This makes it easy to spot the most important ones.
📌 Add Notes for Each Policy
Include a notes field in Airtable. Use it to track extra details, reminders, or next steps for each policy.
⚙️ How to Create Airtable Records from EZLynx #
Every app expects data in a specific format—whether it’s how dates are written, how names are separated, or how fields are labeled. You can use our in-house tool AI Wizard by Workload to clean up or adjust data between steps. If your trigger already sends clean data, you may not need formatting at all.
Step 1: Start a New Automation #
In the Workload dashboard, click Create Workflow.
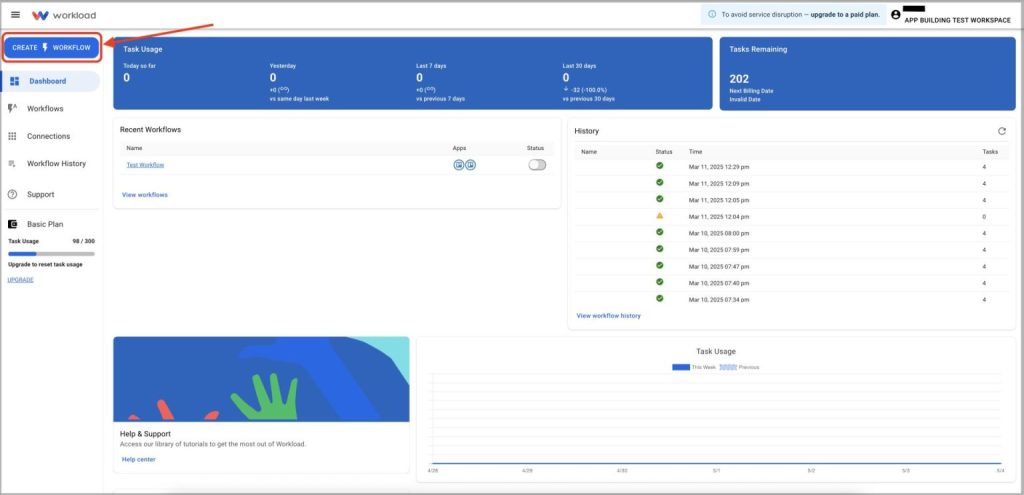
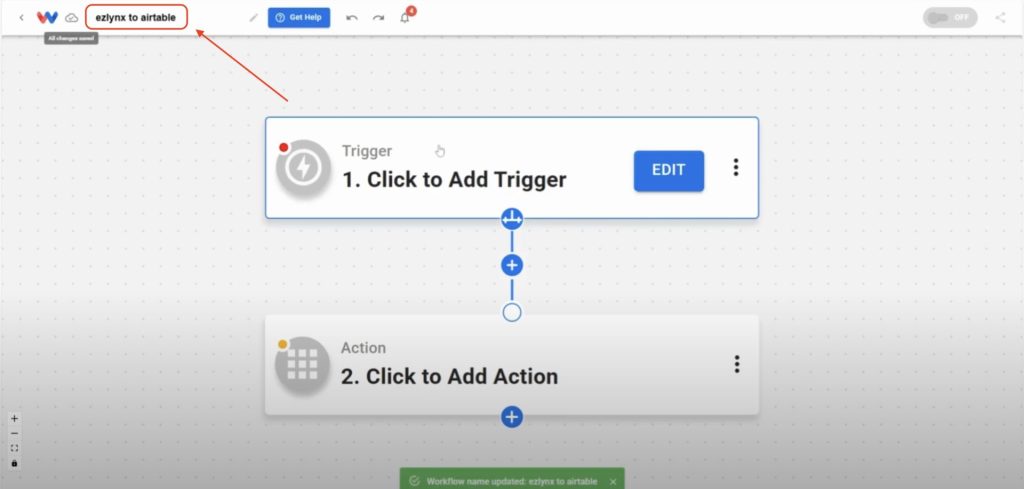
Enter a unique title such as “EZLynx Pending Policies to Airtable”.
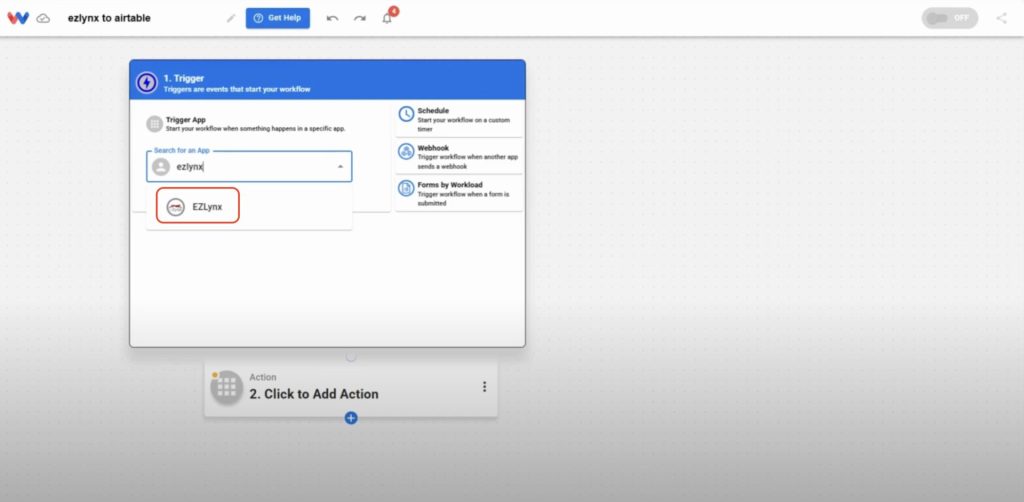
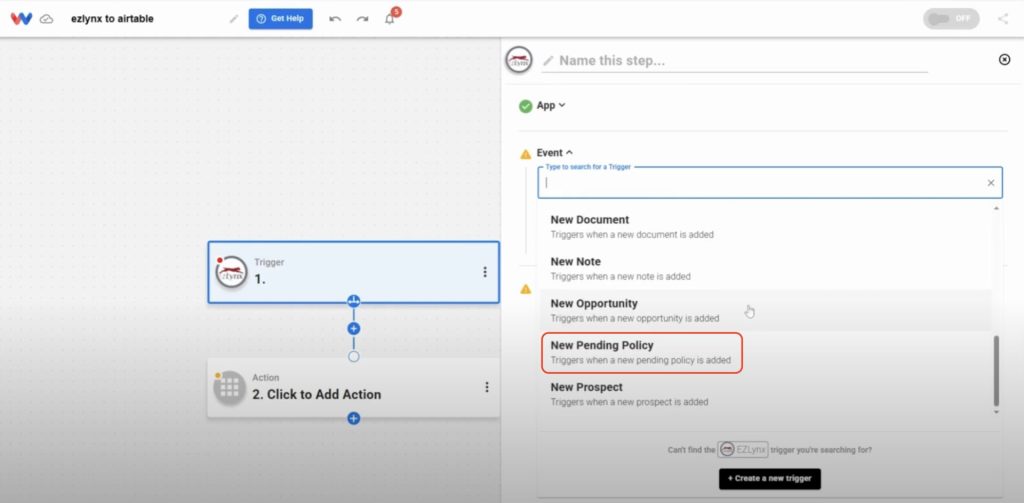
Step 2: Set Up the Trigger (EZLynx) #
Click the Trigger box in the workflow editor and then choose the app EZLynx.
Choose New Pending Policy as the trigger event, then click Continue.
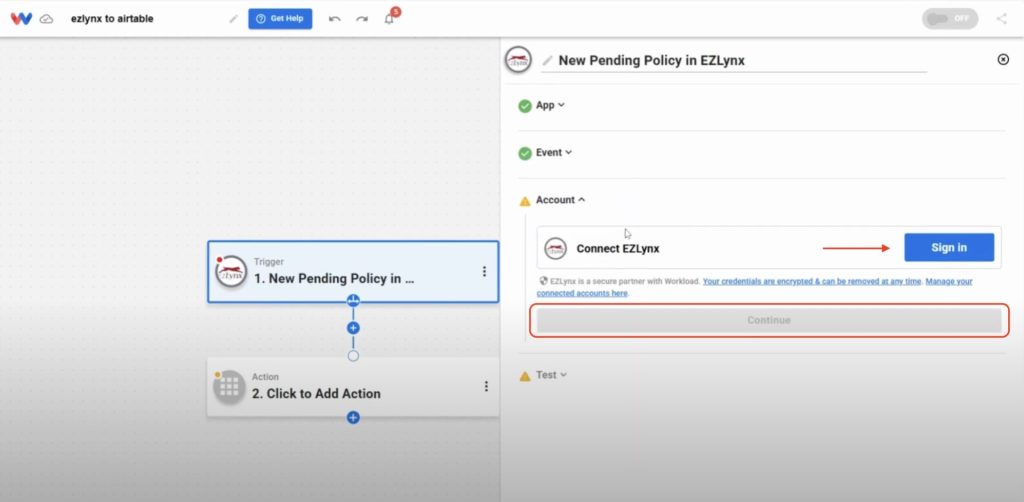
Click Sign in to connect your EZLynx account if you haven’t done so already. For help, follow our step-by-step guide on how to connect EZLynx to Workload. Once connected, click Continue.
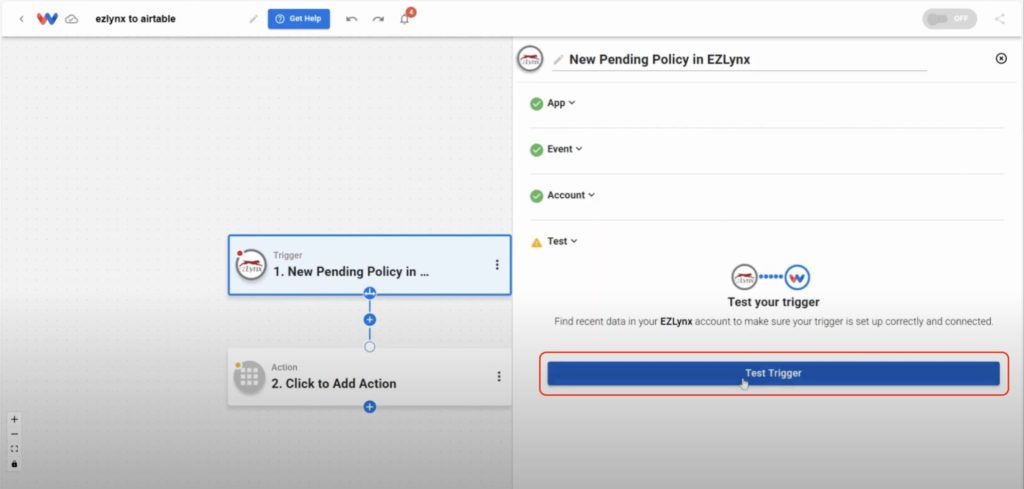
Click Test Trigger to pull in sample pending policy data.
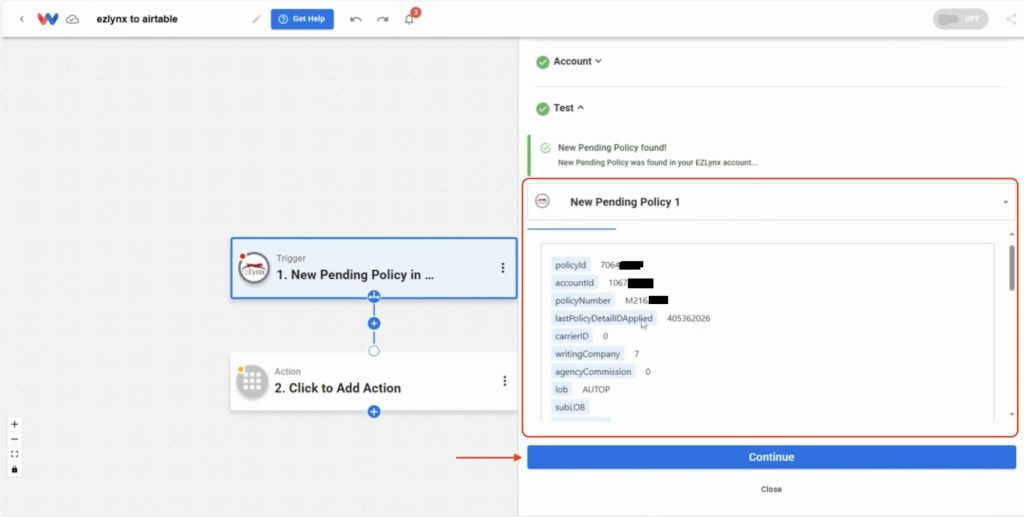
Once you get a succesful response with the policy details, click Continue.
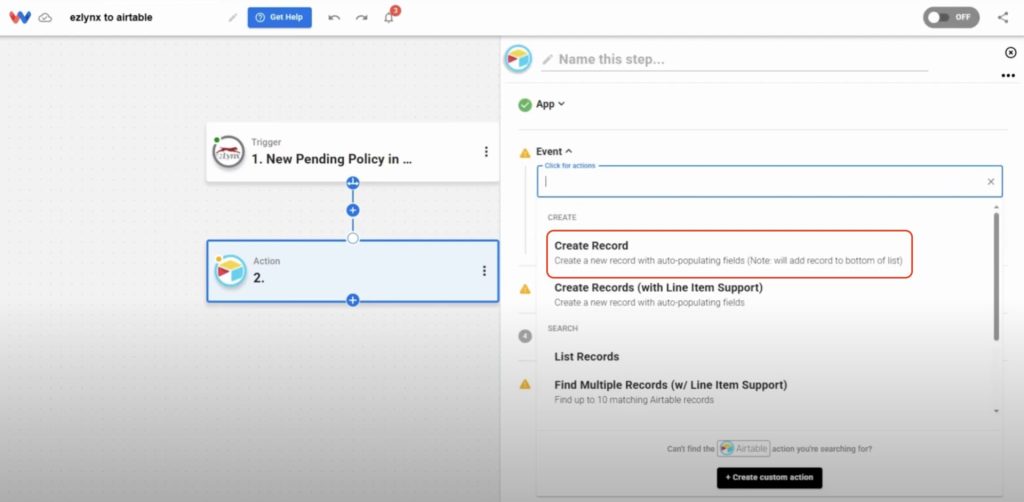
Step 3: Add the Action (Airtable) #
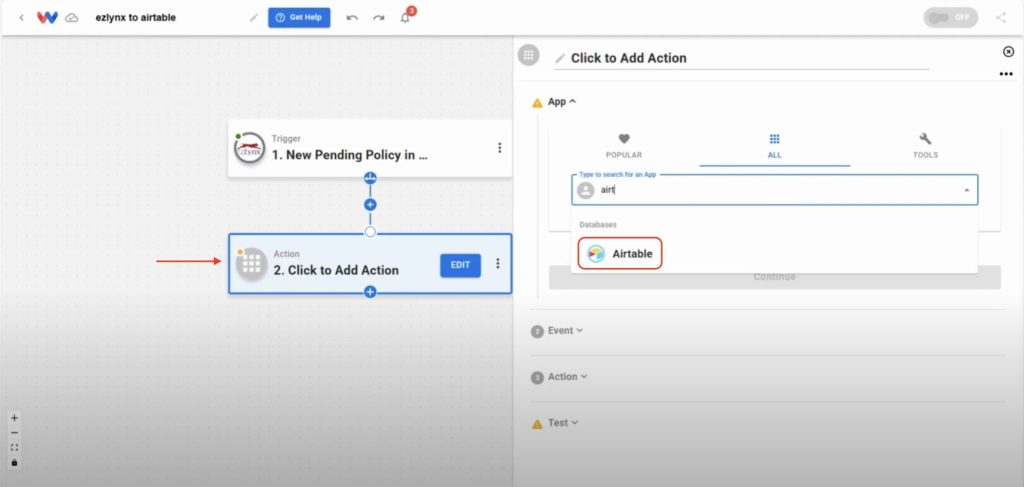
Click into the action step and select Airtable as the action app.
Choose Create Record as the action event, then click Continue.
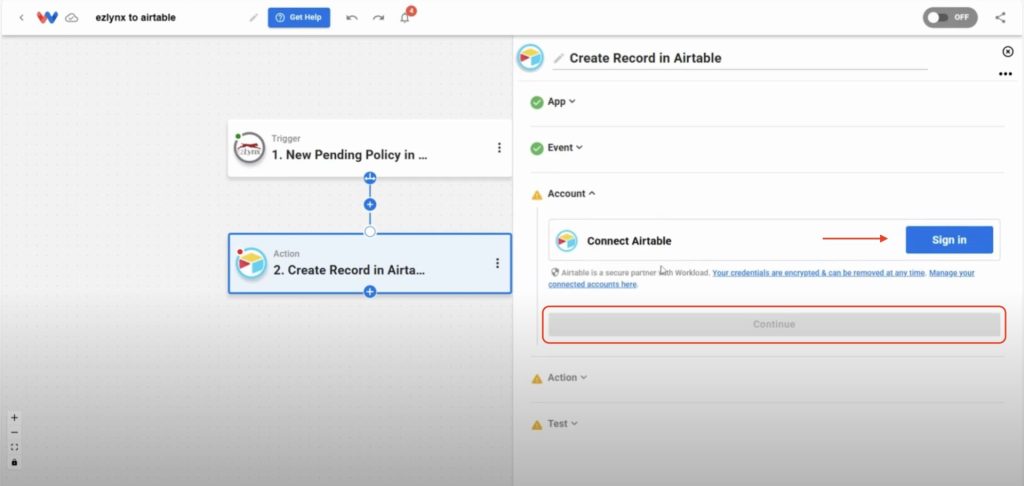
Click Sign in to connect your Airtable account. For help, follow the step-by-step guide on how to connect Airtable to Workload. Once connected, click Continue.
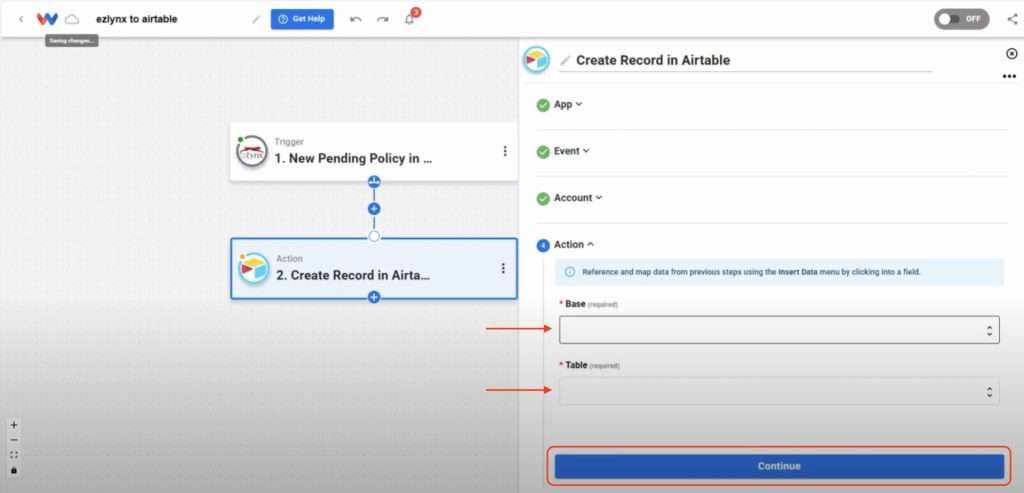
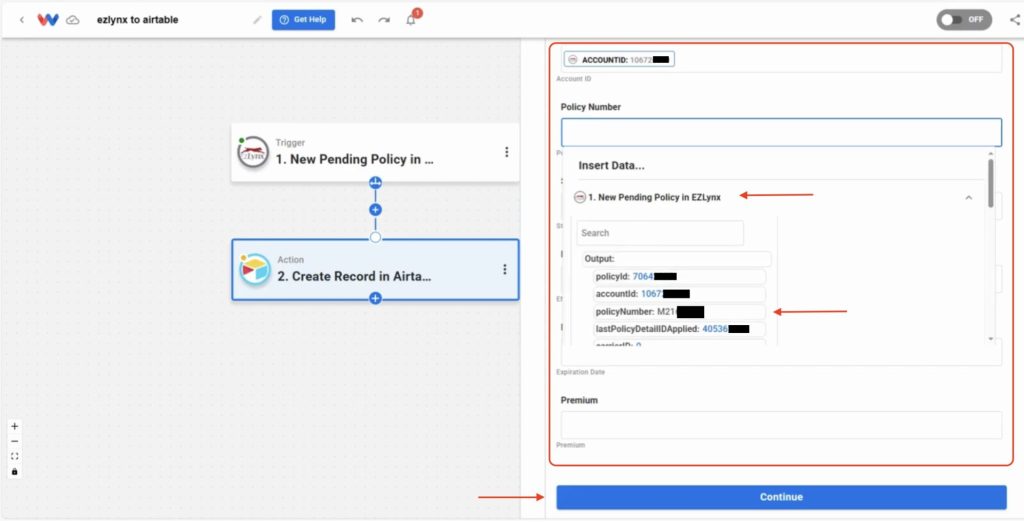
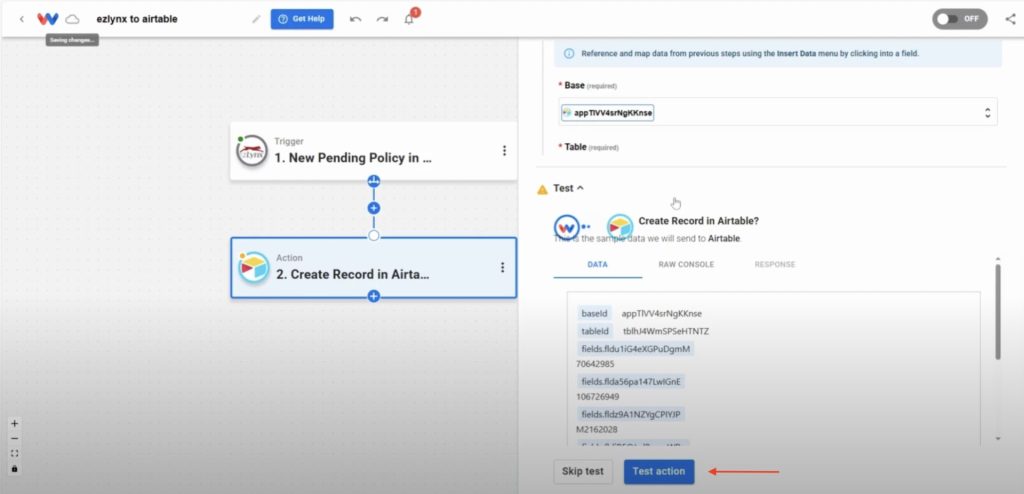
Select the Airtable base and table where you want to store the policies, from the dropdown menus, then click Continue.
Step 4: Create Airtable Table and Map EZLynx Data #
Before mapping, make sure your Airtable table is formatted to match the details you want to pull from EZLynx. Set policy ID, account ID, and policy number as number fields (without commas) so they display exactly as needed. Format effective date and expiration date as date fields for dates, and set premium as a currency field.
Once your table is set up, go back to the Workload Editor and click the dropdown for each Airtable field and select the matching value from the EZLynx trigger. Once you have mapped all of the data you want to include in the table, click Continue.
Click Test action to create a sample record in Airtable.
Once you have a succesful response, click Continue.
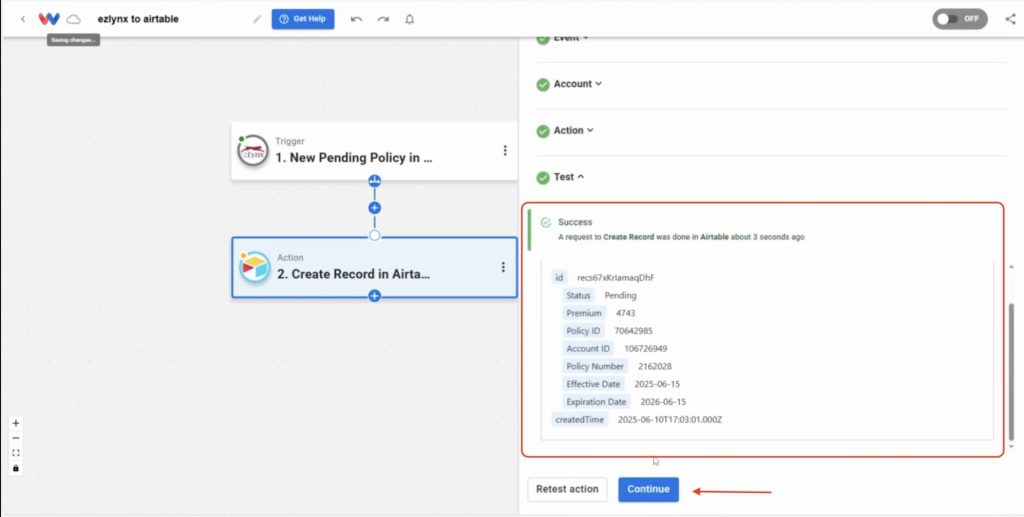
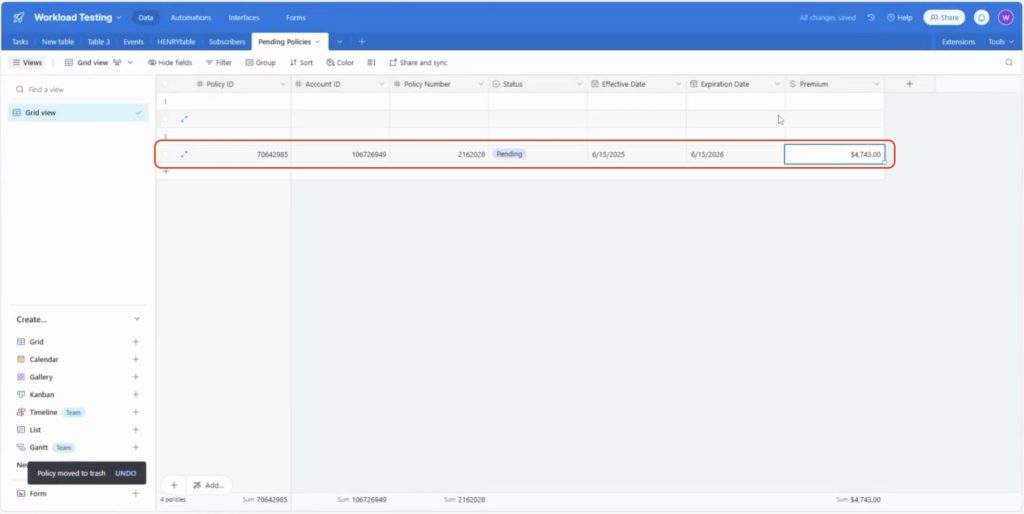
Next, open your Airtable table to confirm all policy details appear correctly.
Step 5: Activate the Automation #
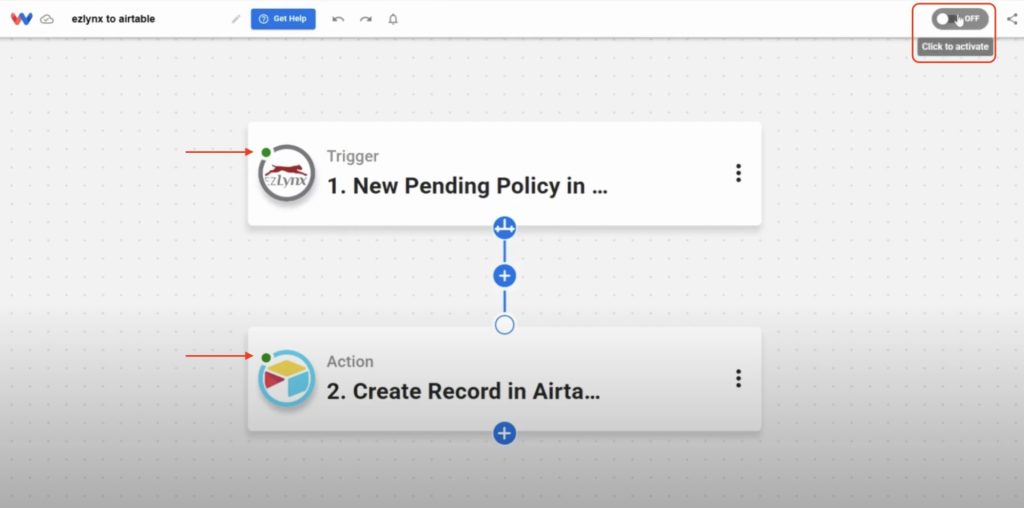
Ensure each step has a green dot, showing it’s configured correctly. Finally, toggle the activation switch to On.
⚡ Power-Up Create Airtable Records from EZLynx: Make It Part of a Bigger Workflow #
🔔 Send Slack Alerts for New Policies
Notify your team instantly in Slack when a new Airtable record is created so they can act on pending policies right away.
📬 Email Policy Summaries to Agents
Automatically send an email with key policy details to the assigned agent whenever a new record is added.
🧹 Archive Expired Policies
Add a filter that moves expired policies to a separate Airtable view or table for better organization.
📈 Update a Live Dashboard
Feed your Airtable data into a real-time dashboard app like Google Data Studio or Tableau for pipeline tracking and reporting.
🧠 Learn More with Workload #
Keep exploring automation and save even more time:
🎓 Visit Workload University
🆘 Browse setup guides in Workload’s Help Center
🛡️ Explore More EZLynx Automations
🗂️ Explore More Airtable Automations


