Notion is where many teams plan projects, take notes, and organize databases. But keeping that information useful outside of Notion often means manual work. Copying data, sharing updates, or re-entering tasks into other tools takes time and slows projects down. When you connect Notion to Workload, all of that can happen automatically.
Workload lets you turn Notion pages and databases into triggers and actions inside automations. A new task in Notion can create a row in Google Sheets, send a message in Slack, or even make an automation that updates your CRM. Details like project names, deadlines, and notes flow into the right place without anyone lifting a finger.
By linking Notion with Workload, you turn a single workspace into the center of your operations. Your notes stay current, your team gets instant updates, and your projects move forward without delays. It’s faster, more accurate, and far easier than trying to keep everything in sync by hand.
🔀 Methods to Connect Notion to Workload #
You can connect Notion from your dashboard or directly inside an automation step. Use the dashboard if you’re setting up for the first time, or connect it from a step while building.
🖥️ From the Dashboard #
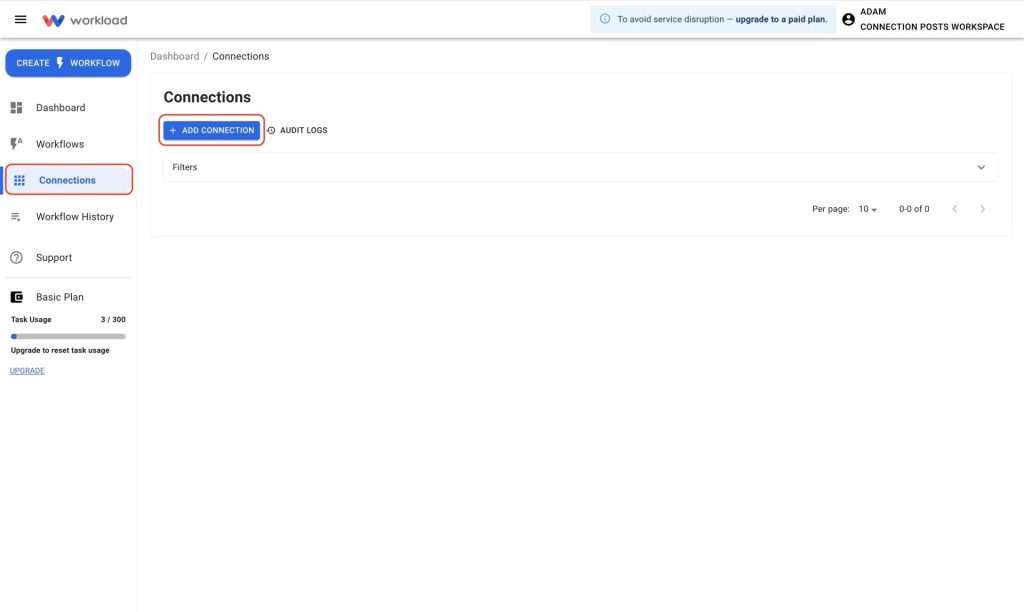
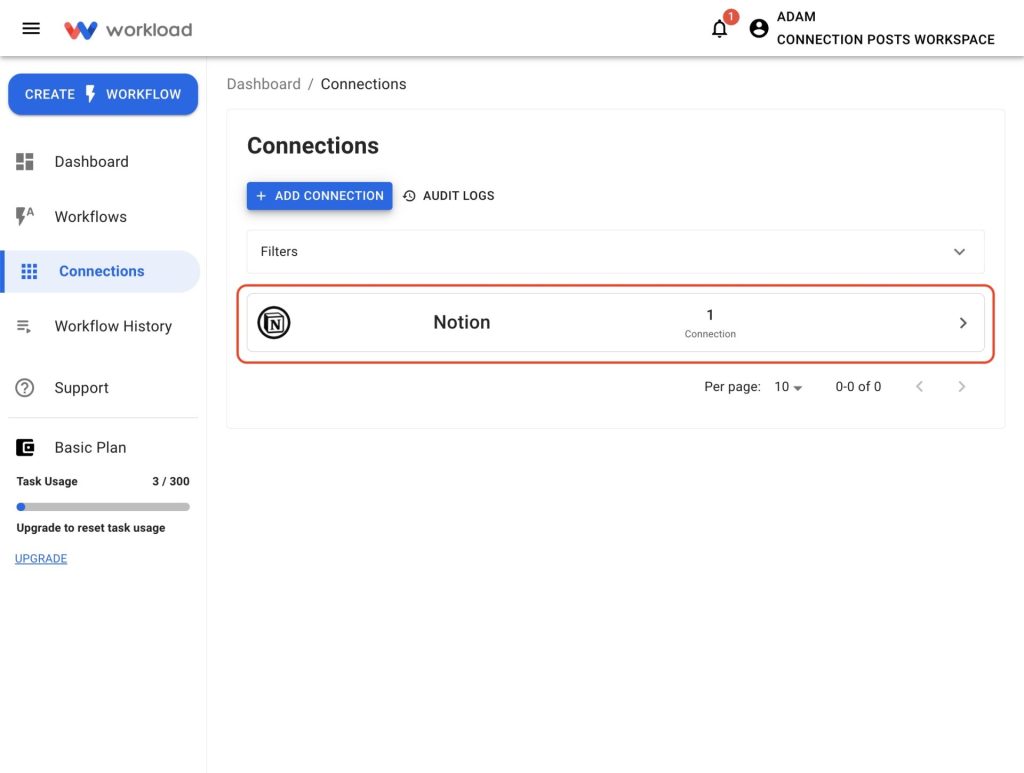
Click the Connections tab in the left-hand menu, then select the blue + Add Connection button.
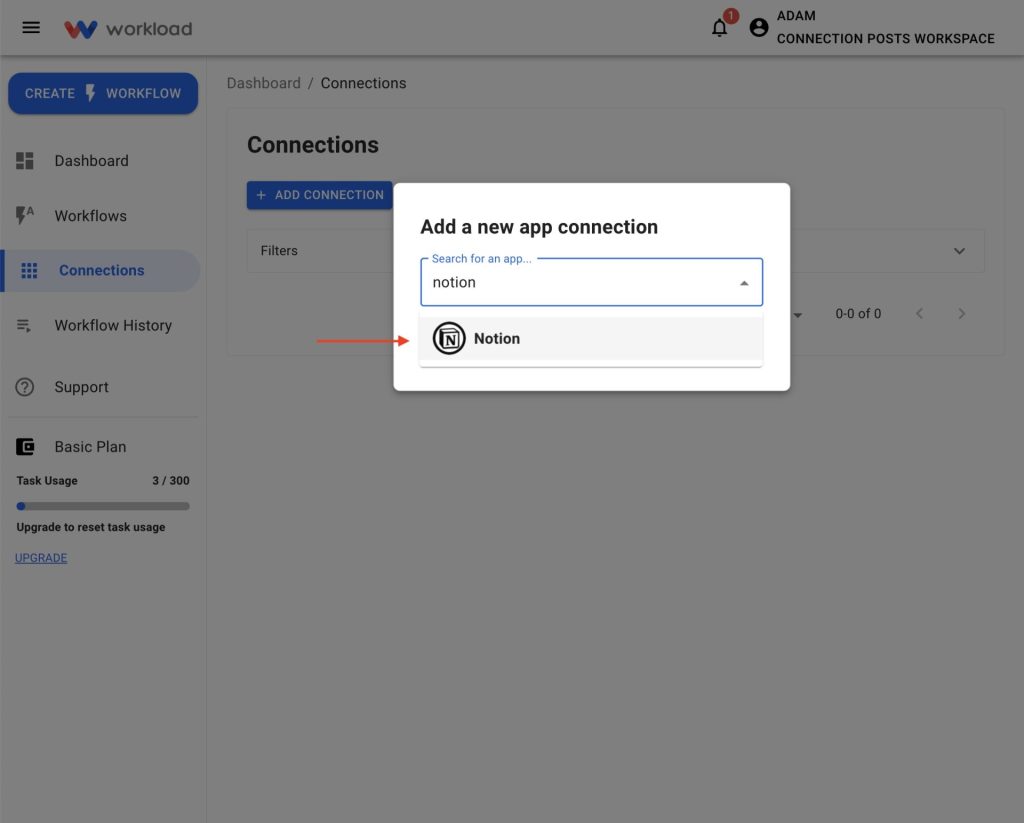
In the popup window, search for Notion and select it from the list.
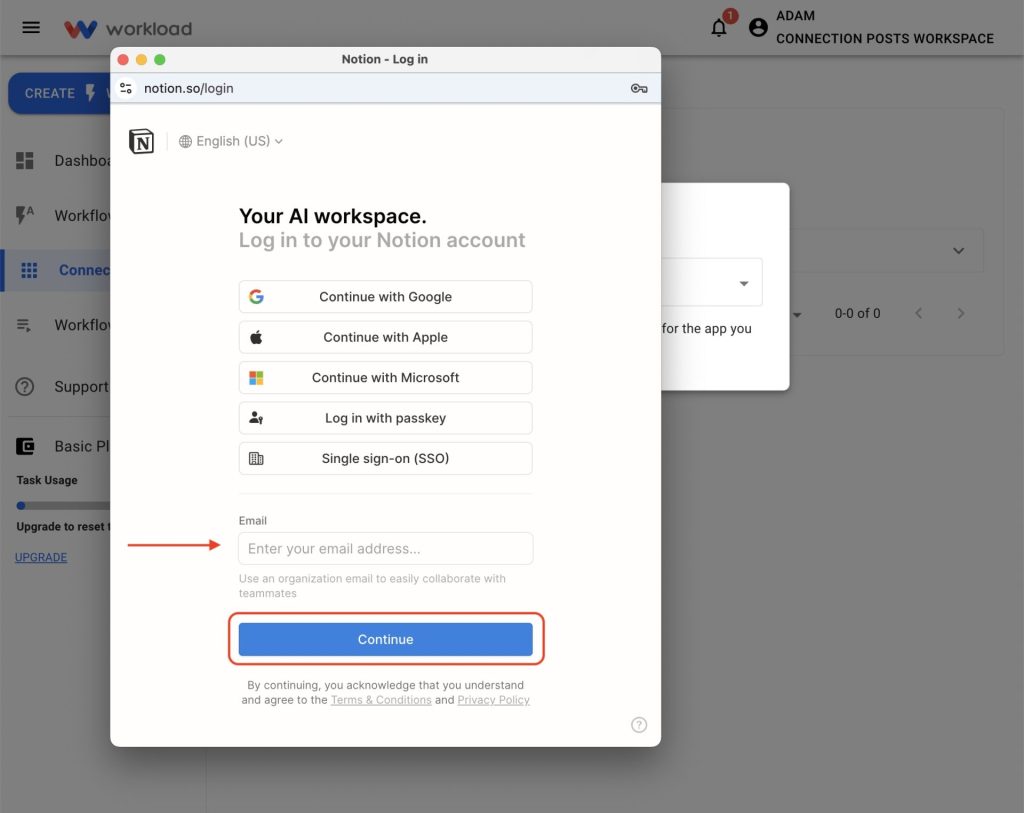
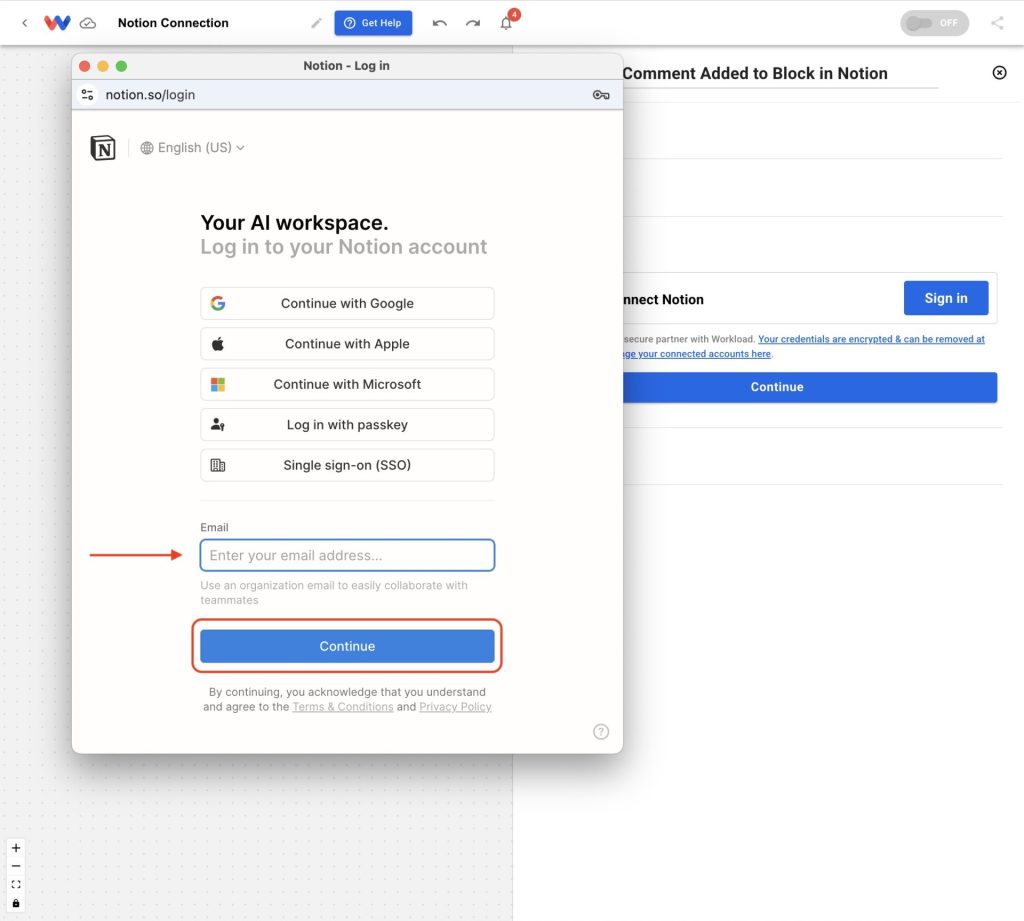
Enter your Notion account email and click Continue.
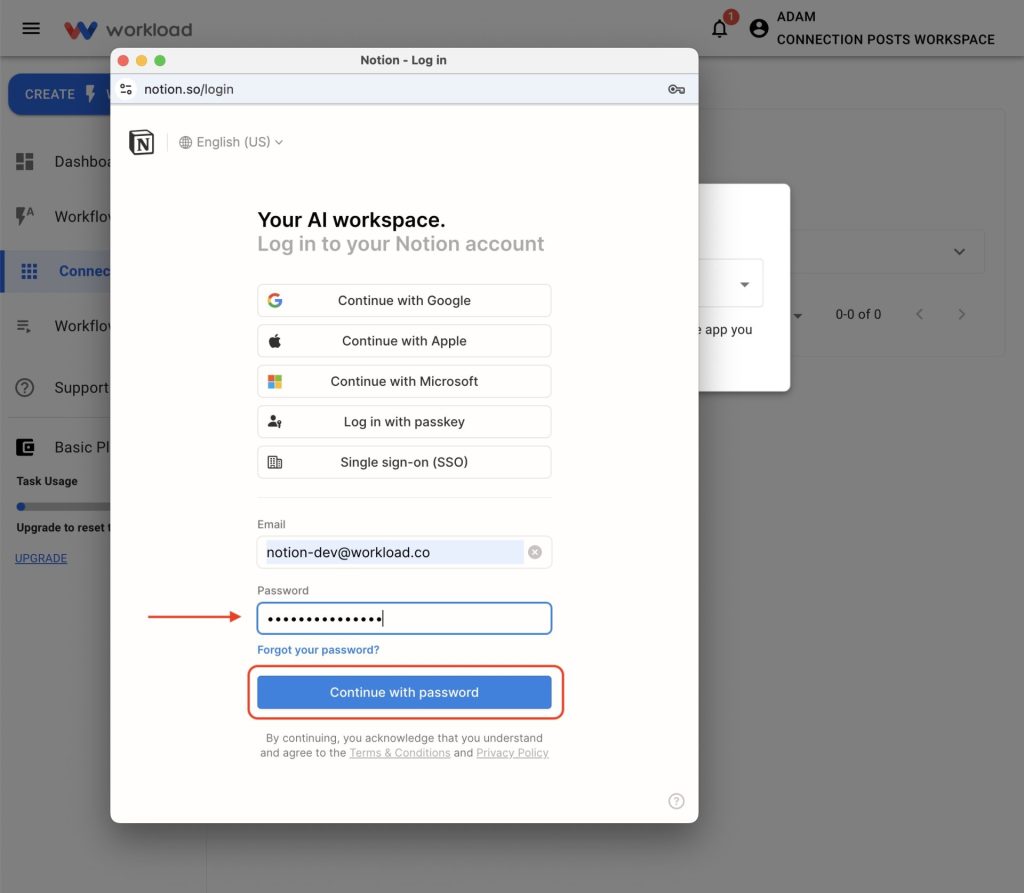
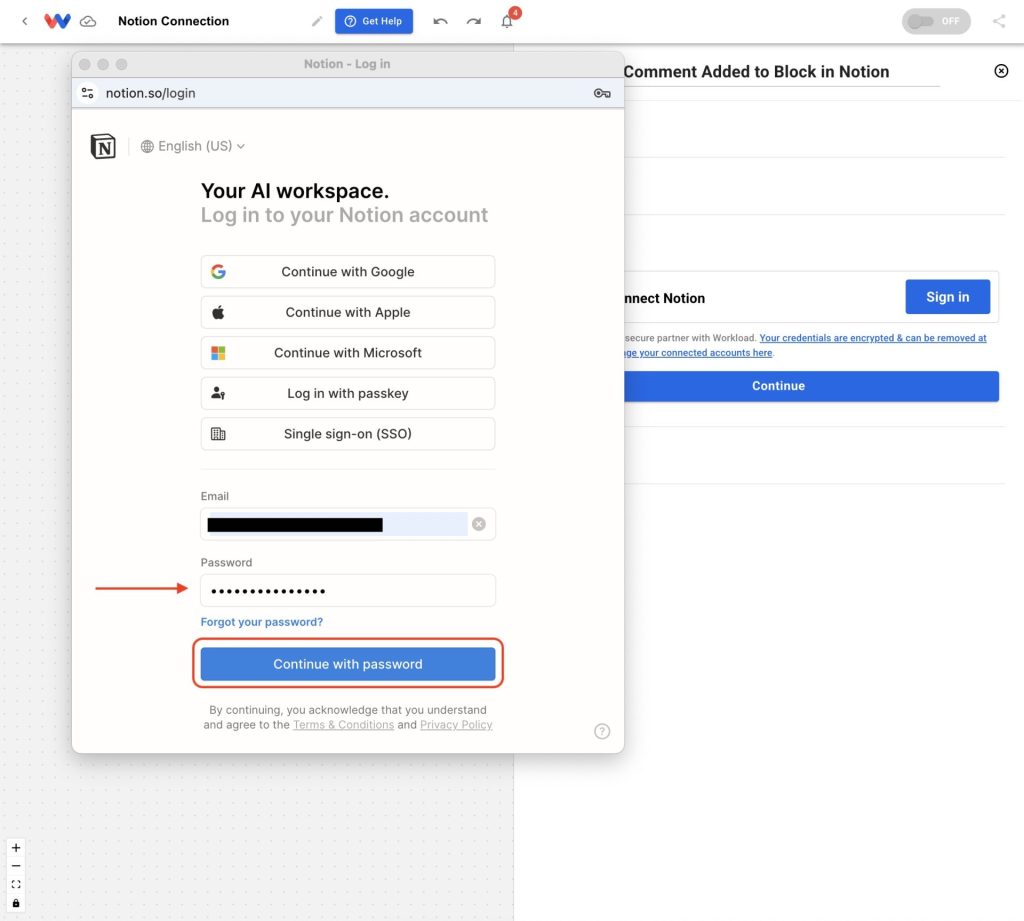
Provide your password and click Continue with password.
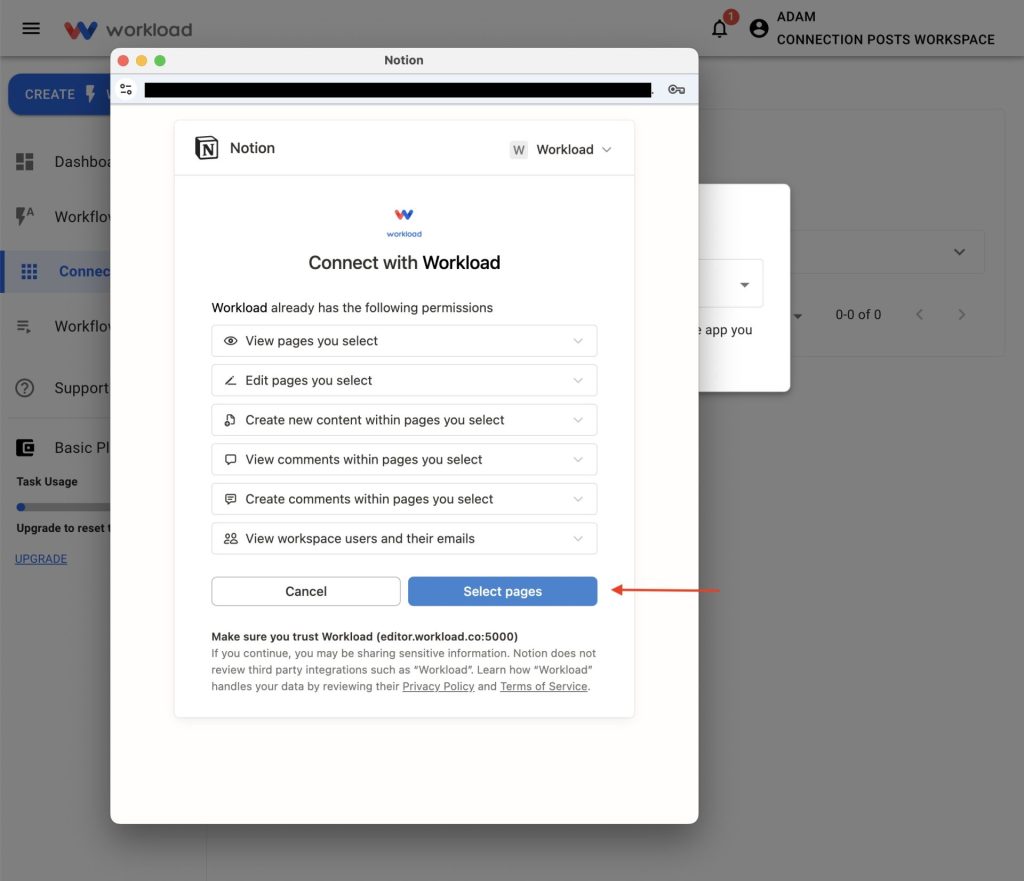
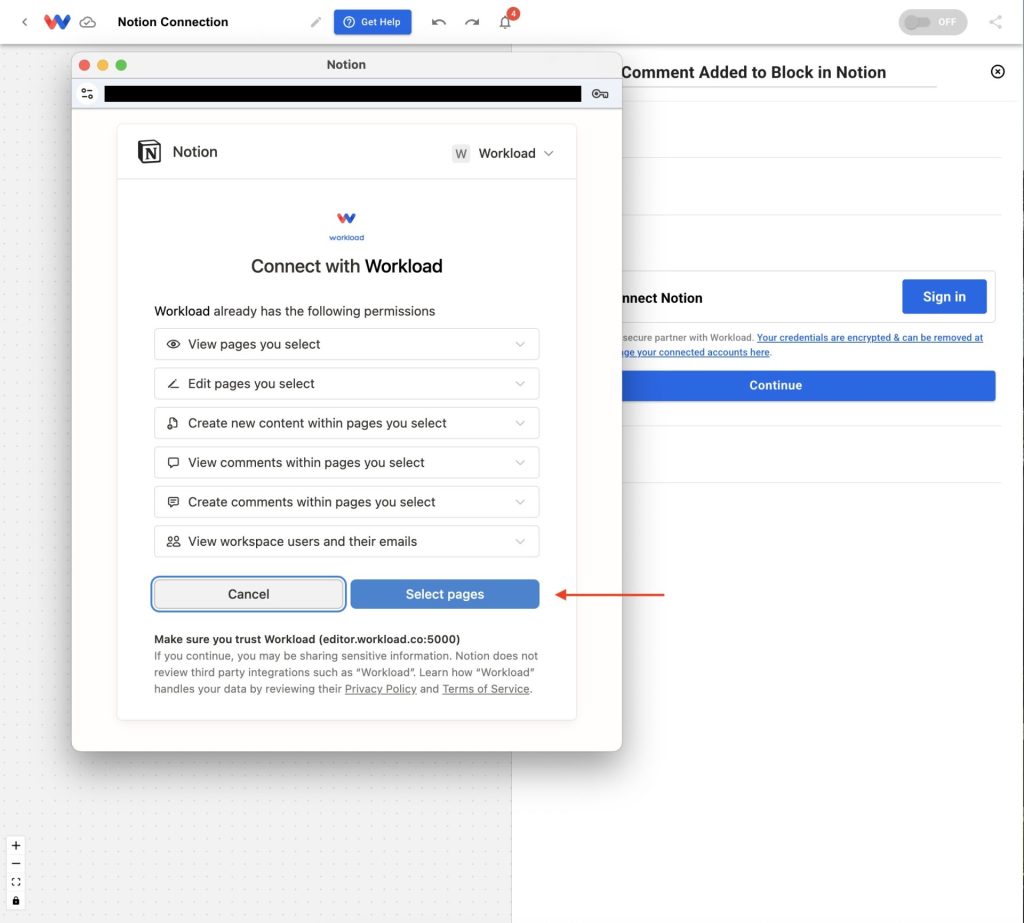
Click Select pages.
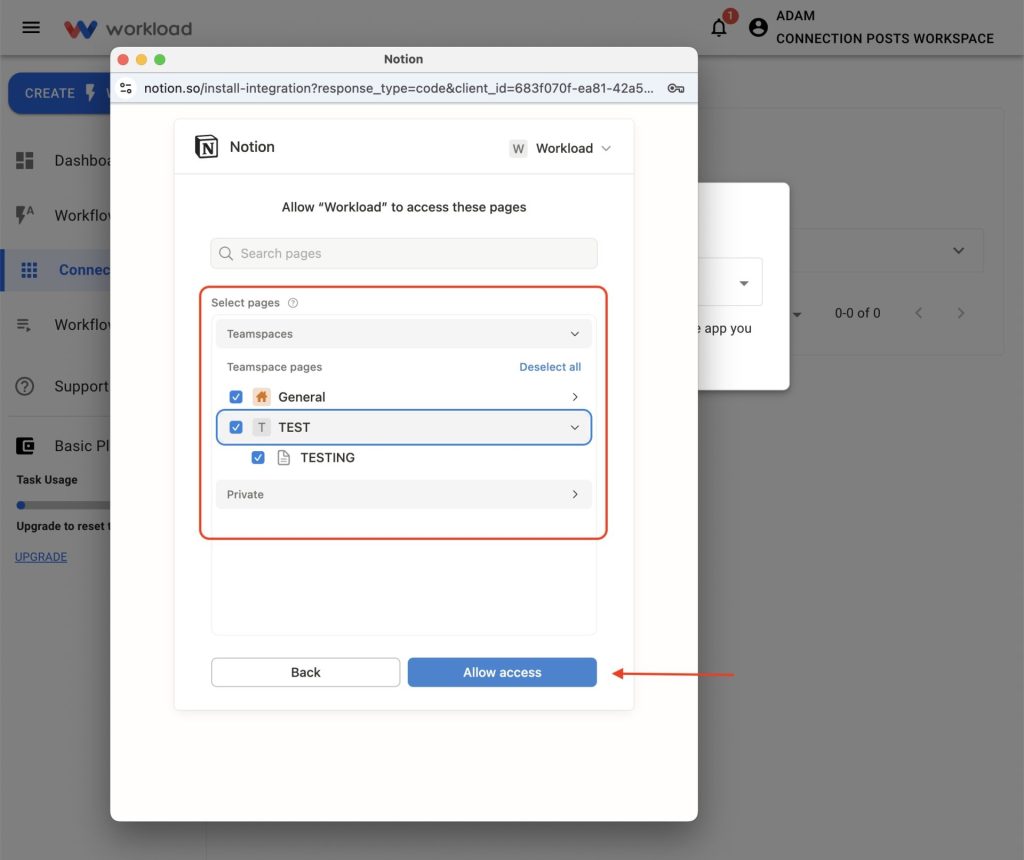
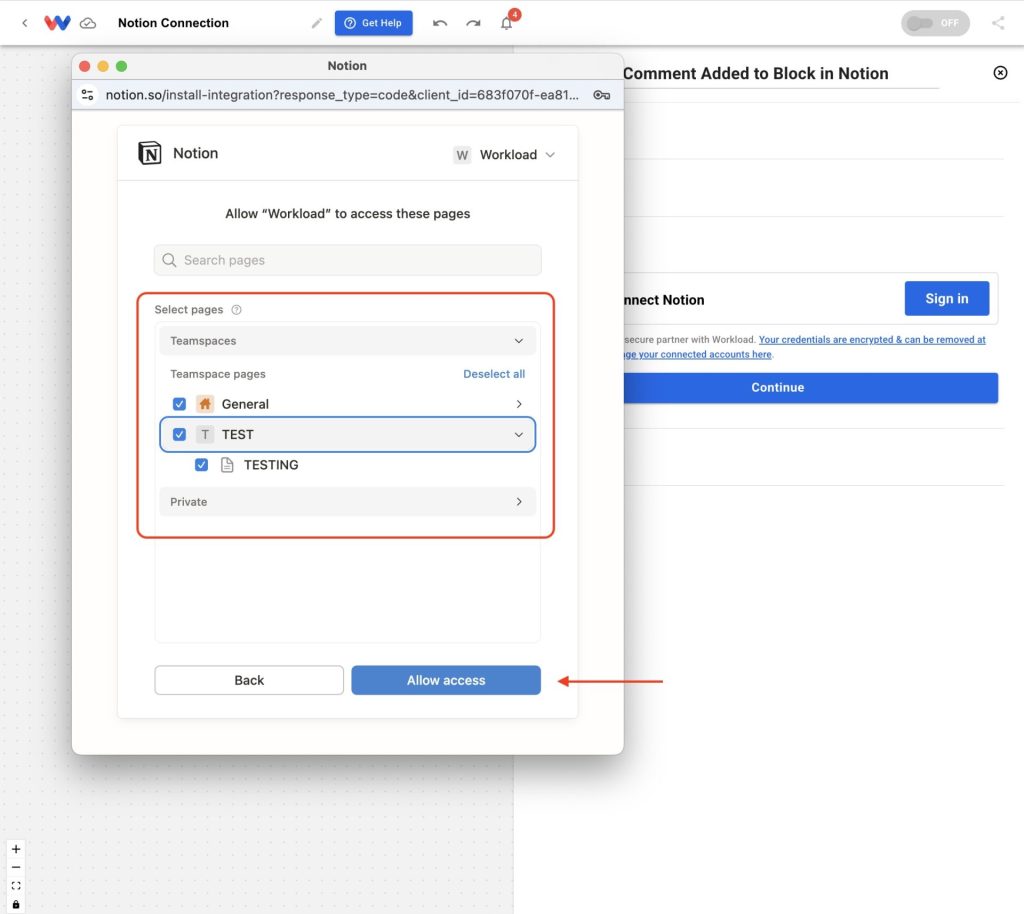
Choose the pages and click Allow access to finish connecting.
Once connected, Notion will appear in your list of active connections.
🪜 From a Workflow Step #
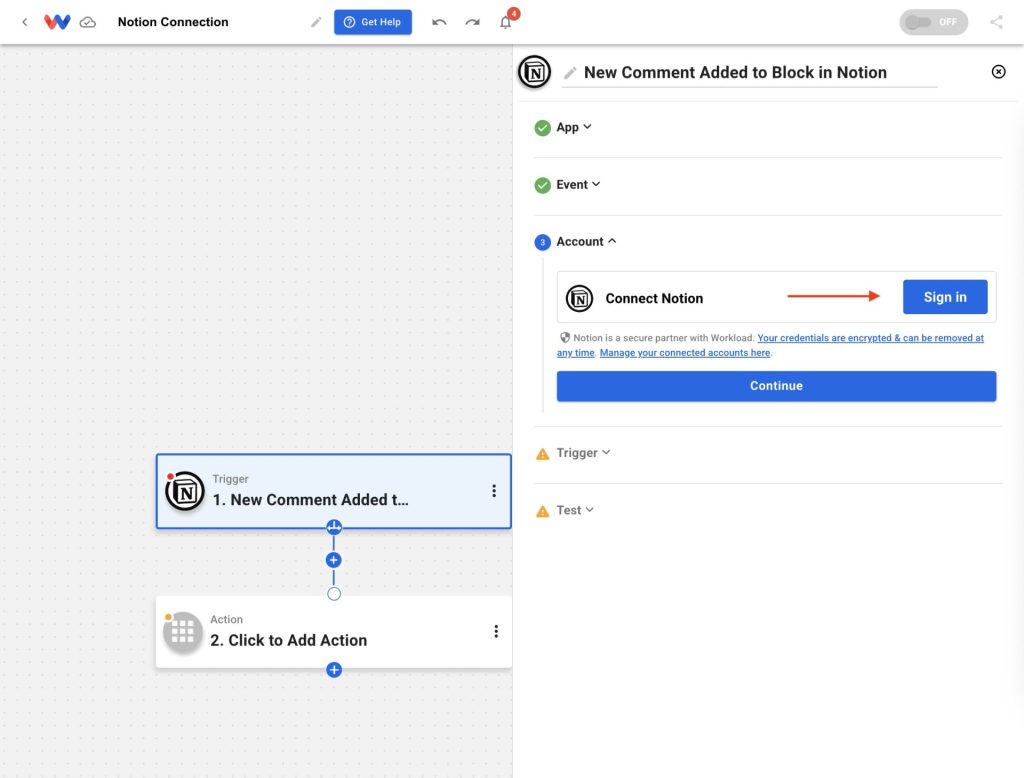
Add a Notion step to your automation and click Sign in under the Account tab.
Enter your Notion account email and click Continue.
Provide your password and click Continue with password.
Click Select pages.
Choose the pages and click Allow access to finish connecting.
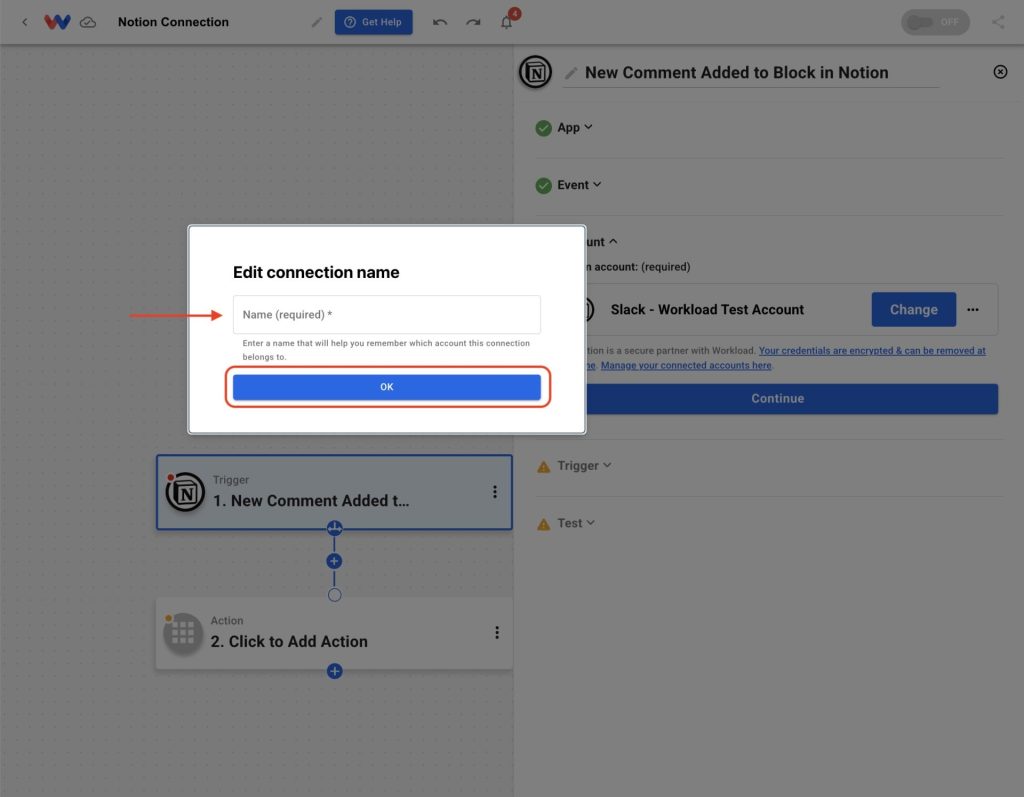
Enter a name for your connection, then click OK.
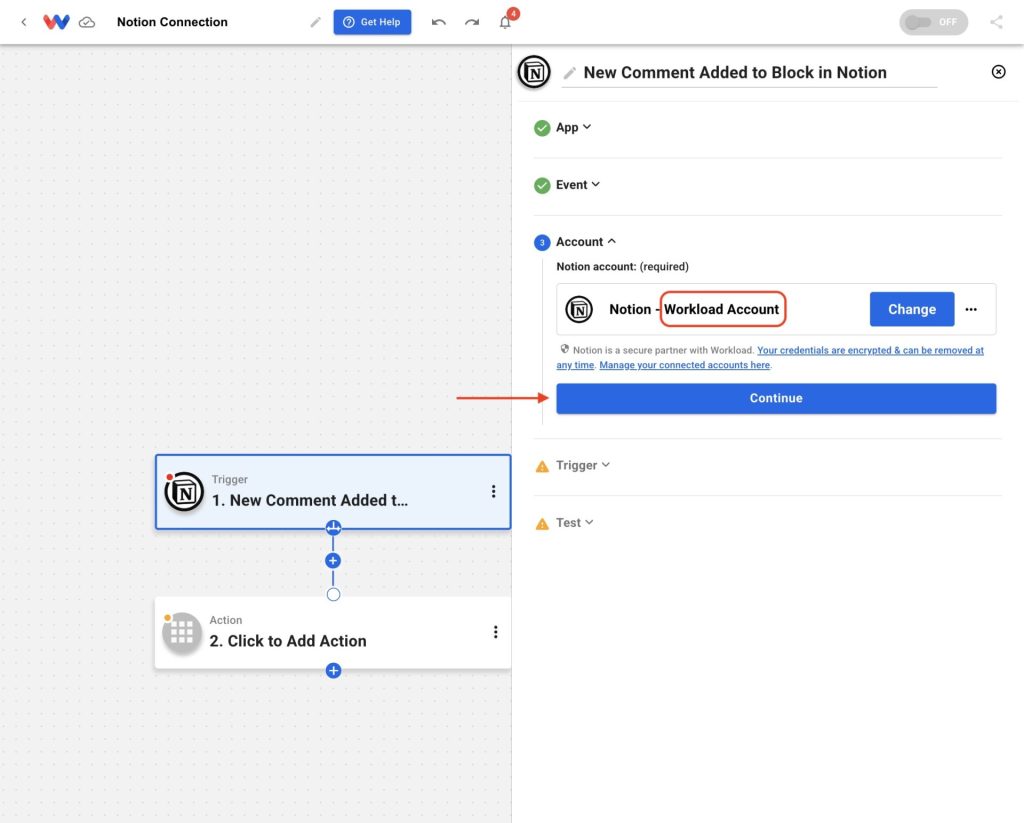
Your Notion account will now appear in the account field.
🚀 Things You Can Do Once You Connect Notion to Workload #
Once your Notion account is connected, it becomes a powerful part of any automation. Here are a few ways teams use it:
- Create a new row in Google Sheets whenever a task is added to a Notion database, keeping reports always current.
- Send Slack alerts when project deadlines or statuses change inside Notion so your team stays on track.
- Turn meeting notes in Notion into follow-up tasks in tools like Todoist or Asana to make sure nothing is missed.
- Log customer requests from forms or emails directly into a Notion database, giving your team a central source of truth.
With Notion connected, you can also combine it with multiple tools in one automation. Route information wherever it’s needed, reduce context switching, and keep your team aligned.


