Instant No-Code Zettle Sales to Slack Alerts 🚨💬
Adam Browder
July 3, 2025
🚀 How Automatically Sending Zettle Sales to Slack Can Help
You’re running a pop-up retail shop on a busy weekend. As customers make purchases through your Zettle terminal, your team in the back office or fulfillment center needs to know what’s selling—fast. Instead of texting each update, this Zettle Sales to Slack automation sends instant Slack messages every time a sale happens, keeping everyone in sync automatically.
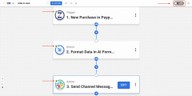
In this tutorial, you’ll learn how to send Zettle sales to Slack using a no-code automation built with Workload. The automation detects new purchases in Zettle and sends a Slack channel message with key order information, so your team is notified in real time—without lifting a finger.
The automation captures product details like name, quantity, and price, and also includes the buyer’s name. A formatting step using Workload’s AI Formatter pulls clean, readable data out of Zettle’s nested array, making it easy to build Slack messages that are both informative and easy to scan.
By eliminating manual updates and making sales data visible instantly, this setup improves response time, reduces errors, and keeps your team in sync—whether you’re in retail, events, or sales operations.
🧩 Connections Needed to Send Zettle Sales to Slack
Before you build out the workflow, here’s what you’ll need:
🛒 Zettle (PayPal Point of Sale) account to track new purchases as they happen in real time.
💬 Slack account to send automated channel messages with purchase details.
🚀 Workload account (free or paid) to create and activate your no-code automation.
Workload makes connecting these tools seamless. Just sign in and grant access when prompted—no developer setup or configuration needed.
⚙️ How to Send Zettle Sales to Slack Automatically
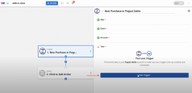
Step 1: Create a new automation
- Go to the Workload Editor and click Create Workflow

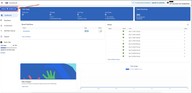
- Give your automation a title like “Zettle to Slack”

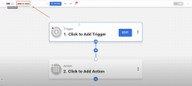
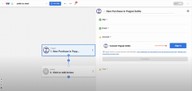
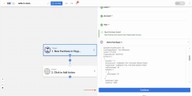
Step 2: Set the Zettle trigger
- Click on the trigger box and choose the app PayPal Zettle

- Select the “New Purchase” event

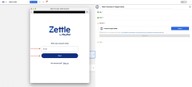
- Begin the process of securely connecting your Zettle account by clicking Sign in

- In the pop-up window, enter your Zettle email address, then click Next

- Enter the password and then click Log in
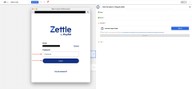
- Once you have successfully connected your Zettle account, click Continue

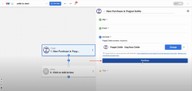
- Next, click on Test Trigger to pull in sample data

- After you get a successful response, click Continue to complete the trigger

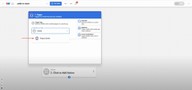
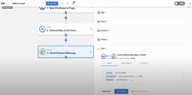
Step 3: Format the product data
- Because of the way that the data is returned from Zettle, we need to format the data so that it can be accepted by Slack. To do this, click into Step 2, then click on the Tools menu and select AI Formatter by Workload.

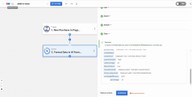
- Set the event to Format Data
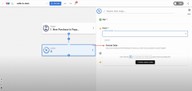
- In the Input Data dropdown, choose the Products array from the Zettle trigger data

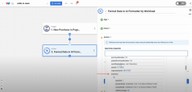
- In the prompt field, enter: Turn this array into an object and then click Continue

- Hit Test action

- Once you get a successful response, click Continue

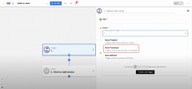
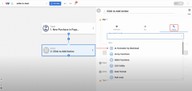
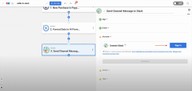
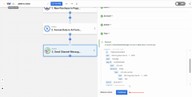
Step 4: Send a Slack channel message
- Add another step by clicking the + icon and then choose the app Slack
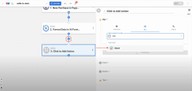
- Select Send Channel Message as the event, then hit Continue

- Connect your Slack account by clicking Sign in
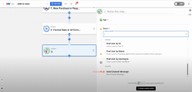
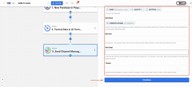
- Set up your action by mapping the data for the fields you want to use from the the previous step responses, then click Continue

- Test the Slack message by clicking Test action

- Once you get a successful response, click Continue
Step 5: Activate the automation
- Make sure each step has a green dot in the corner, then click the On/Off toggle to activate to turn on the automation

- Finally, go to your Slack channel to confirm the message was delivered correctly
🔓 Unlocked: Zettle Sales to Slack No-Code Automation for Instant Updates
This automation unlocks a faster way to keep your team in the loop—no more back-and-forth messages or checking dashboards. Each time a customer makes a purchase in Zettle, the details appear instantly in Slack, helping your team stay responsive and aligned in real time.
🛠️ Customize this Automation
🎛️ Adjust your Slack message format
Change the layout of your channel message to match your team’s communication style. Add emojis, markdown, or custom labels for better readability.
🧠 Use AI Formatter prompts creatively
Tweak the prompt in the AI Formatter step to extract or summarize product data differently—like showing only top-selling items or grouping by category.
🔁 Filter purchases by product or category
Add a filter step before Slack to only alert your team when specific items sell—perfect for tracking promos or limited-time offers.
🕵️ Include more customer data
Map additional fields from Zettle, like customer ID or payment method, into your Slack message to give your team more context per transaction.
⚡ Power-Up: Make It Part of a Bigger Automation Workflow
📬 Send follow-up emails automatically
Add an email step after Slack to notify your customer or sales rep when a purchase comes in.
📊 Log purchases in Google Sheets
Use a Sheets step to store Zettle sales data for tracking trends, auditing, or monthly reporting.
📦 Trigger fulfillment workflows in Airtable
Create new records in Airtable to start packing or shipping based on item and quantity info.
📣 Alert specific team members via DM
Branch your automation based on product category and send direct messages in Slack instead of a public channel.
🧠 Learn More
Keep exploring automation and save even more time:
📺 Watch the full tutorial video
🎓 Visit Workload University
🆘 Browse setup guides in our Help Center
🔄 More Zettle automation tutorials
🌐 More Slack automation tutorials
Tags
Ready to automate your workflows?
Start building powerful automations with Workload today.
Get Started Free