Log Mailchimp Subscribers to Google Sheets Instantly 📬
Adam Browder
July 9, 2025
🚀 What You’ll Gain from Building this Automation
If you’re collecting email signups through Mailchimp, you probably spend more time than you’d like copying names and email addresses into a spreadsheet. Whether you’re tracking leads or organizing new customers, it’s time to log Mailchimp subscribers automatically so nothing slips through the cracks.
With this no-code automation, every new subscriber is logged in Google Sheets the moment they join your list. You’ll see their name, email, and address appear as a new row—ready to review, sort, or sync with other tools.
Workload makes it simple. You don’t need to write code or hire a developer. Just connect your apps, choose your fields, and click activate. In minutes, you’ll have a reliable system running in the background—saving time, reducing mistakes, and keeping your team in sync.
🧰 Essentials Needed to Log Mailchimp Subscribers to Google Sheets
Before you build, here’s what you’ll need:
✉️ Mailchimp account with an active email list to collect subscribers
📈 Google Sheets spreadsheet where you want to store subscriber data
🤖 Workload account (free or paid) to create your automation
Workload makes connecting these tools seamless. Just sign in and grant access when prompted—no developer setup or configuration needed.
⚙️ How to Log Mailchimp Subscribers to Google Sheets
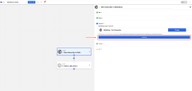
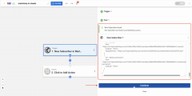
Step 1: Create a new “Log Mailchimp Subscribers to Google Sheets” workflow
- Log in to your Workload dashboard and click the Create Workflow button

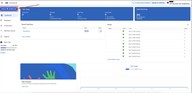
- Enter a unique name for the workflow (ex: Mailchimp to Sheets)

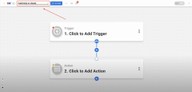
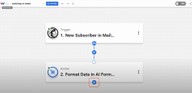
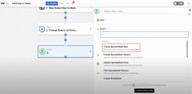
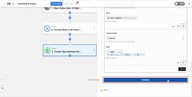
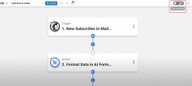
Step 2: Set up the Mailchimp trigger
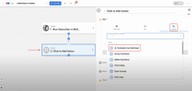
- Click into the trigger box to begin building your automation and choose the app: Mailchimp

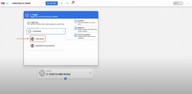
- Select the trigger event: New Subscriber

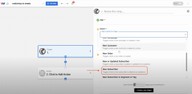
- Under the Account tab, click on Sign in to begin to connect your Mailchimp account. If you need more detailed help, follow this step-by-step guide on how to connect Mailchimp to Workload

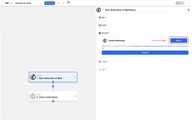
- Once the connection has been named, click Continue

- Choose the Mailchimp list you want to monitor from the dropdown menu, then click Continue

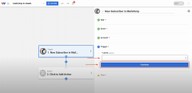
- Click Test Trigger to pull recent data from Mailchimp

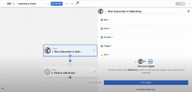
- Confirm Workload receives a successful response of recent subscriber data and then click Continue

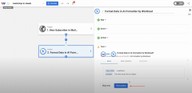
Step 3: Format the Mailchimp data
Mailchimp returns the trigger data inside an array called merge_fields. An array is a group of related pieces of data that are all stored together under one label. For example, data like name, address, and phone number could be grouped inside an array called contact_information. Google Sheets can’t use this format directly, so we will need to use our AI Formatter by Workload to convert it into a simpler structure that can be used by Google Sheets.
- Click into Step 2 and choose Tools → AI Formatter by Workload
- Select the event Format Data, then click Continue
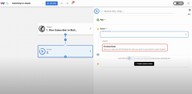
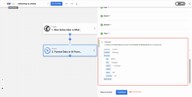
- Set the input field to the merge_fields array from the Mailchimp trigger

- In the prompt box, enter: “Turn this array into an object”, then click Continue.


- Click Test Action to generate a clean, usable format for names and address data
- Once you get a successful response, click Continue to move on to the next step

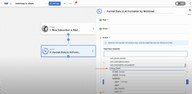
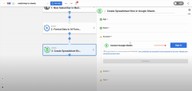
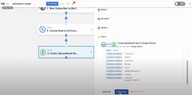
Step 4: Build a Google Sheets Step
- Click the + button below the AI Formatter action to add a new step
- Choose the app Google Sheets
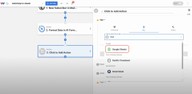
- Select the event Create Spreadsheet Row
- Click Sign in to connect your Google Sheets account. If you need more detailed help, follow this step-by-step guide on how to connect Google Sheets to Workload. Once you have connected your account, click Continue.

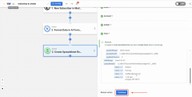
- Choose the spreadsheet & worksheet where you want to log your subscribers

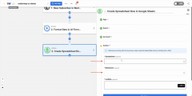
- Use the Add To button to begin mapping data into your spreadsheet. The columns you see will match the columns that exist in your Google Sheet. Remember that some data will be mapped from the trigger response, while other data may need to come from the data formatted by the AI Formatter step. For example, if you have columns like First Name, Last Name, Email, and Address, you can map like this:
- FNAME and LNAME from the AI Formatter step for names
- email_address from the Mailchimp trigger for email
- A combination of address1, city, state, and zip to form a full address
- If you’ve added extra columns (like Phone Number or Birthday), you can map those too—even if the values are empty in your test data

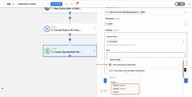
- When everything has been mapped, click Continue
- Click Test Action to make sure your data appears correctly in the spreadsheet

- Once you get a successful response, click Continue
Step 5: Turn your automation on
- Check that each step in your workflow has a green status dot (this means there are no errors)
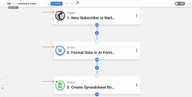
- To activate the workflow, click the On/Off toggle in the top-right corner of the editor

🔓 Unlocked: Log Mailchimp Subscribers to Google Sheets Instantly 📬
This automation unlocks a faster, cleaner way to track your email signups—without the need to export lists or manage messy copy-paste workflows. With your Mailchimp list now syncing directly to Google Sheets, your team stays organized and your data stays current.
👉 Try it now on Workload and take the manual work out of lead tracking.
🛠️ Customize this Automation
🔢 Add more fields
Include extra data like phone numbers, birthdays, tags, or subscriber source by expanding your Google Sheet and mapping those fields in Workload.
🧠 Use filters to limit what’s logged
Want to only track subscribers from a specific location or campaign? Add a filter step before the Sheets action to include only the data that matters most.
🎨 Reformat names, addresses, or dates
Use the AI Formatter again to clean up capitalization, convert date formats, or merge fields before sending them into Sheets.
📂 Organize leads by list or campaign
Create multiple workflows for different Mailchimp lists or segments so each one logs to a specific tab in your spreadsheet.
⚡ Power-Up: Make It Part of a Bigger Automation Workflow
🔔 Send Slack or email alerts
Add a step that notifies your team whenever a new subscriber joins—so no lead goes unnoticed.
📬 Add contacts to a CRM
Push subscriber details from Google Sheets to tools like Airtable, HubSpot, or Salesforce to build out full lead profiles.
🧹 Clean and enrich data automatically
Use AI steps to normalize formatting, flag duplicates, or enrich contact details before logging them.
📈 Trigger downstream reports or dashboards
Once subscribers are logged in Sheets, you can trigger analytics tools, pivot tables, or reports to update automatically.
🧠 Learn More
Keep exploring automation and save even more time:
- 📺 Watch the full tutorial video
- 🎓 Visit Workload University
- 🆘 Browse setup guides in our Help Center
- 🔄 More Mailchimp automation tutorials
- 🌐 More Google Sheets automation tutorials
Tags
Ready to automate your workflows?
Start building powerful automations with Workload today.
Get Started Free