Keeping your Mailchimp contact list updated can be a hassle, but automation makes it effortless. With Google Sheets Mailchimp Integration, every new row in your spreadsheet instantly creates or updates a contact in Mailchimp. Workload handles the entire process for you, ensuring that all details are properly formatted and transferred without manual input. As a result, you save time, reduce errors, and enhance your email marketing workflow.
If you need extra help, you can watch our step-by-step video on the Workload YouTube channel. Additionally, you can visit Workload University or our Workload Help page for more automation tips.
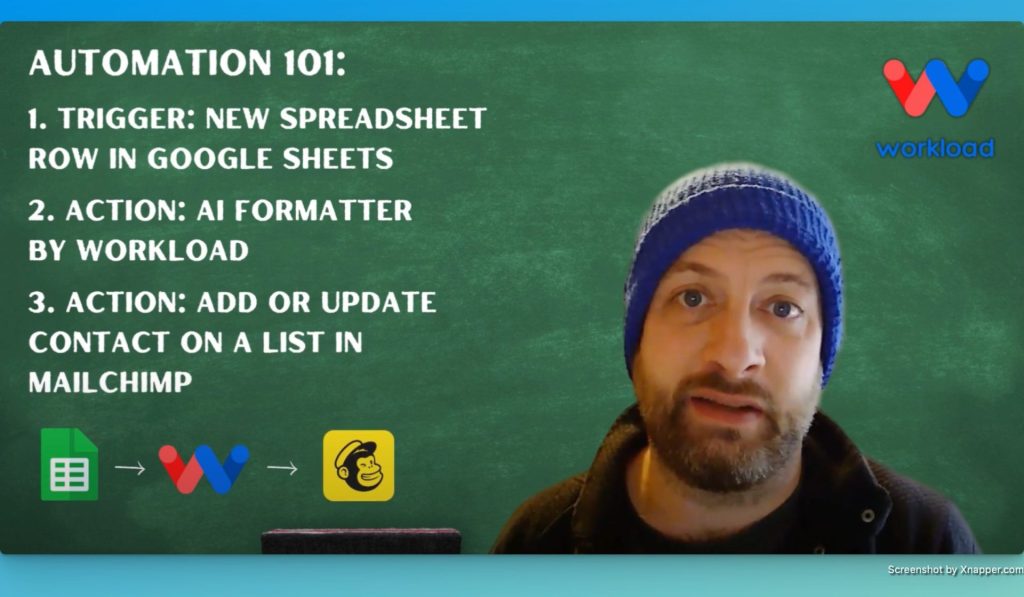
Overview: Google Sheets Mailchimp Integration #
With this integration, you will:
- Automatically trigger the workflow when a new row is added to your Google Sheet.
- Format the data using Workload’s AI Formatter to meet Mailchimp’s requirements.
- Seamlessly create or update a contact in Mailchimp with accurate details.
Before you begin, make sure you have:
- A connected Google Sheets account.
- A Mailchimp account with an active contact list.
- A Workload account to create and manage your integration.
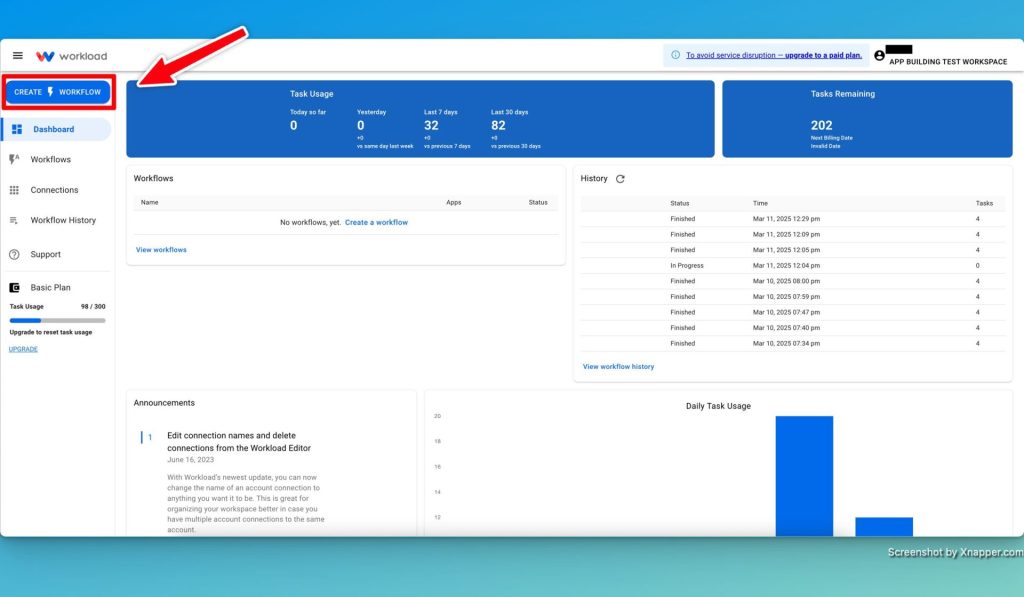
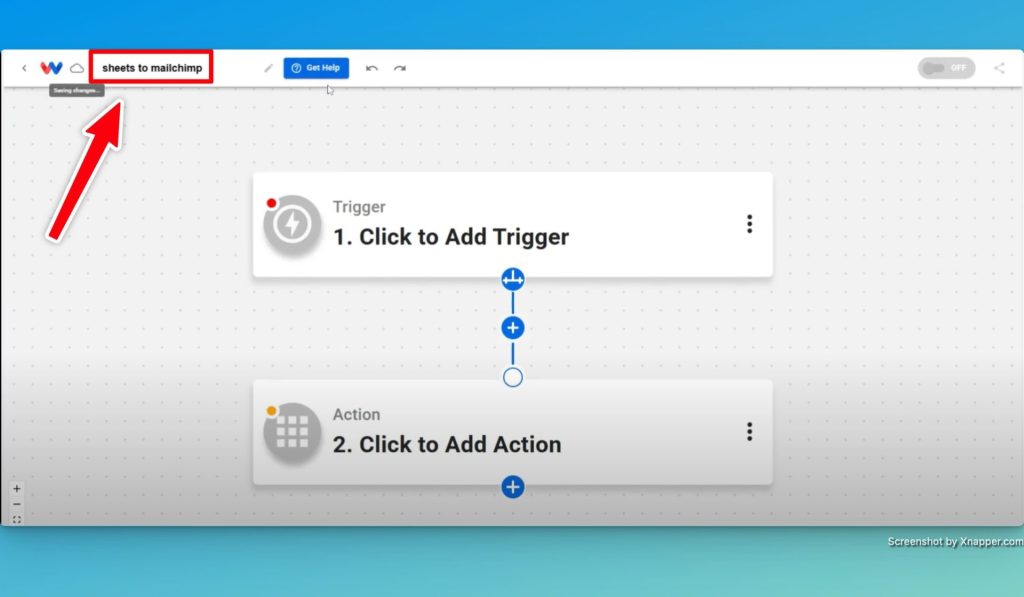
Step 1: Setting Up Your Workflow in Workload #
- Open the Workload editor: Create a new workflow in the Workload editor to begin the integration process.
- Name your workflow: Choose a descriptive title like “Sheets to Mailchimp” for easy identification.
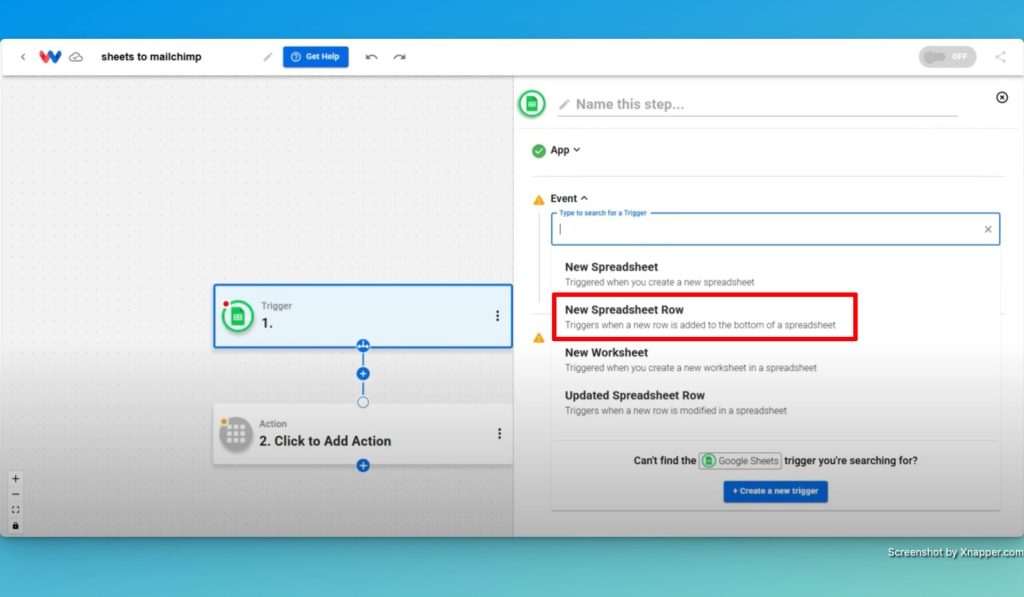
- Select the trigger app: Choose Google Sheets and set the trigger event to “New Spreadsheet Row.”
- Connect your account: Securely link your Google Sheets account to Workload.
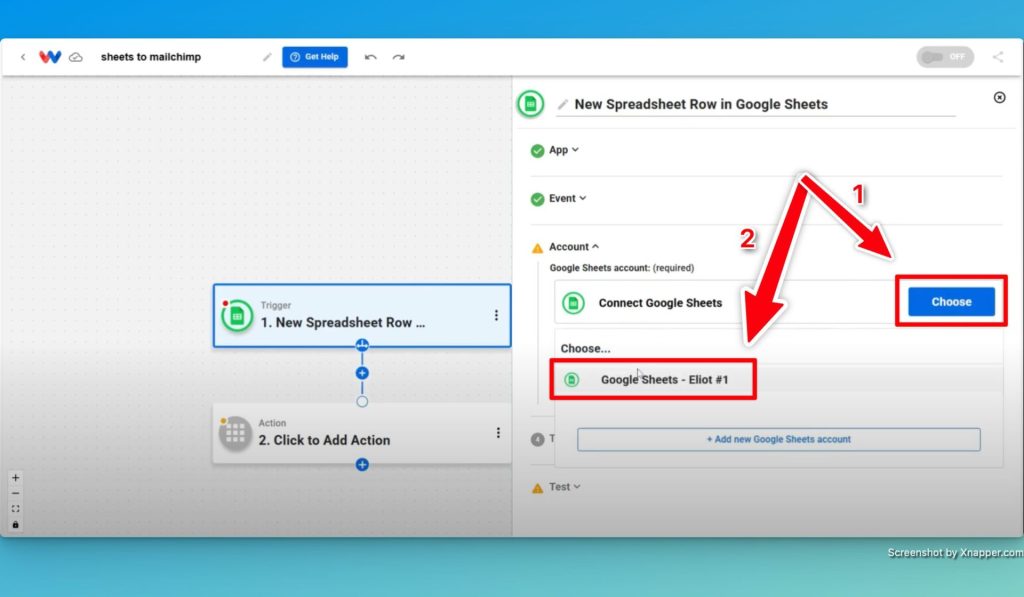
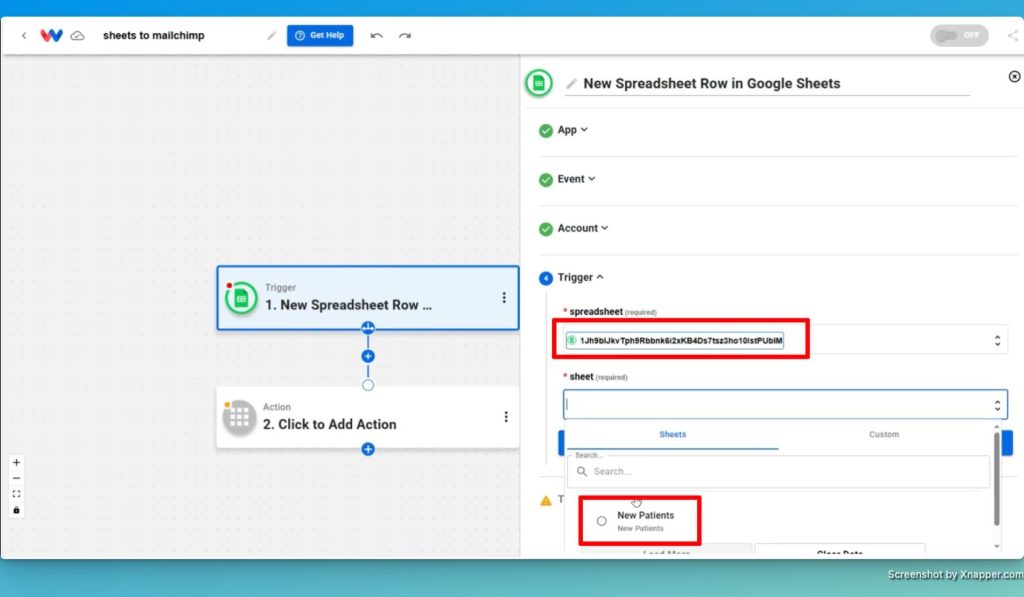
- Choose your spreadsheet: Select the specific Google Sheet you want to monitor.
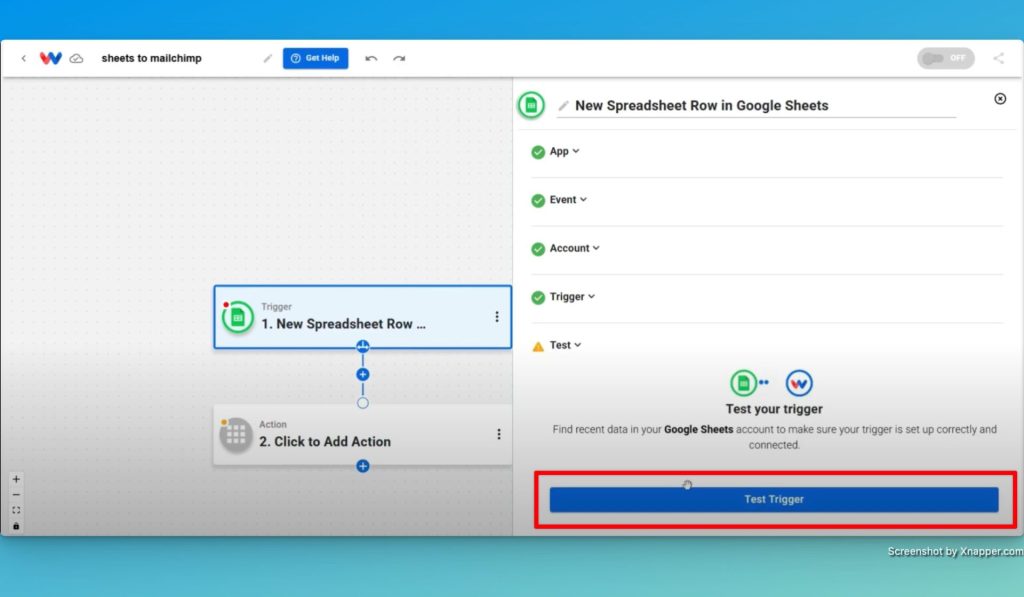
- Test the trigger: Run a test to confirm that Google Sheets detects new rows correctly.
Step 2: Configuring the Google Sheets Trigger #
- Review the retrieved details: Ensure the data includes key contact information like Name, Email, Address, and Birthday.
- Select relevant fields: Determine which data should be sent to Mailchimp and if formatting changes are necessary.

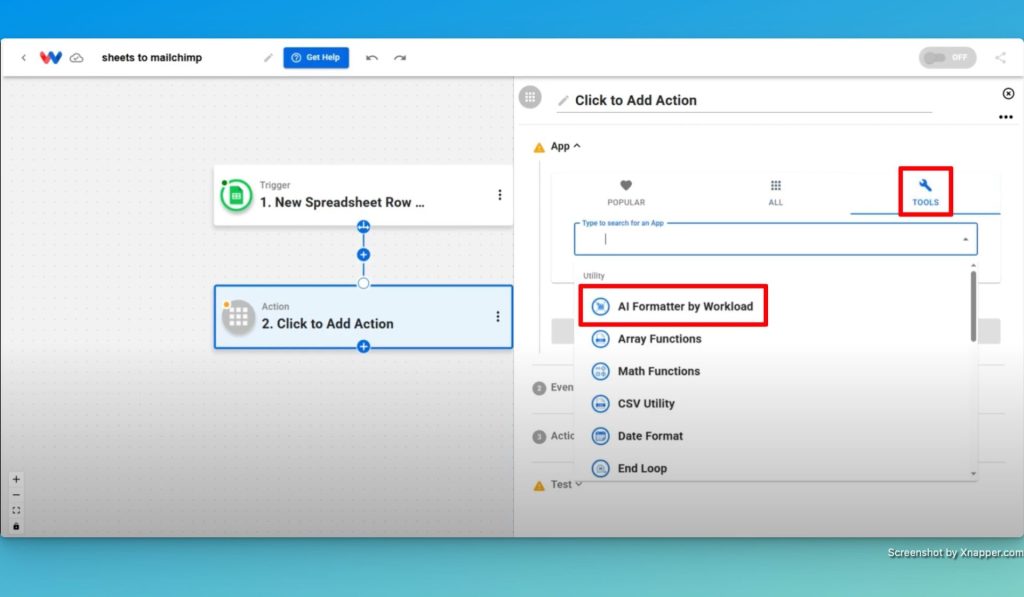
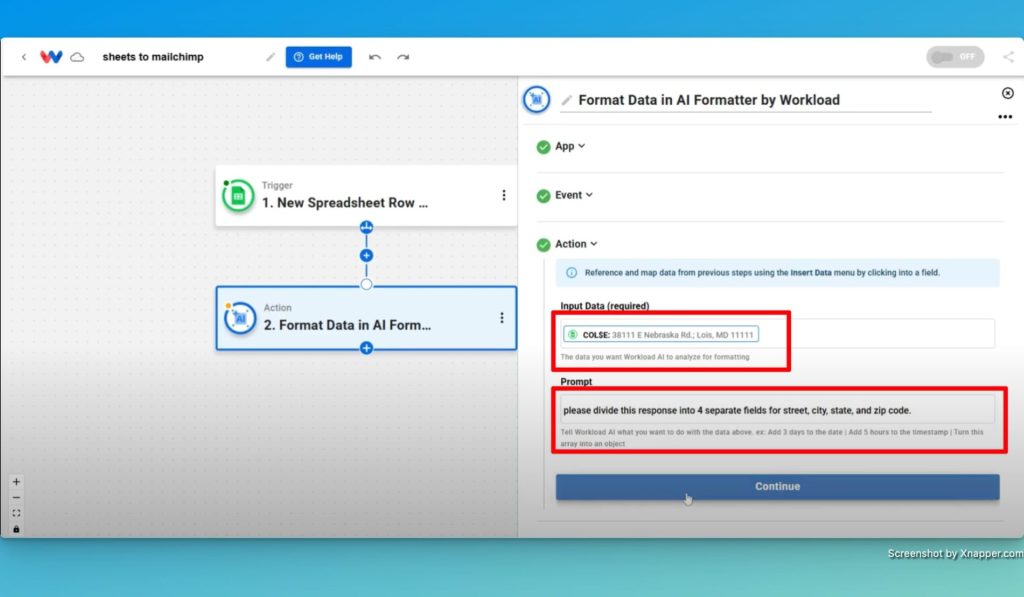
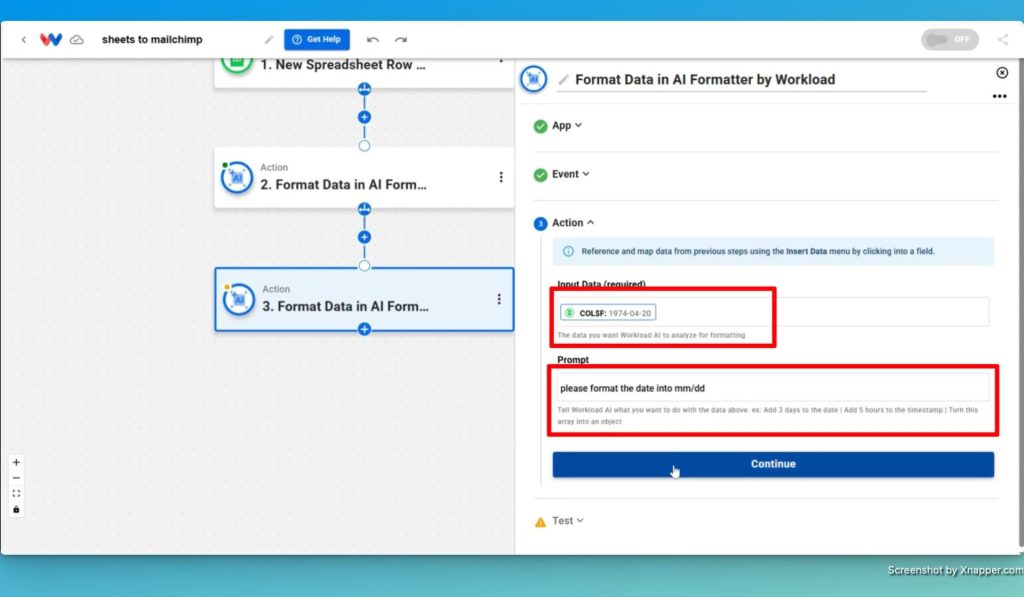
Step 3: Formatting Data with AI #
- Select Workload’s AI Formatter: From the Tools section of the action app selector, choose AI Formatter by Workload. We will use this to adjust the data to meet Mailchimp’s format requirements.
- Format addresses: Split an address into separate fields (street, city, state, zip code) to match Mailchimp’s structure.
- Format birthdays: Extract and adjust the date so it only includes the month and day, as required by Mailchimp.
- Test the formatter: Run a test to ensure accuracy before proceeding.
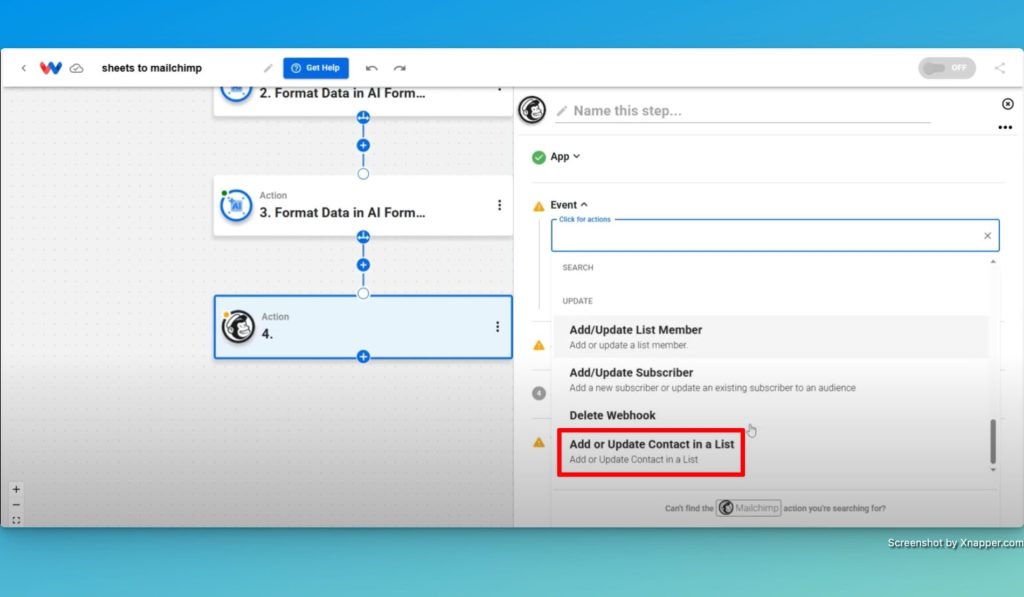
Step 4: Adding Contacts to Mailchimp #
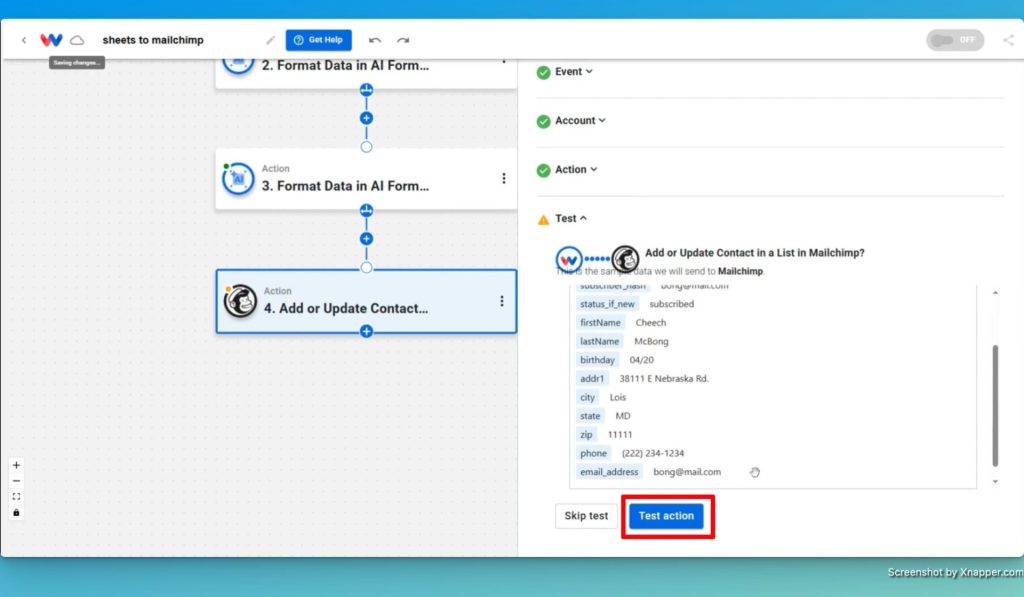
- Add a Mailchimp action: Create a new step in Workload by selecting the Mailchimp app and then choosing the action event “Add or Update Contact in a List”.
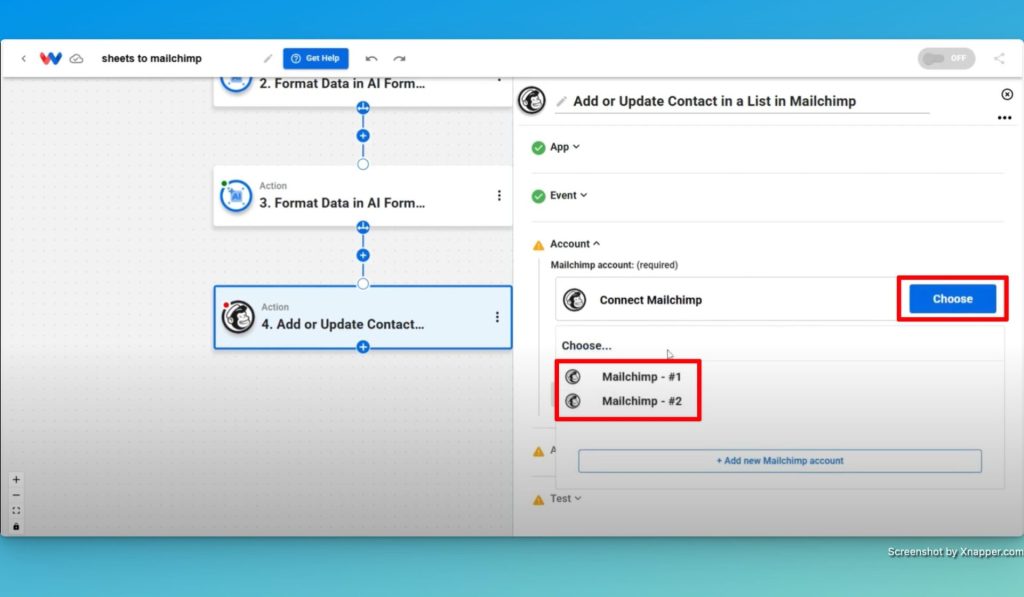
- Connect your Mailchimp account: Log in and select the appropriate Mailchimp account.
- Select contact list: Select desired contact list from Mailchimp.

- Map fields to Mailchimp: Match Google Sheets and AI Formatter data to Mailchimp fields:
- First Name: From Google Sheets.
- Last Name: From Google Sheets.
- Email: From Google Sheets.
- Address: From AI Formatter.
- Birthday: From AI Formatter.

- Test the action: Run a test to ensure contacts are added correctly.
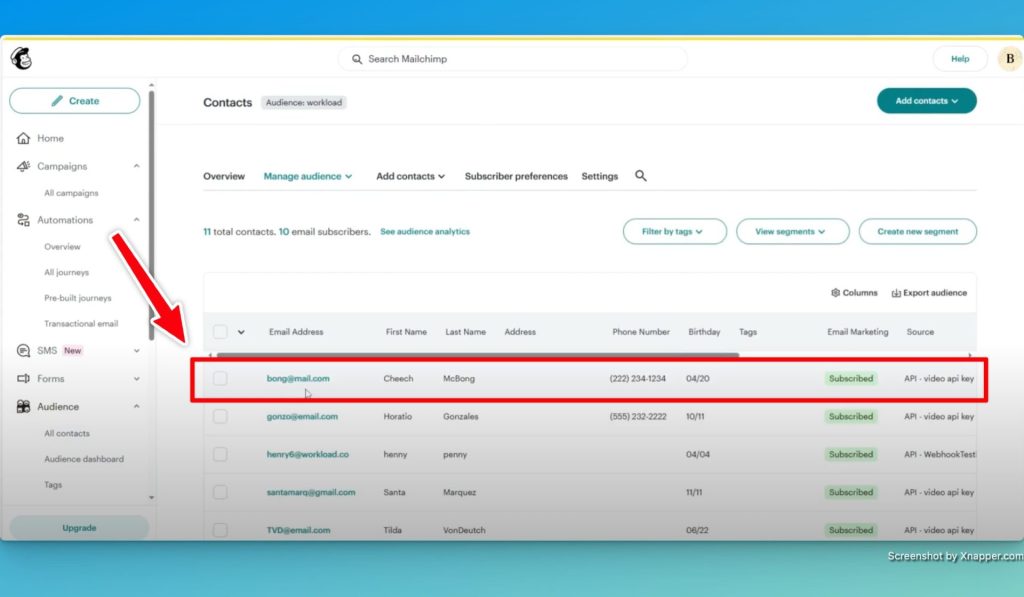
- Verify Mailchimp entries: Check your contact list to confirm the new addition.
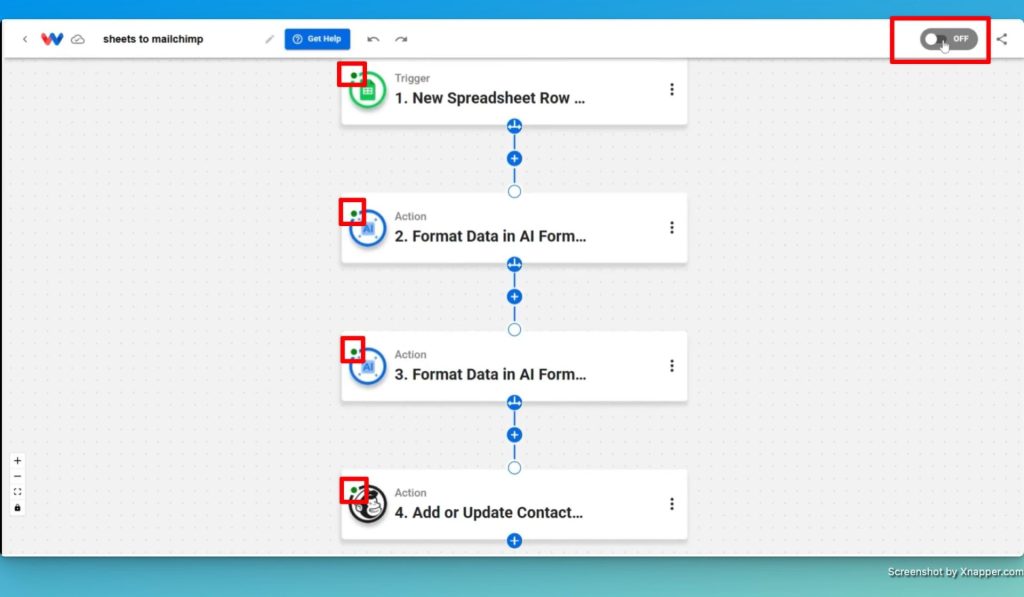
- Activate the workflow: Check that each step (node) is showing a green indicator and then enable the integration so that every new row in Google Sheets automatically adds a contact to Mailchimp.
Conclusion: Google Sheets Mailchimp Integration #
By following these steps, you can streamline contact management with Google Sheets Mailchimp Integration. This automation not only saves time but also ensures accurate data entry, reducing the risk of errors in your email marketing efforts.
For even more automation solutions, visit Workload University or explore our Workload Help page.
Happy automating!


