Still manually exporting and importing contacts between HubSpot and Mailchimp? Let’s put an end to that. With the HubSpot to Mailchimp Sync workflow, Workload listens for new HubSpot contacts and moves them into Mailchimp for you—instantly and without lifting a finger.
You decide exactly how the data flows. Map only the fields you care about—whether it’s email and name, or every custom property you’ve added in HubSpot. Choose which list to send contacts to, set their subscription status, and even add conditional steps. This flexibility means you build a workflow that fits your process perfectly, saves you hours, and keeps your marketing running smoothly.
Need help? Watch our tutorial video with Elliot, your personal Workload tour guide, or check out Workload University or our Help Center for more tips and tricks.
A High Level Look: HubSpot to Mailchimp Sync Workflow #
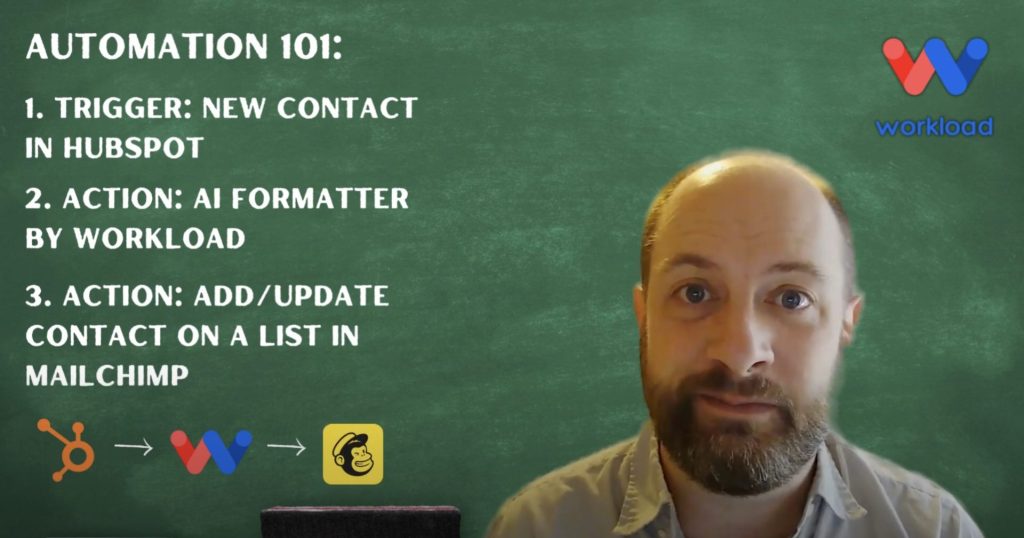
This workflow has three main functions:
- Listens for New Contacts: It starts whenever HubSpot creates a new contact.
- Cleans and Formats Data with AI: It pulls fields out of HubSpot’s properties array and flattens them into individual fields.
- Adds or Updates a Contact in Mailchimp: It maps the clean data into Mailchimp’s contact fields and subscribes them to your list.
What You’ll Need:
- A HubSpot account with custom contact properties (e.g., address, birthday, phone)
- A Mailchimp account with an audience (mailing list) created
- A Workload account to build and run the workflow
Step-by-Step: Build a HubSpot to Mailchimp Sync Workflow #
Step 1: Set Up the Trigger (HubSpot) #
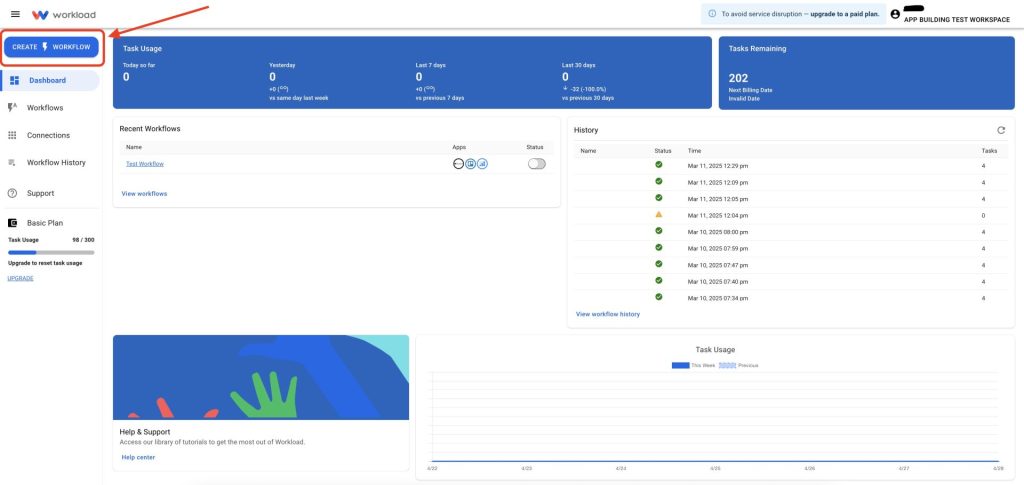
- Create Workflow: Login to the Workload Dashboard and click Create Workflow.
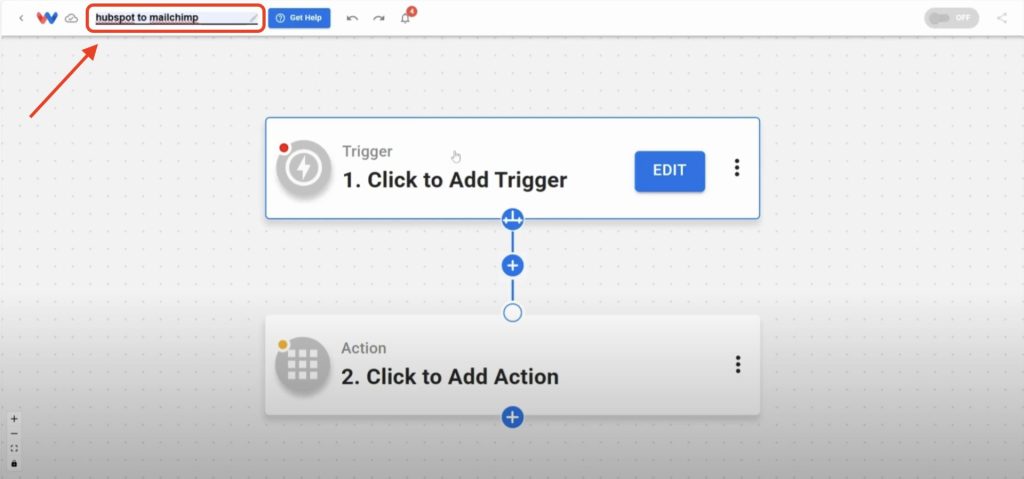
- Name Your Workflow: Enter a unique name. (ex: HubSpot to Mailchimp Sync)
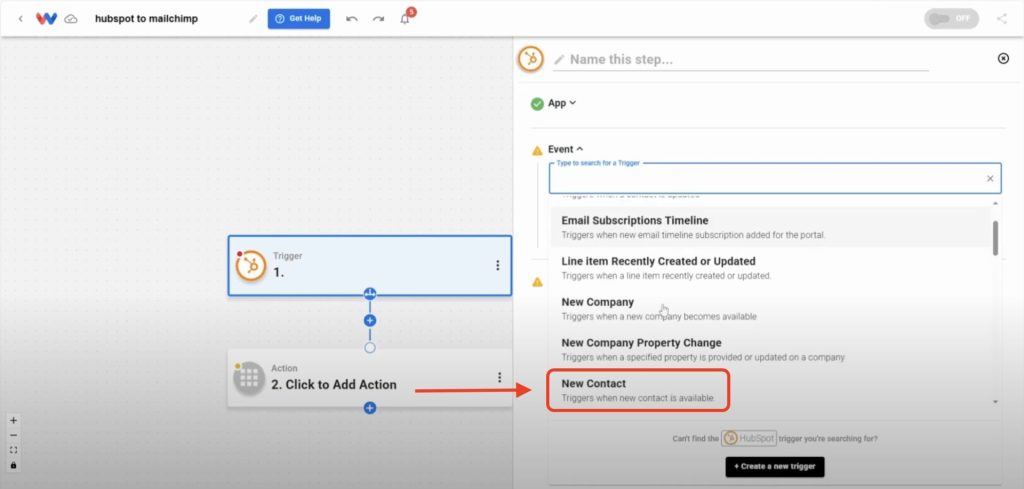
- Choose Trigger App & Event: Select HubSpot, then choose New Contact.
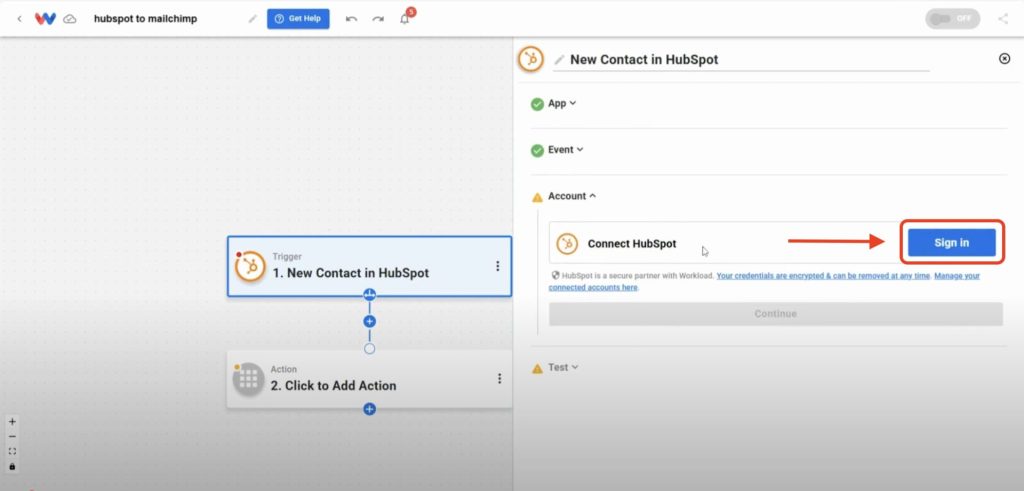
- Connect Your HubSpot Account: Sign in to link your HubSpot account (or pick an existing connection).
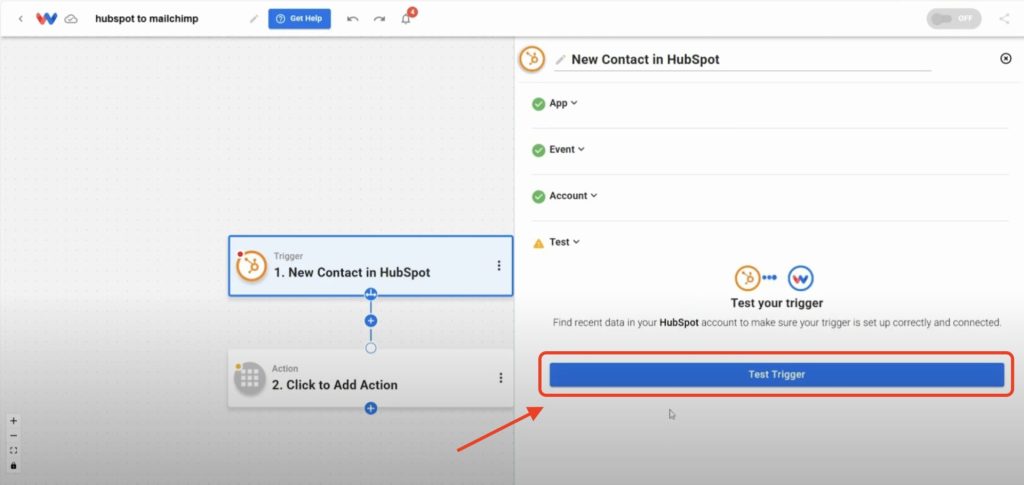
- Test the Trigger: Click Test Trigger to pull in a sample contact.
Step 2: Format Trigger Data (AI Formatter by Workload) #
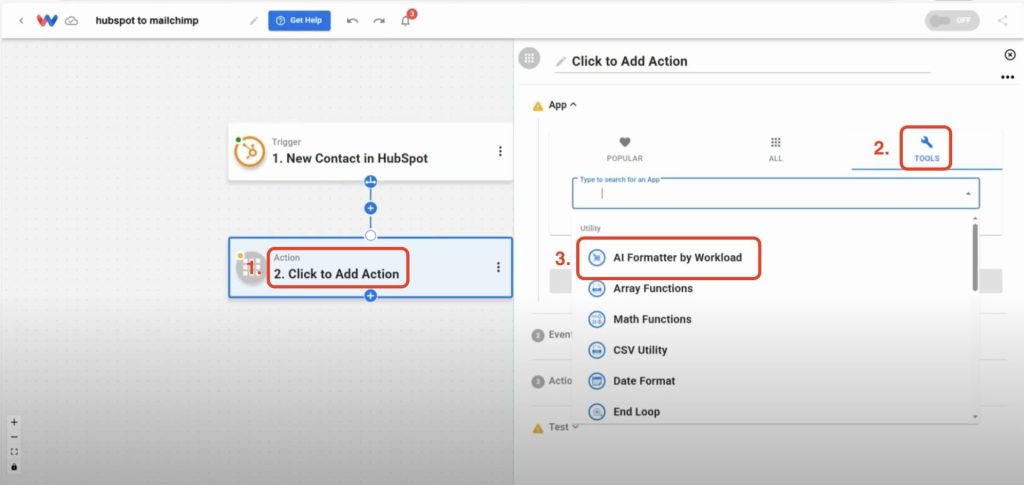
- Add a Formatter Action Step: Click into Step 2, select the Tools icon, then choose AI Formatter by Workload.
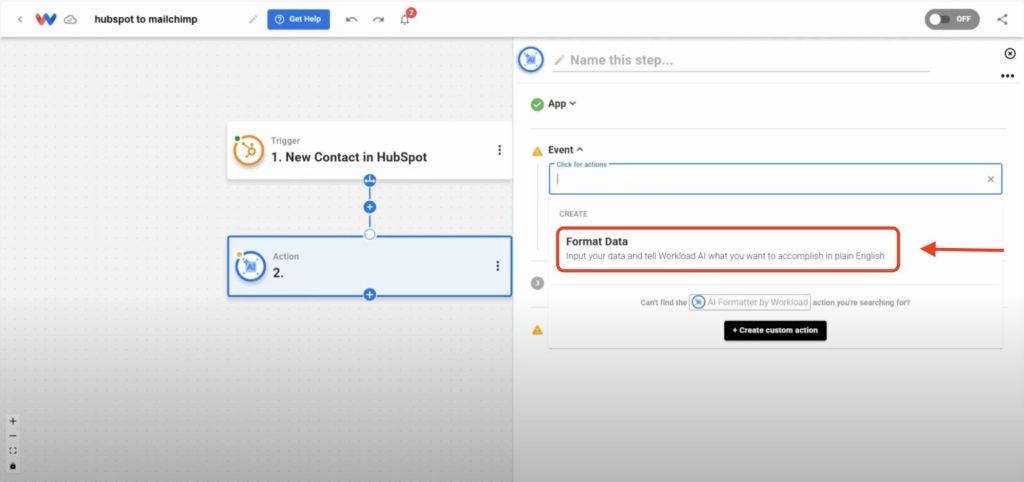
- Select Action Event: Choose Format Data as the event.
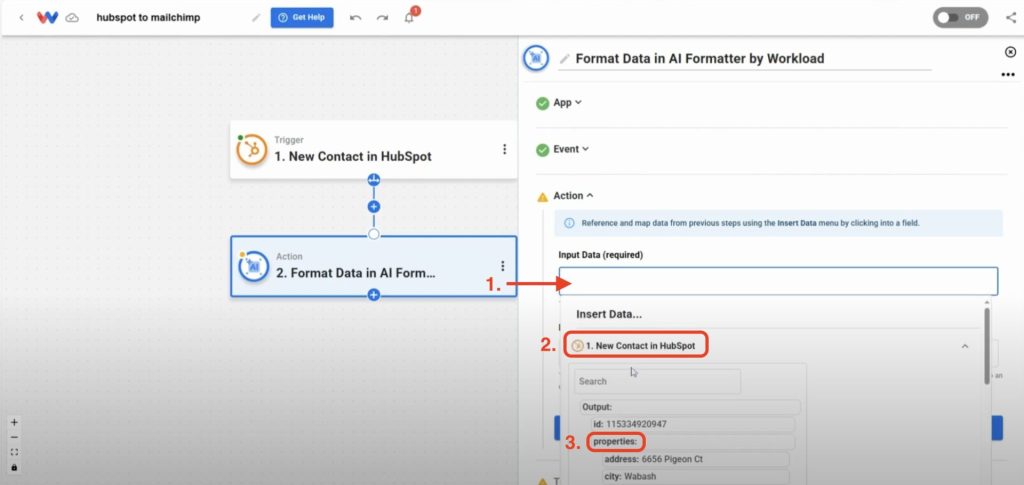
- Select Input Data: Click in the box labeled Input Data. Next, Click on 1. New Contact in Hubspot. Then, pick the
propertiesarray from the HubSpot trigger response.
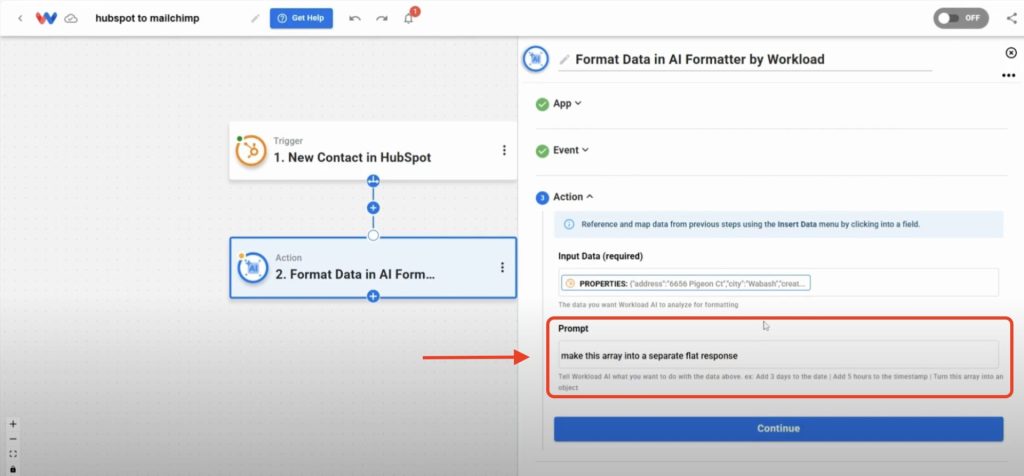
- Prompt the AI Formatter: Type a prompt that tells the AI Formatter to format the data. (ex: Convert this array into a flat object.)
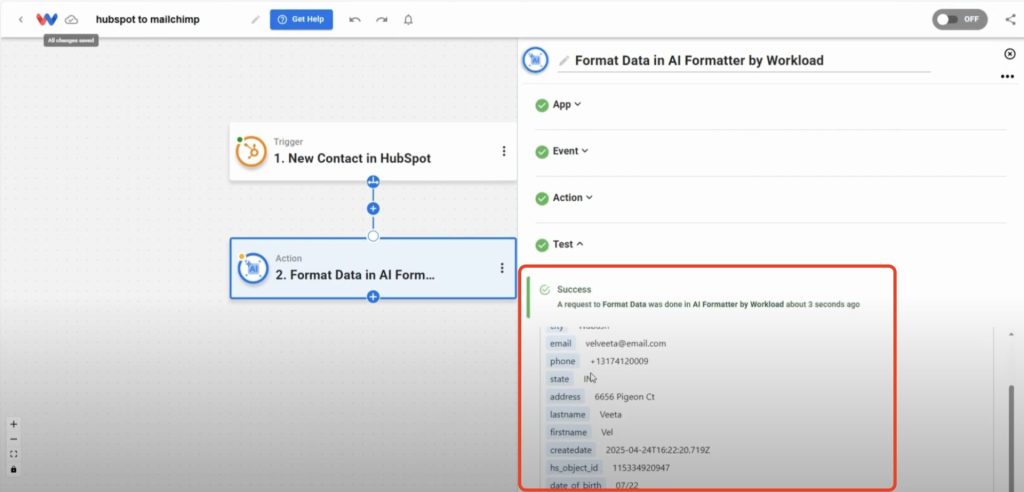
- Test the Action: Click Test Action to confirm you receive individual fields ready for mapping.
Step 3: Add or Update Contact (Mailchimp) #
- Add an Action Step: Click + Add Action and choose Mailchimp as the app.

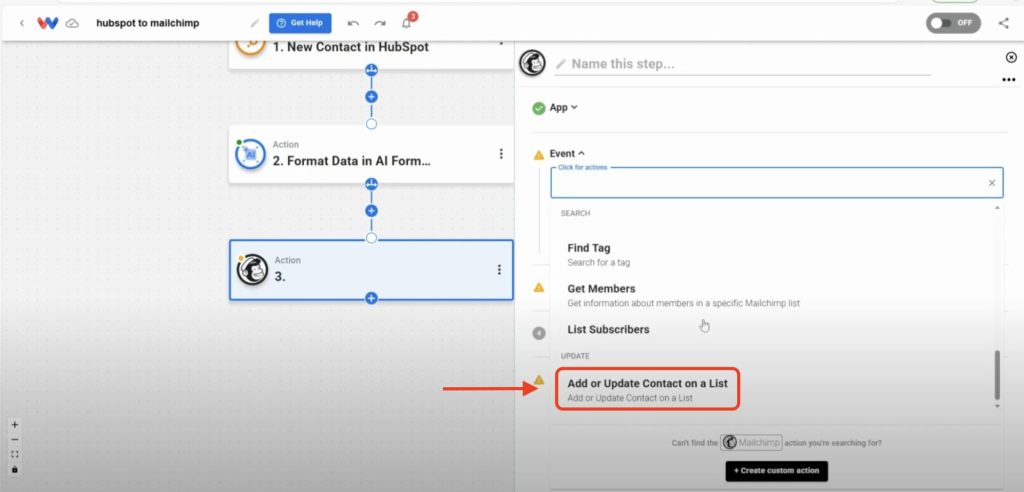
- Select the Event: Choose Add or Update a Contact on a List.
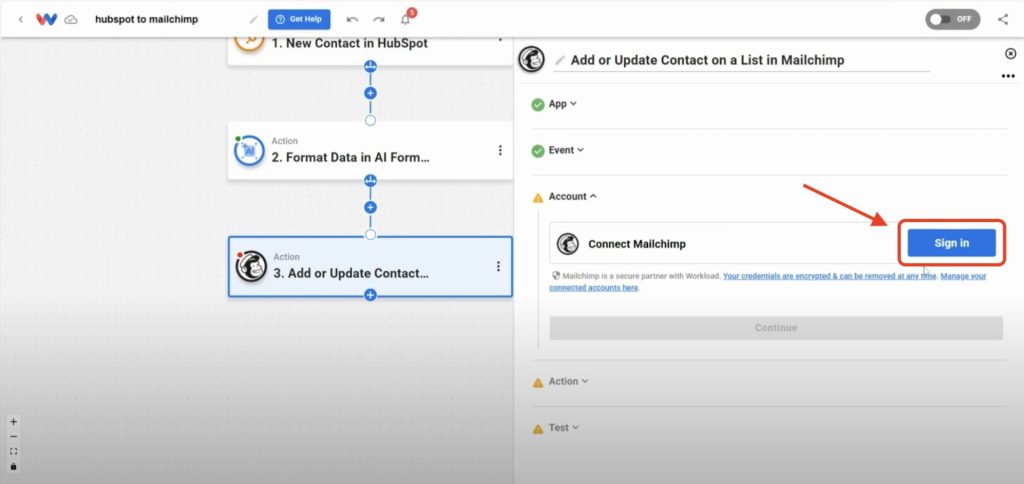
- Connect Your Mailchimp Account: Sign in to securely link your Mailchimp account Workload.
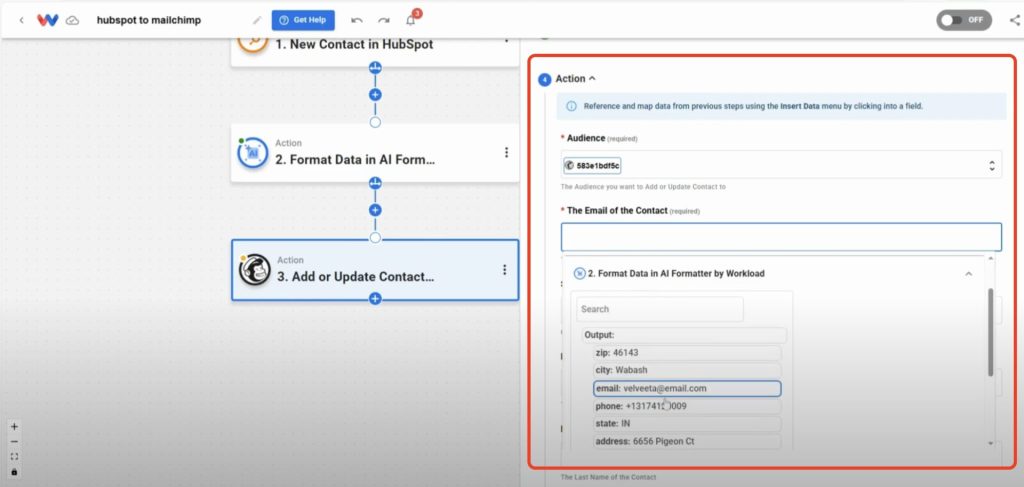
- Map Formatted Data: Map the data from the previous steps for the fields that you want to include in Mailchimp. Also, please take note of the fields that Mailchimp requires and make sure those fields are included in HubSpot. Here are some commonly used fields:
- Audience: Select your Mailchimp list (e.g., “Workload”).
- Status: Set to subscribed.
- Email Address: Map from the AI Formatter step.
- First Name & Last Name: Map accordingly.
- Phone Number: Map phone field.
- Address: Map street, city, state, ZIP.
- Birthday: Map in month/day format.
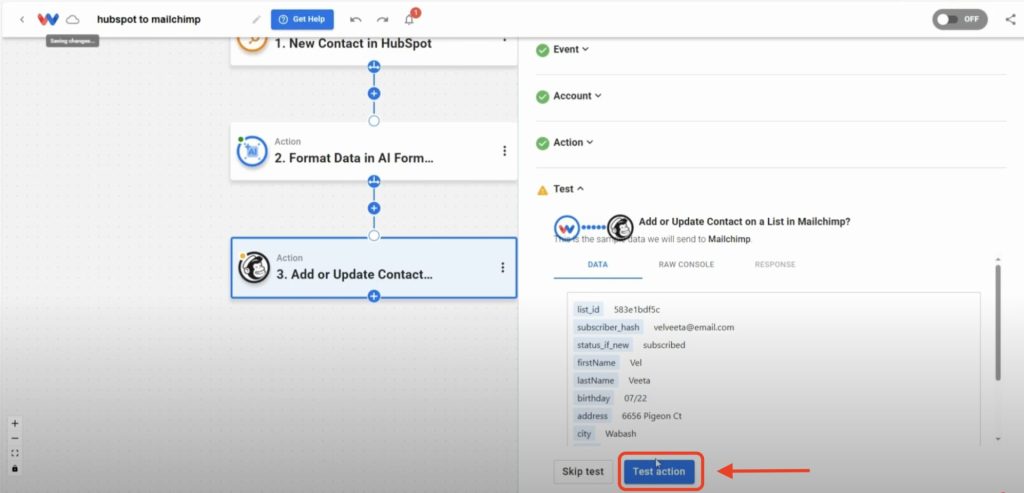
- Test the Action: Click Test Action to verify the contact appears in Mailchimp.
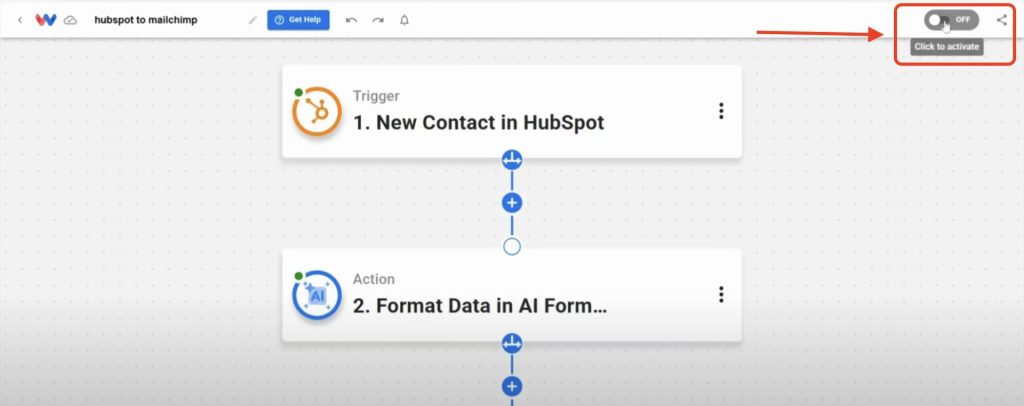
Step 4: Activate Your HubSpot to Mailchimp Sync Workflow #
- Check Each Step: Verify every node shows a green indicator.
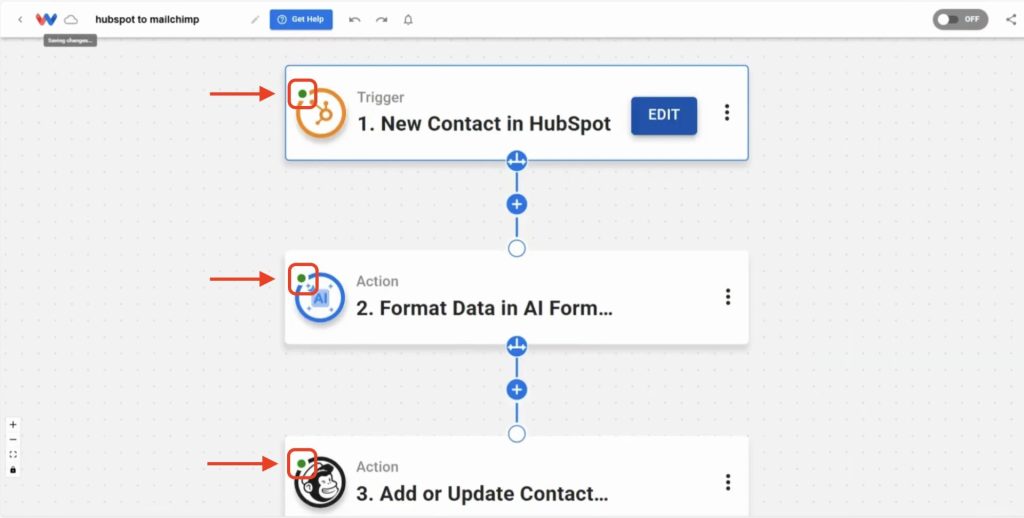
- Activate Workflow: Toggle the workflow On.
Wrapping Up #
Now that your custom HubSpot to Mailchimp Sync is live, forget about manual imports for good. Every new contact you choose to map flows straight into Mailchimp—accurately. You’ll eliminate mistakes, free up hours, and keep your lists perfectly in sync—all without touching a spreadsheet.
Want to automate even more tasks? Use Workload templates to build your own workflows or browse our guide library for more integrations. For additional help, visit Workload University or our Help Center. With Workload, automation doesn’t need to be difficult—it just needs to work.
Automate your work—take back your day!


